Author:
Charles Brown
Date Of Creation:
3 February 2021
Update Date:
1 July 2024

Content
- To step
- Part 1 of 3: Building the skeleton
- Part 2 of 3: Making an automatic door
- Part 3 of 3: Being able to lock the door from two sides
- Necessities
- Tips
- Warnings
In Minecraft, you can use pushers to make a "door" out of almost any fixed block. You can also make a much larger entrance than with a normal "door" item, such as the 2 x 3 structure as described in this manual. Once all the redstone wiring is in place, your door will open faster than your "Sesame, open!" can say. Pushers are available in the Minecraft Pocket Edition from update 0.15.0.
To step
Part 1 of 3: Building the skeleton
 Gather your materials. See the Supplies section at the end of the article for a full list of building materials. If you're not sure how to build it, use the following recipes:
 - Sticky sucker = pusher + slime ball
- Redstone torch = redstone + stick
- Pressure plate = stone + stone (melts cobblestone into stone)
- Lever = cobblestone + stick
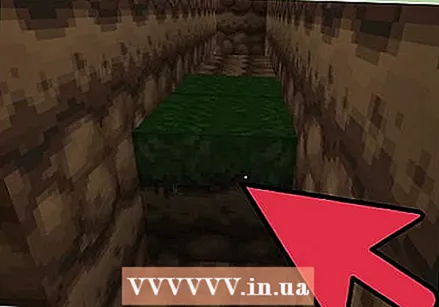
 Make a 2 x 3 stone structure. Place six blocks of stone in the following pattern: two blocks wide and three blocks high. This becomes the "door" that is pushed aside by the machines to let you in.
 - You can use almost any fixed block besides stone. There are a few blocks that don't work with sticky pistons, such as pumpkins or (in Creative mode) bottom rock.
 Point sticky pistons to this structure from both sides. Place a pillar of three sticky pistons with their green pusher heads to the left of the stone structure. Leave a space of a block between the rock and the pushers. Repeat with another pillar of three sticky pistons on the right.
 - These pushers are located on both sides of the door, and not on the front and back. All blocks should be placed in a row.
 Place a redstone torch behind each sticky piston pillar. Place a redstone torch on the ground directly behind the rock side of the lowest pusher. Repeat for the pillar on the other side.
 - The lowest two pushers of each pillar need to be extended to hit the stone structure.
 Place stone above the redstone torch. To fire the top pusher, place a block of stone directly above the redstone torch (behind the middle pusher). Place redstone dust on top of this stone. Repeat this for the other pillar.
 - Again, you can use any solid material except rock.
- Redstone "dust" is slang for plain redstone (placed on a block).
Part 2 of 3: Making an automatic door
 Dig a trench four blocks deep in front of the door. Make sure the trench extends two blocks from the door, and all the way from one redstone torch to the other. You should eventually have a trench 4 deep x 2 wide x 8 long.
  Place more redstone torches under the first pair. Stand at the bottom of the trench and look at the wall below your wall structure. Dig two blocks under your first redstone torch and place a second redstone torch on the ground in this hollow - the pushers should now retract, taking the stone with them. Repeat for the other side. A profile view of the far left and far right pillar should now look like this, from top to bottom:
 - Redstone dust
- Stone
- Redstone torch (on the ground)
- Block of earth (ground level)
- Redstone torch (a block under it)
- Block of soil
- Bottom of the trench
 Place a layer of rock in the trench directly in front of the door. Place four blocks of stone in the center of the trench, lifting it one layer. Leave the rest of the trench at the current depth.
 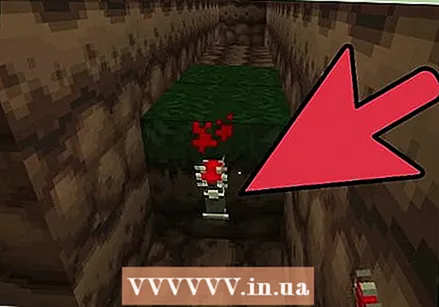 Place redstone torches on either side of this layer. Place one redstone torch on the left and one on the right. These torches should are on the side of the block, not on the ground.
  Cover the trench with redstone. Draw a line of redstone dust between the two torches on the left (the pushers should stick out again when this happens). Repeat for the two torches on the right. Finish it off by covering all four blocks in the raised area with redstone dust.
  Create a platform in front of the door. Place a 2 x 2 stone on the ground in front of the door, directly above the elevation in your trench.
 - Be careful not to destroy redstone dust when you place it.
 Place pressure plates on this platform. Place two stone pressure plates at the end of this platform. When you step on that, they should activate the redstone underneath, causing the pushers to retract. The door will now open and will not close until you step off the pressure plates.
 - However, be careful when walking. If you take too long, the door will close on its own and stifle your game character.
- If the door won't open, double check that your redstone dust and torches are in the right place.
Part 3 of 3: Being able to lock the door from two sides
 Dig a tunnel under the door. Stand on the elevation at the bottom of your trench. Dig a tunnel under the door, two blocks past it. The tunnel should be two blocks wide, directly under the stones of the (closed) door. The floor of the tunnel should be on the same level as the raised platform.
  Completely cover the floor of the tunnel with redstone dust. Make sure it connects to the other redstone.
  Place pressure plates on the ground above the tunnel. Return to the surface. Place pressure plates in two squares in front of the door, directly above the buried redstone. These pressure plates should open the door when you step on it, just like the pair on the other side.
  Attach a handle to the redstone on the other side. You can now use your door. However, any roaming enemy can walk over the pressure plates and go through the door. Adding a handle allows you to create a lock:
 - Place the handle in a suitable place on the ground. If you want to be able to lock the door from both sides, make a hole in the wall and place the handle there.
- Place more redstone dust to connect the track to the left of the trench to the handle.
- Place another line of redstone to connect the track to the right of the trench to the handle.
 Troubleshoot potential lever problems. Right click on the lever and walk over the pressure plates. Right click on the lever again and repeat. The doors should open only when the handle is in either position. If this doesn't work, examine the redstone trail to the lever:
 - Redstone tracks can only come up one block at a time. Place blocks in the shape of a "staircase" to raise it from the bottom of the trench to ground level.
- If the redstone closest to the handle is dark (not loaded), remove redstone dust a block away from it earlier in the trail. Replace this with a redstone repeater to boost the signal. Make sure you place the repeater so that the front of it is facing the direction the signal is supposed to move.
 Cover the mechanism. Now your door should be fully operational. Cover all wiring with blocks of your choice. Make sure all redstone dust has a block of air directly above it or it won't work.
Necessities
- 6 sticky pistons
- At least 30 redstones
- 6 redstone torches
- 4 pressure plates
- 1 lever
- Various fixed blocks of your choice
Tips
- If you prefer to make a 2 x 2 door, leave out the highest pushers and the redstone that makes the door move.
- Also try building it the other way around, so that the door opens from below!
Warnings
- Make sure you don't get stuck in the door; then your Minecraft character suffocates!


