Author:
Eugene Taylor
Date Of Creation:
10 August 2021
Update Date:
1 July 2024

Content
- To step
- Part 1 of 4: Charging and preparing the camera
- Part 2 of 4: Taking a photo
- Part 3 of 4: Enhance your photos
- Part 4 of 4: Gathering your equipment
- Tips
- Warnings
Polaroid OneStep cameras are handy, fun devices for taking instant photos. Polaroid cameras produce small prints that you can hang anywhere, such as on your fridge, paste in a photo album or share with friends.
To step
Part 1 of 4: Charging and preparing the camera
 Place your film in the camera. Pull the switch to open the bottom cover of the camera. This will reveal the slot where you should place your film cartridge. Place the cartridge in the slot with the dark side up and the metal contacts down, and then close the door.
 - If your Polaroid camera has an old cartridge that you want to keep, remove the film in a completely dark room and place the cartridge in a container that will protect it from any exposure to light.
 Wait for a dark slide to come out of the camera. Immediately after inserting the cartridge, a dark film should emerge from your camera. This indicates that the camera is working properly and is ready to use !!
 - If no dark photo is coming out of the camera, it probably means there is a problem with your film or camera. If you bought a new film, you may have a problem with the camera itself. Test with another cartridge to determine the problem.
- You may want to save this dark film because you can use it as a cover to protect your photos during the exposure time after they come out of the camera.
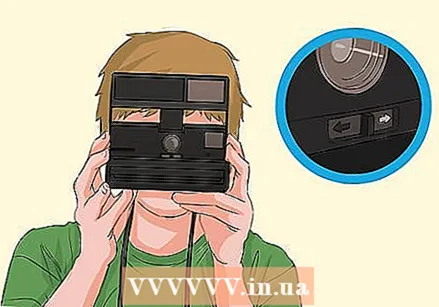
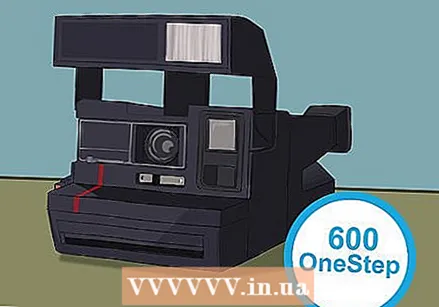
 Turn on a Polaroid 600 camera by opening or flipping the flash bar. These cameras require you to activate them before use. Examine your model to determine whether to open and close or flip the flash bar. These cameras turn off quickly, so just repeat the process when you're ready to take a picture.
 - If you see a flash on a 600 series Polaroid OneStep camera, it means you have a model that you need to flip.
- Polaroid SX-70 Land cameras do not have an on / off button. These cameras are ready to use as soon as your movie is loaded.
 Play with your exposure compensation switch to fix exposure problems. A camera's exposure refers to the sensitivity of the camera and the film to light, which is then captured in the frame. Most OneStep models have a small slider that increases or decreases the amount of light that the camera lets in. Experiment with multiple shots at different exposure levels to see what produces the best results for your film and camera.
 - If you are shooting with Impossible Project SX-70 film, move the switch to the darker side. This film has a higher light sensitivity, which makes images appear overexposed if the switch remains in the center of the slider.
Part 2 of 4: Taking a photo
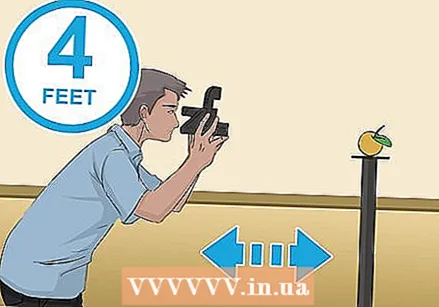 Stand at least three feet away from your subject. Because OneStep cameras include fixed focus lenses, they use distance or depth of field to focus on the subject. They do not contain the electronics necessary for autofocus. Make sure you have enough distance between yourself and your chosen subject so that the camera can produce a sharp image.
 - You may need to experiment with distance when taking pictures with Polaroid cameras. Some models can produce better images at a distance of about three meters. Some models may not work from more than three meters away, so be patient and test your camera first.
- Some models may have a close-up setting, which allows you to take pictures of subjects less than 1 m away from you. Unfortunately, these settings generally don't work very well. Ignore them and stick to the one meter rule.
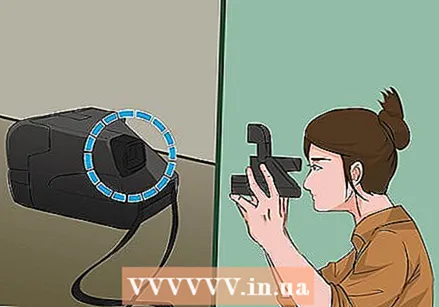 Use the viewfinder to determine an image of your subject. Unlike most modern cameras, the viewfinder does not allow you to see through the camera's lens. Since the viewfinder does not provide you with a perfect replica of what the frame will be, you should leave enough space on either side of your chosen subject when framing your photo.
  Press the button to take a photo. Once you're ready to go, taking a photo with a Polaroid OneStep is about as easy as it gets. No adjustments are required. Just press the button, take the photo, and you can see your work almost instantly!
 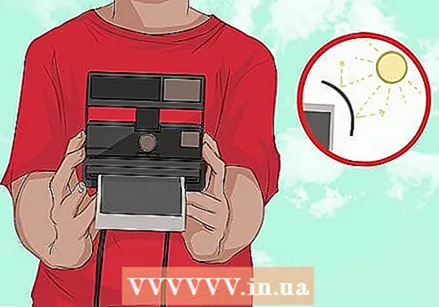 Protect your photo from the light to avoid damage. When the photo comes out of the camera, make sure it is not exposed to light. You can store photos directly in a case or a light-safe storage location, or cover them with paper. This will ensure that the chemical process required for development is working properly.
  Wait at least 10-30 minutes before viewing your photos. Keep your photos face down or shielded from light for the entire time they are developing. While some old Polaroid movies can be done in 90 seconds, it's safer to wait longer. If you're using the new Impossible Project movie, be especially careful. You would rather have a well-developed image after half an hour than a failure after five minutes.
 - The Impossible Project recommends waiting 10 minutes for black and white film and 30 minutes for color film.
Part 3 of 4: Enhance your photos
 Take pictures outdoors for best results. Polaroid cameras respond well to lots of natural light. They give the best results with outdoor shots on sunny or slightly cloudy days. When starting out, try taking landscape photos first. This allows you to get used to the camera.
  Avoid extreme heat or cold when shooting with Impossible film. This new film works best in moderate temperatures between about 13 and 28 degrees Celsius. Cold weather can lead to overexposed prints with no color contrast, while warm days can give your photos a red or yellow hue. To shoot at higher or lower temperatures, you can warm up the film by placing it in a bag and use your body heat or cool it down by putting it in the fridge before taking pictures.
 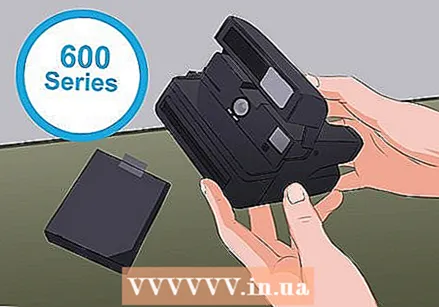 Use Polaroid 600 series cameras for indoor photography. SX-70 film is generally not light sensitive enough to take good indoor pictures. Because Polaroid cameras need so much light to give you clear images, it is important to choose a camera that is suitable for more light-sensitive film.
  Use the flash indoors as an additional light source. Use the built-in flash on your camera. While the flash can cause a harsh exposure in some of your photos, it's important to start with the flash to see how best to brighten your indoor photos.
 - If you can, take photos in a room with many windows to take advantage of natural light, even indoors.
 Cut a square piece of paper to stick over your flash. Most older Polaroid cameras are designed so that the flash is always in use, so it is often difficult or impossible to turn the flash off manually. If you want to see what turning off the flash does for your photos, use a small piece of dark-colored paper and some masking tape to cover the lamp.
  Use external light sources to brighten your subject. If you're shooting outdoors at night, shooting on a dark day, or indoors, you may need to add some light to your subject. Try LED strobe lights aimed at your subject. For an easier option, start by aiming a flashlight at your subject.
Part 4 of 4: Gathering your equipment
 Choose Polaroid 600 OneStep models for cheap, reliable cameras. OneStep cameras have fixed focus lenses that allow you to simply point your camera and capture your photo. Polaroid produced batches of these cameras in the 1980s and 1990s, and they remain popular because they are relatively easy to find and even easier to operate.
 - You can purchase refurbished Polaroid 600 OneStep cameras online from the Impossible Project. This will give you a camera that has been inspected and tested by a team of repairers.
- For less expensive but potentially defective cameras, check online or at a garage sale. Since Polaroid has produced so many of these cameras, there are several ways to find pre-owned ones. Be aware that this may be a device that is defective.
- Many customers now buy Fujifilm instax cameras, a type of instant camera not manufactured by Polaroid. These newer options are very easy to use and they produce long-lasting direct prints. They need their own Fuji instax film that is compatible with different cameras, in different sizes and colors.
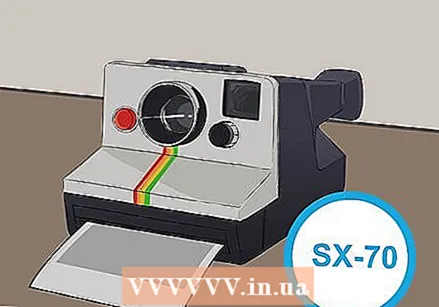 For a retro option, choose the Polaroid SX-70 OneStep Land camera. These iconic cameras can only be found on a website like eBay. The generally easy to use camera gives you the classic Polaroid look with its white body and rainbow sticker. They do not have a built-in flash, so they require a little more maintenance than the 600 series.
 - You have to attach the flash to the top of the camera. The camera must include the optional flash bar when you purchase it.
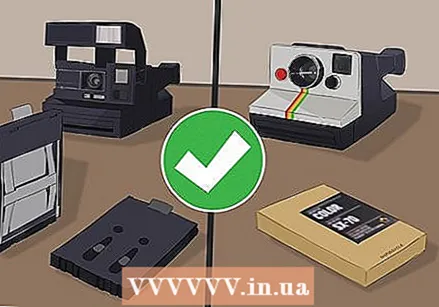 Buy new Polaroid film from the Impossible Project. The Impossible Project produces new film that is compatible with all Polaroid cameras. These newer rolls of film are often of better quality than second-hand film that you can find online. The Impossible Project film requires longer exposure times and is usually more expensive than used film cassettes.
 - Make sure you buy the right film for your camera. 600-series cameras require 600-type film, and SX-70 cameras require SX-70-type film.
- SX-70 cameras can use 600-type film if you install a Neutral Density filter on your film cassettes. You have to purchase these filters separately from your film. They are available from the Impossible Project.
 Look for old Polaroid film cassettes on eBay - cheaper as an option, but less reliable. Used film cassettes, like Polaroid cameras, can be easily found online. While this purchase could result in film that is cheap and works well, you can also accidentally buy defective film that will stop taking pictures. If you're concerned about costs, try the options used first, and opt for the Impossible Project products as needed.
 - The film cassettes contain the "batteries" of the Polaroid OneStep cameras, so if the film doesn't work, the camera won't.
Tips
- If the dark film doesn't pop right out of the camera, it may mean you have to press the shutter button once. If this doesn't work then your camera or film is probably defective.
Warnings
- Don't believe the myth that shaking Polaroid photos speeds up their development. On the contrary, this could even damage the photo.


