Author:
Tamara Smith
Date Of Creation:
19 January 2021
Update Date:
1 July 2024

Content
- To step
- Method 1 of 3: Sew a hem on a fleece blanket
- Method 2 of 3: Fasten the edges of the blanket with fringes
- Method 3 of 3: Make a braided blanket border
- Necessities
- Zoom
- Fringes
- Braid
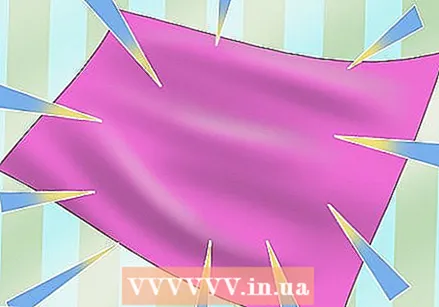
Fleece blankets are easy to make and great to give as a gift! Once you've cut the fleece to the desired size, all you have to do is finish your blanket. You can finish a fleece blanket with a simple folded hem, by adding fringes to the edges and tying them, or by weaving fringe loops around the edges of the blanket to create a braided edge.
To step
Method 1 of 3: Sew a hem on a fleece blanket
 Fold and pin the edges if you want. You can fold the edges of the blanket to create a hemmed edge on your blanket, or you can fold the edges over and sew along the raw edge of the blanket. The choice is yours. If you decide to fold the blanket over, fold an inch on each of the four sides of the blanket and pin the folded fabric to keep everything in place.
 - Fleece does not fray easily, so a folded hem is not really necessary unless you think a folded hem looks nice.
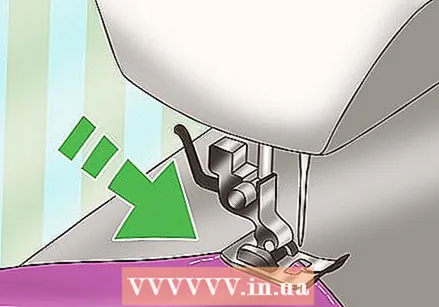
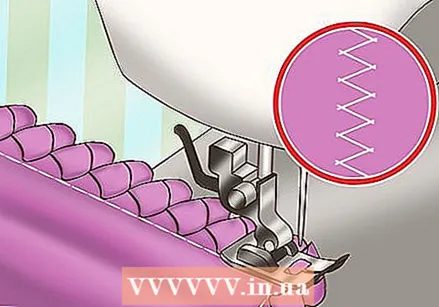
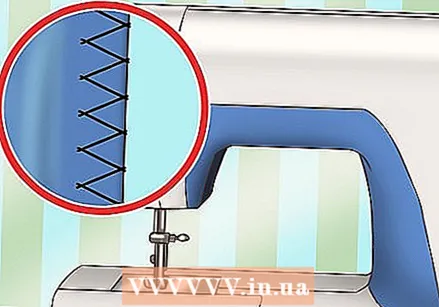 Set your sewing machine for the zigzag stitch. You can use a zigzag stitch to secure the folded hem or you can sew over the raw edges of the fleece blanket to give them a nice finish. Consult your sewing machine manual to learn how to set it up for the zigzag stitch. There should be a dial or digital setting where you can select the type of stitch.
 - Adjust the zigzag stitch settings to long and wide by turning the width and length to the highest settings.
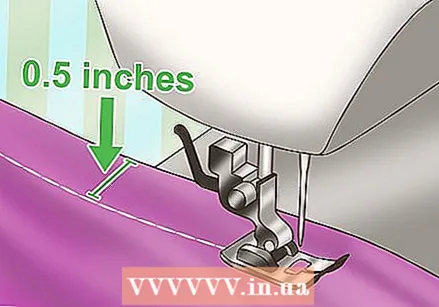
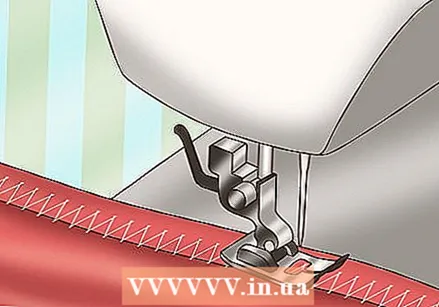 Sew around the edges of the blanket. Raise the sewing machine presser foot and place the fleece underneath. Lower the presser foot and start sewing the zigzag stitch along the raw edges of the fabric. Work slowly and hold the fabric taut as you sew.
 - When you have folded the fabric, place the needle about 0.5 cm from the folded edge. This is to ensure that the needle goes up to or just over the raw edge of the folded fabric.
- If you have not folded the fabric over, sew about 0.5 cm from the raw edge of the fabric.
- If you have trouble getting the fabric to move evenly under the presser foot, you can place a piece of tissue or wax paper under the fabric and on the feed dogs. This will help prevent the fabric from getting caught in the feed dogs and you can tear the paper off after you finish sewing.
 When you reach the end, use a double stitch. To lock the last stitches, press the reverse lever on the side of the sewing machine, while continuing to press lightly on the pedal. Sew back about an inch, then release the lever to sew forward again. Sew the last edge of the fabric and stop the machine.
 - Cut the remaining thread right along the blanket and you're done!
Method 2 of 3: Fasten the edges of the blanket with fringes
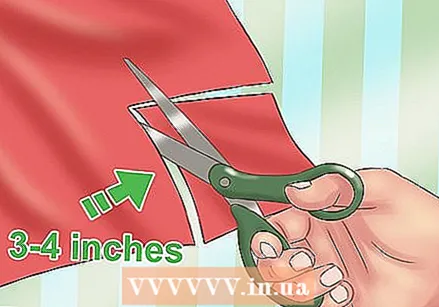 Cut out a three to four inch square of fabric on all corners of the blanket. If you are making a double layer fleece blanket, you will need to cut a square of fabric at each corner or the blanket will not lie flat. Measure and mark the spot with a fabric marker or pen, then cut along the lines.
 - You don't have to cut a square of fabric from the corners if you're only adding fringe to a single-layer blanket.
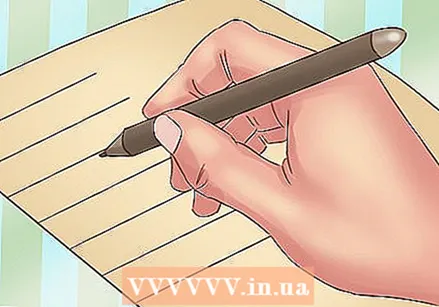 Make a template to cut the fringes. Making a fringed blanket border is a lot easier when you have something to use as a guide and make sure all fringes are the same size. Use a ruler to draw lines 5 cm long on a piece of construction paper or cardboard. The lines should be 1.5 cm apart.
 - Use a dark pen or marker to draw the lines so they are clearly visible.
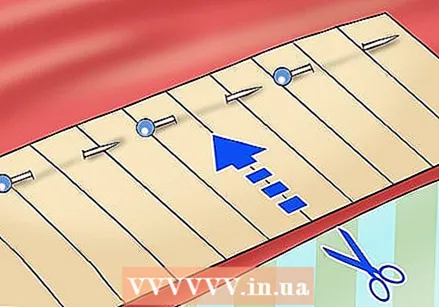 Use the template to cut fringes throughout the perimeter of the blanket. Secure the template with tape or pins 3 to 4 inches from the edge of the blanket. Use the template as a guide to cut the fringes. Line up the scissors with one of the guidelines each time you cut the fabric.
 - You can cut the fringes on only two sides for a single-layer blanket, or all four sides for a double-layer blanket.
 Tie the fringes together. When you are done cutting the fringes, go around the edges of the blanket and tie the fringes that are next to each other together. Tie two fringes together and then the next two. Do this all the way around the blanket.
 - If you are making a double layer blanket, you actually tie four fringes together at the same time, because the fringes are layered.
Method 3 of 3: Make a braided blanket border
 Sew 1.5 cm from the edges of two layers of fleece. Two layers of fleece are needed to make a braided border, so you need to put two pieces of fleece of equal size together so that the sides with the motif face each other. Then sew a straight stitch 1.5cm all the way around the edges of the fleece pieces, except for a 6 '' opening where you can turn the pieces over.
 - Use a light pressure on the pedal to avoid sewing too fast. When sewing fleece, slowly is best.
- It is very important that you do not sew all the way through the edges of the blanket, as you will need an opening to get the blanket fabric through.
- Keep the fabric taut to prevent the fabric from catching in the feed dogs. If the fabric still gets caught or does not move smoothly, place a piece of tissue or wax paper on the feed dogs, and then place the fabric on the paper. Sew through both and when you are done tear the paper out of the seam.
 Turn the blanket inside out. Go into the opening you have and pull the fabric through the opening. Continue until all of the fabric is reversed and the seam you just sewn along the edges of the fabric is on the inside of the two layers.
 - Use your fingers to push the fabric out in the corners if necessary, should it build up in the blanket.
 Sew the opening closed. After you have turned the pieces, tuck in the raw edges of the fabric and sew the opening closed. Use the same straight stitch you used to sew the rest of the edges. Make sure to sew the stitch so that the edge is as even as possible.
 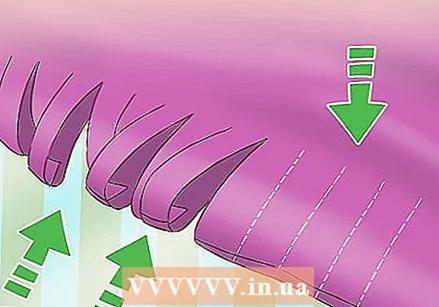 Use a template to cut fringes around the outside of the fabric. By using a stencil you can guarantee evenly spaced fringes to braid the edges of the blanket. Create a template of lines on a piece of construction paper or cardstock. The lines should be 5 cm long and 2.5 cm apart. Place the template approximately 3 inches from the raw edges of the blanket and trim the fringes using the template as a guide. Cut from the edge of the fabric to the edge of the stencil.
 - You may find it helpful to glue or pin the stencil to the blanket.
 Sew with a straight stitch along the inside edges of the blanket where the fringes end. To secure the fringes, set your sewing machine to a straight stitch and sew around the edges of the fringes. This is where the fringes in the blanket begin.
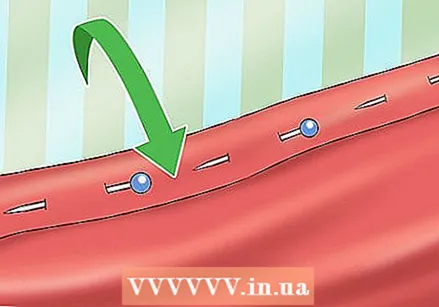
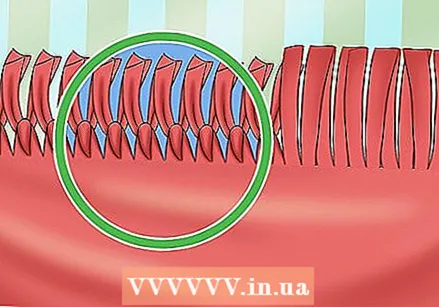
 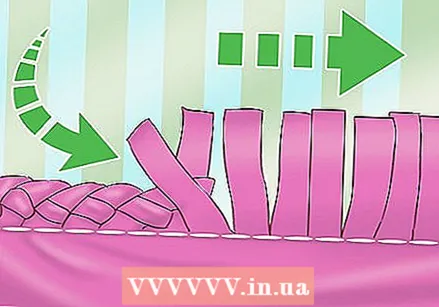 Run a loop through the loop next to it using a crochet hook or your fingers. To braid the fringes, start at one corner of the blanket and pull a loop through the loop to the right of it. Then pass the next loop through the loop you just passed through the first loop.
 - Continue doing this all the way around the blanket until you have interwoven all the loops at the edge of the blanket and you only have one loop left.
 Sew through the first and last loop to secure the braid. Put the last loop in the first loop you passed through. Set your sewing machine for the zigzag stitch and place the loops under the presser foot of the machine. Sew through the loops then push the machine handle to change direction and sew back over the same spot. Then release the pedal on your sewing machine and remove the fabric from under the presser foot.
 - Cut the remaining threads close to the blanket and your blanket is now ready for use!
- You can manually sew over the loops to secure them if desired. Thread a needle with a 50 cm long thread and pull the thread through the eye of the needle until the ends are even. Tie the ends and sew through the loops several times to secure them. When you are done with this, tie a knot in the thread to secure it and cut the excess thread.
Necessities
Zoom
- Pins
- Sewing machine
- Scissors
Fringes
- Piece of cardboard or construction paper
- Ruler
- Pen or marker
- Scissors
Braid
- Piece of cardboard or construction paper
- Ruler
- Pen or marker
- Scissors
- Crochet hook (optional)
- Sewing machine or needle and thread


