Author:
Tamara Smith
Date Of Creation:
28 January 2021
Update Date:
1 July 2024

Content
- To step
- Part 1 of 5: Emptying the installed browser
- Part 2 of 5: Clearing Google Chrome
- Part 3 of 5: Emptying Mozilla Firefox
- Part 4 of 5: Keep it private
- Part 5 of 5: Erasing all data from your phone
- Tips
Just like your computer's internet browser, your Android device's browser will keep a list of the websites you have visited. This makes it easier to revisit those websites, but it can also create embarrassing or potentially dangerous situations. If you are concerned that someone will poke around your browser history, or you plan to give your device to someone else, see Step 1 below to learn how to clear your browser history.
To step
Part 1 of 5: Emptying the installed browser
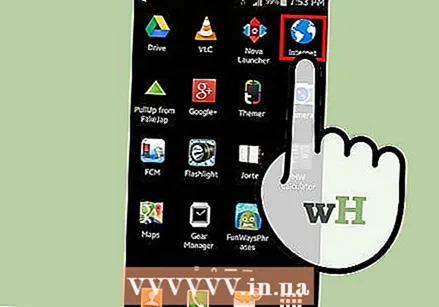 Open the internet browser. If you are using Android 4.0 or earlier, your browser will simply be called "Internet". You will have to clear the history via the settings of the app.
 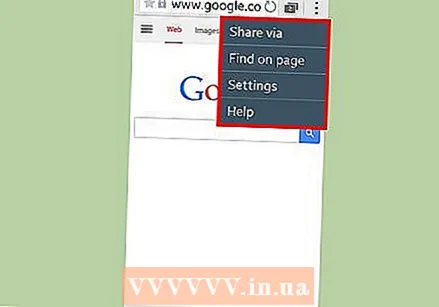 Tap the Menu button. Press either the Menu button on the device, or tap the menu button on your browser in the top right corner.
 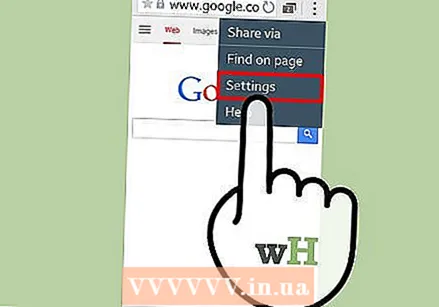 Tap Settings. This will open a new window with your browser settings.
 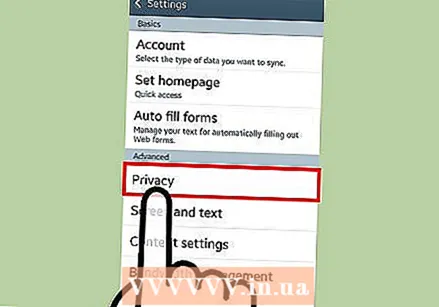 Tap on Privacy. You may need to scroll down to find this option. Tap to open the privacy management options.
 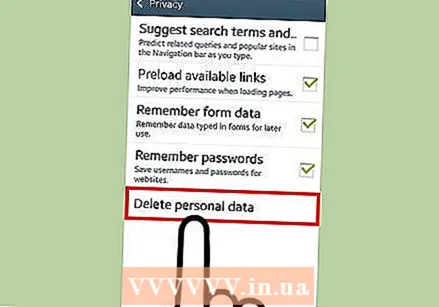 Tap on "Clear History". This will delete all information about the sites you have visited. If you also want to delete the cookies, tap on "Clear all cookie data".
Part 2 of 5: Clearing Google Chrome
 Open the Chrome browser. As with the built-in browser, you will have to clear the history from the browser itself.
 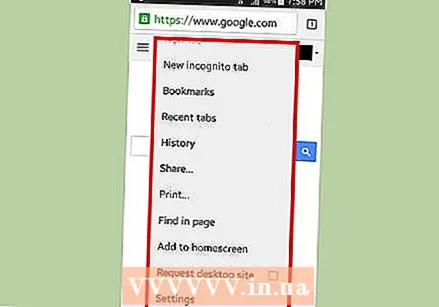 Tap the Menu button. This can be found in the top right corner, and looks like 3 horizontal lines.
 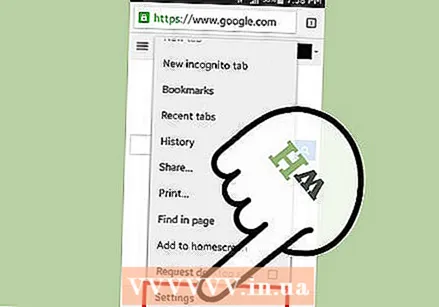 Tap Settings. This will take you to the Google Chrome settings screen.
 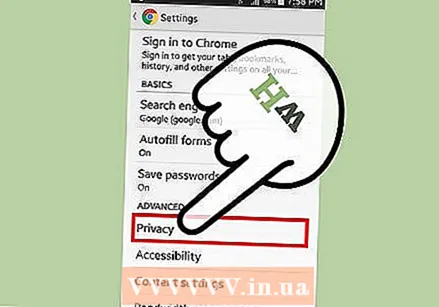 Tap on Privacy. These can be found in the Advanced section of Settings.
  Tap "Clear Browsing Data". This button can be found at the bottom of the menu of your phone, or at the top right of the screen of your tablet.
 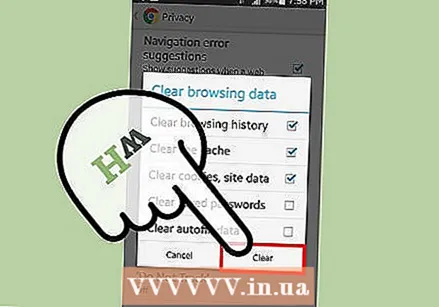 Check "Clear browsing history". This will clear all browser history from Chrome. Tap Clear to continue.
Part 3 of 5: Emptying Mozilla Firefox
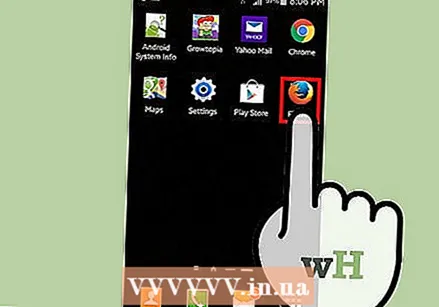 Open the Firefox browser. As with the built-in browser, you will have to clear the history from the browser itself.
 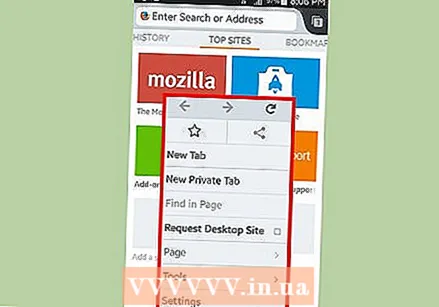 Tap the Menu button. This can be found in the top right corner, and looks like 3 horizontal lines.
  Tap Settings. This will take you to the Firefox settings screen.
 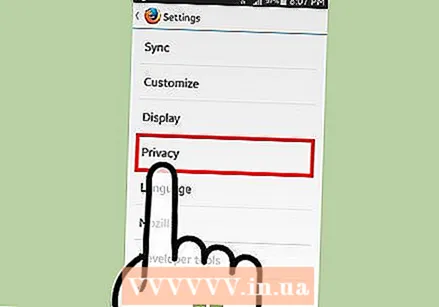 Tap on Privacy. This will open a new screen with your privacy management options.
 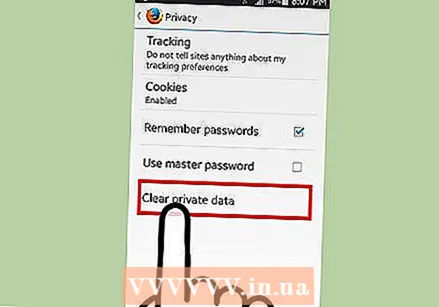 Tap on "Clear private data". This will open a checklist of all the different types of items that can be removed. Make sure "Browsing & download history" is checked. You can also use this to erase a variety of other data types.
 - When you have made a selection, tap "Clear data".
Part 4 of 5: Keep it private
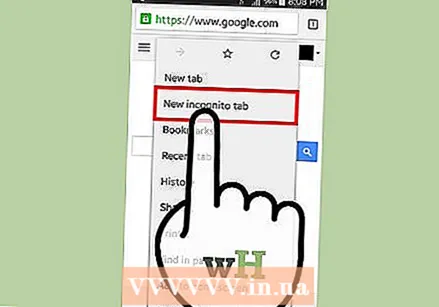 Use the Incognito (private browsing) mode. Most browsers except the built-in version can run in a protected mode. This is also called Incognito mode in Google Chrome and Private Browsing in Firefox. Everything you do on the internet is no longer tracked by the browser.
 - To start the incognito mode of Google Chrome, tap Menu and then "New incognito tab". The incognito tab is darker than a regular browser tab.
- To activate private browsing in Firefox, tap Menu and then "New Private Tab". A new tab will open, with the mask logo indicating that you are working in private mode.
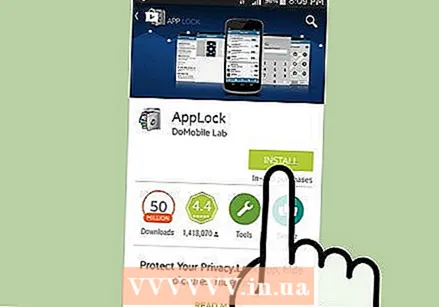 Install an app locker. If you find yourself often lending your phone to family and friends, install an app locker. This ensures that not everyone who uses your phone can access all apps.
 - Popular choices include AppLock, App Lock, Smart App Lock, Locker Master, and many more.
 Clear your history regularly. You never want someone to accidentally view your browsing history, so make sure to clear it often. This also prevents your personal information from being lost or stolen.
Part 5 of 5: Erasing all data from your phone
 Back up any data you want to keep. If you give or sell your phone, you want to delete all your data from the phone. This prevents your data from falling into the wrong hands. Emptying your phone will erase all data, so make sure you have everything you want to keep (media, contacts, files) in a different location.
 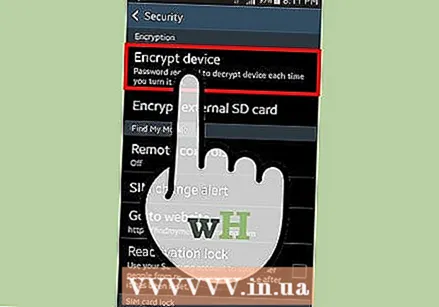 Encrypt your Android. As with computers, an erased Android drive is not completely empty, but will have to be overwritten. This means that someone with sufficient knowledge and the right software will be able to retrieve that data from your drive. To avoid this, it is better to encrypt everything on your phone before you know it. With this, no one can access your data, even if they can recover the deleted data with special data recovery software.
 - Charge your phone completely. Encryption takes a lot of time and you need a full battery, in addition to having the device connected to a power source.
- Open the Android settings menu by tapping Settings from the Home screen or the App Drawer.
- Tap the Security section. Scroll down and select "Encrypt phone". Create a PIN that you use to access your encrypted phone.
- Wait for encryption to finish. This can take up to an hour and interrupting this process can damage the data on your phone.
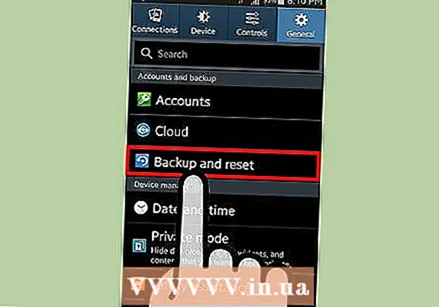
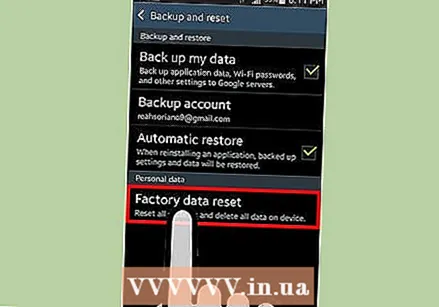 Reset the phone. Return to the Settings menu and select the "Backup & reset" option. Tap on the option "Factory data reset".You will be asked to confirm this and then enter your PIN for encryption. After that, the phone will start to reset which may take a few minutes. Once the phone has been reset, all data will be erased and the phone has returned to the factory settings. Now it is safe to sell or give the phone away.
Tips
- It is always wise to get all the data from your phone, including the history, if you decide to sell the device.
- If you want to clear the search history of Google Now, you will have to do this via the Google History website. See elsewhere for more information on this.

 in Windows 7")

