Author:
Roger Morrison
Date Of Creation:
25 September 2021
Update Date:
1 July 2024

Content
- To step
- Method 1 of 2: Making simple cornrows
- Method 2 of 2: Choosing a unique cornrow style
- Necessities
Cornrows are a fun and practical way to wear your hair. It adds some style to hair that you grow and also protects your hair from heat damage caused by other styling techniques. For simple front to back braids, you can follow some easy steps to get fantastic braids. Someone more experienced with braids can separate different braids on different unique styles to create the perfect look.
To step
Method 1 of 2: Making simple cornrows
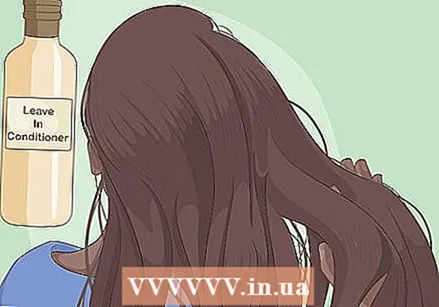 Wash and detangle your hair. Use normal shampoo and conditioner to wash your hair. While it is still damp, detangle your hair with a no-rinse conditioner and a brush. Then add an oil or cream to retain the moisture. Your hair will be much easier to braid when it is a little damp and has no tangles.
 - Examples of oils and creams you can use to keep your hair moist and tangle-free include coconut oil, argan oil, jojoba oil, shea butter, and aloe cream products. Check the natural hair care shelf at a drug store or beauty supply store to find these products.
- If your natural hair has small curls, it is good to blow-dry your hair before braiding. Blow drying will help straighten your curls and make your braids look neater.
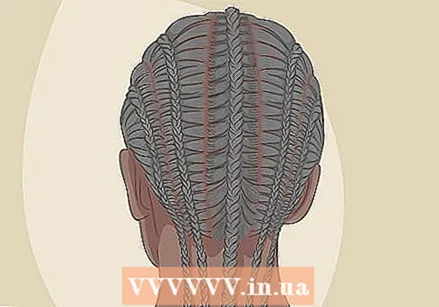
 Divide your hair into sections from front to back. Use the end of a barber's comb to divide your hair in rows from your forehead to your neck. You can divide your hair in half first and then divide each part into 1-3 rows more. Hold the rows in place with small-tooth clips or bobby pins.
 - If you don't want a center parting, you can create 2 rows near the center to make a row on the center of your head. Then you can make more rows on the sides of it.
- Try to space the rows evenly so that your braids are roughly the same size.
 Divide the first row into 3 small sections. Start with a row of hair on the top or side of your head and remove the clip from there. Take some hair from the front, near your forehead or ear, between your fingers. Divide that row into 3 equal parts with your fingers: a left part, a middle part and a right part.
 - Use both hands to do this. Hold a section of hair with 1 hand while holding 2 other sections of hair with the other hand.
- Before you start braiding, you can apply some gel or mousse along the hairline. This will help you grip the hair better, tame flyaways and keep your braids tidy.
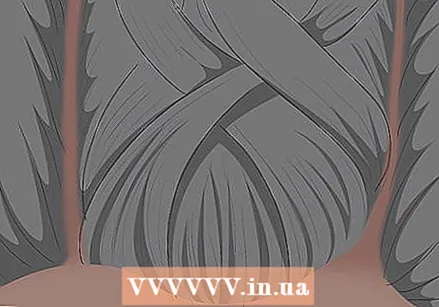 Make the first stitch. Start with the left or right part and place it over and over the middle part, making this part the middle part now. Place the section on the other side over and on the middle part, so that it is now in the middle, and swap the current middle part with that part.
 - You will always hold 1 strand of hair with 1 hand, while the other hand holds 2 strands.
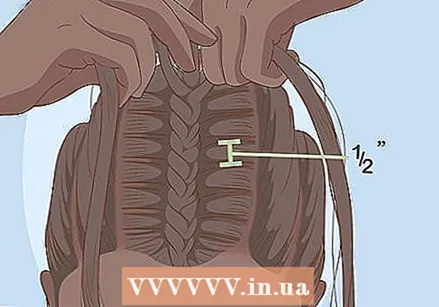 Take a small section of hair from the loose hair below the braid tie and then repeat the above technique. Always add a section of hair of about 1 cm to each stitch as you work. Each time you make a new braid tie, bring some loose hair with you, continue this way until you reach the nape of the neck. This will keep the braid attached to your head.
 - If you don't pick up hair at every stitch, the braid will be loose and come off your head, instead of staying put like a braided braid should. You should get a French braid in every row.
 When it reaches your neck, finish the braid and secure it with a rubber band. When you reach your neck, you don't have to reach for her anymore. Simply finish the braid until you have used the rest of the hair in that row. If you want, you can secure the end with a rubber band.
 - The length of the end of your braid will depend on the length of your hair.
 Apply the same braiding technique to every row you made. Untie the next row of hair and repeat the process: divide that row into 3 equal parts at the front, by your forehead or ear. Then braid in until you reach your neck and continue braiding with the rest of the hair. Then secure the braid with a rubber band.
Method 2 of 2: Choosing a unique cornrow style
 Try braiding from the side for an elegant look. This design is similar to front to back braiding, but turned to the side. Create 3 horizontal parts, starting from one ear, instead of vertical parts. Clamp all parts except 1 out of the way. Start each braid on the side, near your ear, and braid each row by picking up new hair at each stitch.
 - All braids should start on 1 side. Bring your braids to the left or to the right, whichever you prefer.
- These braids will end in different places on the other side of your head. Secure them with rubber bands, just like with other braids.
 Twist the braids for a unique shade. If you want to add a unique touch to traditional braids, part your hair starting at the front of your head while making an arc to the other side of your head. Make 4 more parallel rows of this, so that you have a total of 5 rows that from the front across and around your head seem to turn you into uniform, curved rows. Then make curved braids in the rows.
 - End the curved hair sections at your neck on the opposite side of the original direction from the direction of the original curves. When you are done with all the braids, you can piece them together into a low ponytail on the side of your head, if you like.
 Make long braids into a high ponytail. If you have long hair and like to wear a high ponytail in your hair, try braiding your hair to the point where you usually start your ponytail. Make sections along the perimeter of your hairline and braid them in. Tuck each braid where you make your ponytail, on the back of your head instead of your neck.
 - Feel free to braid the rest of each row without braiding, so that your ponytail consists of braids.
- This style also looks good with different sized braids; you can also make it easy for yourself by always creating and weaving 1 row at a time.
 Try braids with zigzag parts for something completely different. Create zigzag-style sections starting at the front of your forehead and then working back and forth in about 5 cm sections all the way up to your neck. Then braid the strands as you normally would, but with the hair arranged in a zigzag pattern.
 - You can also combine this parting technique with other styles, such as with the side braids. Or keep it simple by making only 1 or 2 zigzag parts and leaving the rest straight.
Necessities
- Shampoo and conditioner
- Conditioner to leave in the hair
- Hairdryer
- Gel or mousse
- Styling oil or cream
- Hairdressing comb
- Rubber bands


