Author:
Frank Hunt
Date Of Creation:
16 March 2021
Update Date:
1 July 2024

Content
Do you have a bread machine, but no manual because you bought the machine second-hand, inherited it from a family member, or just lost the manual? Instead of putting it away in a cupboard and adding it to things you'll "ever use again", get started making your own fresh, crunchy and delicious bread! See step 1 below to get started.
To step
 Get to know your machine. Take some time to get to know the appliance. There is a hinged lid that can be lifted and closed, perhaps a window, and probably also a small ventilation grille. Next to the lid, there will be a control panel with a few buttons (and maybe a light or two if you have a nice version). There is a baking tin inside the bread machine. It should have a handle on it, probably folded down so that the lid can close. The baking pan works both as a mixing bowl and as a baking pan. In the center of the baking pan is a small metal kneading knife. With this the dough is kneaded and mixed. When the dough bakes, it bakes around the kneading tray. You have to remove the sheet from the bottom of the bread after the bread is baked.
 - You must have all three parts to make bread. The machine itself, the baking pan and the kneading knife. If any of these parts are missing, you will need to replace it. The kneading blade is the smallest part and the part most likely to be missing. It is also the least expensive part to replace. If you need replacement parts, you can search online to find your machine manufacturer. Go to the manufacturer's website and email them about what you need.
- The baking pan and kneading blade are removable. To take out the pan, you may need to pull hard on your machine, depending on how it clicks into place. Check it, take the handle and pull. Don't worry, it won't break that quickly. After you take out the baking pan, examine it. If you turn it upside down, the kneading blade will fall out. There will be a rod in the baking pan over which the kneading knife fits. To put the pan back into the machine and snap it into place, you may have to push it down hard. This may be easy, or you may have to turn the gear under the baking pan to get the bucket to fit properly in the machine.
 Discover the capacity of your baking pan. Take the baking pan and place it next to the sink. Fill a measuring cup with water. Pour the water into the baking pan. Do this until the baking pan is full. Count how many cups of water you add to the bucket. This part is important, so measure carefully. When choosing a recipe, it is important that you adapt it to the size of the baking pan you have. You don't want to make a one-kilo bread recipe in a machine that can only handle one pound. This would result in a big mess.
 - If your baking pan holds 2.5 liters of water, you can make a 1-1 / 2 pound loaf of bread.
- If your baking pan can hold three liters or more of water, you can make a two kilo loaf of bread.
- If your baking pan has less than 1 gallon of water, you can make a pound loaf of bread.
 Familiarize yourself with the settings. Look closely at the buttons and display on the control panel. You will likely find a selector button, a start / stop button, crust button and timer or arrow keys. Remove the plug from the wall socket. Plug in the power cord again. The machine is now in the default setting.
 - Close to the selection button you will see various options. The most common are: white or base, whole grain, French, sweet, quick, and dough. To set the machine to a specific program, keep pressing the selection button until the desired program is reached. Sometimes there is a number for each program. For example, white or base is usually 1. Whole wheat is 2. French is 3, and so on. Each program takes a different amount of time to mix and bake the bread.
- The crust setting is not available on all machines. If you do see a button labeled crust, then three settings are available: Light, Medium, and Dark. The default setting is medium. When you unplug the appliance and plug it back in, it will automatically be set to the medium setting. If you prefer a light or dark crust, press the crust button to change the setting. Usually the crust button will not work until after you have selected the dough cycle and before you press Start.
- Using the timer is described in a separate section, below.
 Gather your ingredients. There are a few basic ingredients you need to make bread in a bread machine. These are yeast, flour, salt, sugar, moisture and fat.
 - Yeast for use in a bread machine must always have "Active Dry" on the label. Sometimes you can buy yeast in a jar especially for bread makers. Yeast packets, available in the grocery store baking area, usually contain 2-1 / 4 teaspoons of active dry yeast. You can use one packet of yeast to replace two teaspoons of yeast in most bread machine recipes. The extra 1/4 teaspoon of yeast won't make that much of a difference. Do not use fast-rising yeast. It's not worth the extra expense, and the time savings are negligible once you're used to making bread.
- Bread flour yields better bread. Bread flour is made from durum wheat, so it contains more gluten, or wheat protein, than regular all-purpose flour. Allround flour is a mixture of hard and soft wheat. This makes it suitable for biscuits, pastries and quick breads, where soft wheat flour is preferred, and yeast bread, where hard wheat flour is preferred. This flour is formulated to be used for all baking purposes. Bread flour is made for yeast bread. If you don't have bread flour, you can use all-round flour or flour for most bread recipes. The results will not be the same as if you had used bread flour, but you will still get good results, and you will still be able to make good bread with it. Sometimes you need to add a little bit more flour to your dough if you are using all purpose flour. This doesn't always work, but it can help.
- Salt is a necessary ingredient in machine-made bread. It regulates the rising process so that the bread dough does not spill over the bread tray in the machine. Salt also adds flavor to the bread. Bread made without salt does not taste as good as bread made with a little salt.
- Sugar, honey, and other sweeteners soften the texture of the dough and finished bread. They also contribute to browning of the bread and a crispy crust. However, the most important role they play is as an easy to use nutrient for the yeast. Yeast can use the starch in the flour as a food, but it is much happier if it is given easy-to-obtain foods like sugar or honey. Most bread machine recipes require at least a small amount of sugar. However, bread machines do best when not too much sugar is added. It is not uncommon to add a full cup of sugar to the dough when making sweet bread yourself. However, when making sweet dough in the machine, it is better to use 1/4 to 1/2 cup of sugar or honey. This is because the dough rises faster and higher in a bread machine than when it is prepared by hand. Too much sugar is too much food for the yeast and it gets too activated. This can result in a lot of mess in the machine, which is unpleasant to clean up.
- Liquids used in a bread machine should be at room temperature or slightly warmer. You should never use hot liquids in a bread machine. Liquids that are too hot will kill the yeast. Liquids at room temperature make the yeast happy. If you're using tap water, warm tap water is fine. If you are using yogurt or buttermilk, take it out of the fridge to warm it up a bit before putting it in the bread machine. (This is not strictly necessary, especially for breads baked on the basic setting or longer. When using the fast setting it is important that the liquids are warm or at least at room temperature).
- Fats make the finished bread richer, softer and keep the dough from sticking to the non-stick coating of the baking pan. Usually 1-4 tablespoons of fat are used in a 1-pound bread machine dough. Most fats can be used interchangeably in a bread machine. Margarine, oil, lard, chicken fat, bacon fat or butter all give the same result. Some fats will add a different flavor and the texture of the bread will change slightly depending on what type of fat you use. Solid fats do not need to be melted before they are added to the bread machine. It helps if they are at room temperature, but this is not always practical.
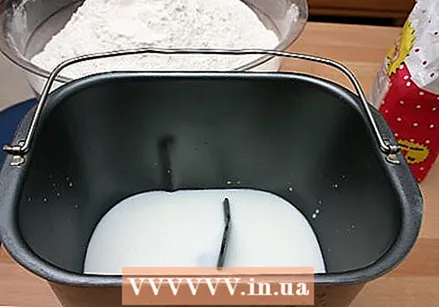 Add the ingredients in the correct order. If you immediately mix and bake the dough, it does not matter in which order you add the ingredients. If you want to program the machine with the delay cycle to start while you are away, the sequence becomes important. The ingredients must be added in such a way that they remain inert until the machine starts mixing. That's why it's a good idea to get into the habit of adding the ingredients this way from the start.
 - First put the liquids in the bread machine.
- Add the flour or flour. When adding the flour or flour, rinse it over the water to cover the water.
- Then you can add the other dry ingredients such as salt, sugar, milk powder and spices.
- The last thing to add is the yeast. Most recipes suggest that you make a shallow indentation or small bowl in the center of the flour and sprinkle the yeast in it. This is important as it will keep the yeast from touching the liquid until the machine starts to mix. If the yeast and liquid come together before the machine starts, the yeast will become active and likely make a big mess of the machine.
Method 1 of 1: Using the timer
 Put your ingredients in the baking pan and click the baking pan into place.
- Use a recipe that you have already tested and that you trust.
- Put the ingredients in the baking pan in the correct order, as described above.
 Select the program you prefer.
 Using some math, figure out when you want the bread to be done.
 Use the arrow keys to set the time to the number of hours you calculated above.
 Close everything and press Start. Now let the device do its work quietly.
Tips
- If you're making bread with water and want to try something fun, add a spoonful of vinegar to the liquid ingredients. You don't taste the vinegar in the finished bread, but the acid in it keeps the bread fresh after baking. This old-fashioned trick still works well today.
- Milk, buttermilk and yogurt soften the finished bread and give it a finer crumb. With milk or buttermilk, you can use warm tap water and add powdered milk or dry buttermilk with your dry ingredients. If you have any whey left over from cheese making, you can use that to make a finer crumb bread. It also tastes good, better than you might think. Plus, thin yogurt that doesn't quite work out is great in bread.


