Author:
Roger Morrison
Date Of Creation:
25 September 2021
Update Date:
21 June 2024
Content
- To step
- Method 1 of 3: With a trimmer
- Method 2 of 3: Using a seam ripper
- Method 3 of 3: Remove stitch holes
- Tips
- Warnings
- Necessities
- Using a trimmer
- Using a seam ripper
- Remove stitch holes
Embroidery is a great way to add style and detail to a garment. However, if you made a mistake or simply changed your mind about the design, you will have to remove the embroidery. Fortunately, this is easy to do. With a little ironing afterwards you may even be able to remove the holes in the stitching for a seamless finish!
To step
Method 1 of 3: With a trimmer
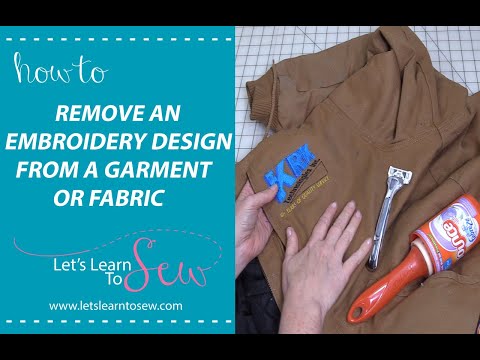
 Buy a trimmer. You can find this device online or at a well-stocked fabric store. It kind of looks like a beard trimmer. It is ideal for professional quality embroidery, such as logos on jackets, shirts and caps.
 - This device is not recommended for hand embroidery that is done with a needle, thread and hoop.
 Turn the garment or fabric to reveal the back. There is a small chance that the trimmer will rub against the fabric and cause it to fade. Doing this on the front of the garment will reveal the messy texture. However, if you are working from the back, this will not be the case.
 - Some embroideries may still include the stabilizer. First tear off this reinforcement.
- Embroidery is thinner in the back of the fabric, making it easier for the trimmer to get through.
 Push the trimmer 2-3 cm over the stitching. Place the trimmer against the edge of the embroidery, making sure the blades dig into the threads. Slowly push the trimmer forward about 2-3 cm, like a cart or scoop.
 - If you're working on a logo, you can also move the trimmer across the width of the letter.
 Lift the trimmer and move it to the next segment. Push the trimmer forward again 2-3 cm, then lift it up again. Work around the edge of the embroidery like this, from one side to the other. Once you are done with the first row, move on to the second 2-3 cm row. Keep going until you've shaved off all the embroidery.
 - How often you do this depends on the size of the embroidery. For a small project, you may only need to do it once.
 Return to the right side of the fabric and remove the stitches by hand. Depending on how fine and tight the embroidery is, you may not be able to see the loose threads. Look closely to find the area you shaved, then use a darning needle or seam ripper to pull up and pull the strands away.
 - Slide the needle or seam ripper under the stitches and then pull them up. Use your fingers to pluck out the wires.
- You can drag your fingernail over smaller stitches to scrape them off.
 Repeat the process if necessary. Not everything will come off the first time, so turn the fabric over and run your trimmer over the remaining stitches. Go back to the front and pluck the stitches from the embroidery.
  Use a lint roller to remove the thread dust from the fabric. If you don't have a lint roller, you can use a piece of masking tape instead. Make sure to include both the front and the back of the fabric.
 - This process can reveal a few stuck threads or stitches. In that case, use a seam ripper to remove it.
Method 2 of 3: Using a seam ripper
 Turn your project over so you can see the back of the embroidery. If this is a real piece of clothing, you may want to turn it inside out. Working from the back is important. If you are working from the front, you could accidentally cut the fabric, which will eventually be visible.
 - Hand-embroidered items are best placed back in the embroidery frame.
- If your embroidery still has the stabilizer on the back, rip it off before continuing.
 Cut out the stitches with a seam ripper. Determine how many stitches to remove first, then slide a seam ripper under those stitches and lift it up at an angle to tear through. The blade inside the curved part of the seam ripper cuts through the threads.
 - You can use embroidery or manicure scissors. Use only the tip of the scissors to cut the threads, taking care not to cut the fabric.
- If this is a large piece of embroidery, only finish a few inches at a time.
- If you are working on multi-layer embroidery, start with the satin stitches.
 Return to the right side of the fabric. If this is a piece of clothing, just turn it over for the right thing. Depending on the type of stitches the embroidery is used, you may even notice the cut threads starting to fray.
  Pull the stitches out of the right side of the fabric. Slide a darning needle under the stitches, then pull them away. Use tweezers to pull any remaining stitches from the fabric.
 - If a stitch cannot be removed easily, turn the fabric over again - you may not have cut the entire stitch.
- Again, if you are cutting out a multi-layered piece of embroidery, you are only pulling out the satin stitches.
 Repeat this until you have removed all the embroidery. Go back to the wrong side of the fabric and cut more stitches. Turn to the right side of the fabric and pull out the threads.
 - If you are working with a multi-layered piece of embroidery, continue with the basting and decorative stitches. Finally, do the main stitches.
Method 3 of 3: Remove stitch holes
 Iron the right side of the fabric using the correct setting. The heat setting on your iron is labeled either by the temperature or by the type of fabric. Choose the setting that is most suitable for your fabric. For instance:
 - Use a warm environment for cotton or linen, and a cool or warm environment for silk and plastics.
- If you are dealing with cotton and your iron is labeled by fabric type, select the "cotton" setting.
 Rub your fingernail horizontally across the stitches. Find the holes created by the removed stitches, then scrape over them with your fingernail. You only need to do this 2-3 times.
 - Work on a hard surface, such as a table.
- You can also use the tip of a spoon.
- Be careful with silk as it can tear easily.
 Scrape your fingernail vertically over the puncture holes. By scratching the holes sideways, you only closed the vertical wires. Scratching them vertically (top to bottom) will tighten the horizontal wires.
 - Don't worry if the gaps don't disappear right away.
 Press the fabric with an iron and repeat the process, if necessary. Iron the fabric with the correct heat setting. Scrape your fingernail horizontally and then vertically over the holes. If the holes are still visible, repeat the entire procedure 1 or 2 more times.
 - Don't worry if they don't disappear completely. You repeat the whole procedure on the wrong side of the fabric to remove the remaining holes.
 Turn the fabric over and repeat ironing and scraping. Iron the fabric with an iron and scrape the holes 2 to 3 times with your fingernail. First go horizontally across the holes, then vertically.
 - As with the front, you may have to repeat the ironing and scraping a few times.
Tips
- Remove the embroidery from the back if possible.
- If you are redoing a small portion of the hand embroidery, leave a short length of the yarn so that you can tie it to the new piece.
Warnings
- If the garment is old, that part of the fabric that appears under the removed embroidery may differ from the rest of the fabric.
Necessities
Using a trimmer
- Trimmer
- Seam ripper
- Lint roller
Using a seam ripper
- Seam ripper
- Scissors (optional)
Remove stitch holes
- Iron


