Author:
Charles Brown
Date Of Creation:
2 February 2021
Update Date:
1 July 2024
Content
- To step
- Method 1 of 4: Get started
- Method 2 of 4: Mastering the basics
- Method 3 of 4: Continue with some more advanced techniques
- Method 4 of 4: Maintaining the recorder
- Tips
- Warnings
- Necessities
The recorder is a wooden wind instrument that has been used since the 14th century. It produces a soft flute sound. Compared to other instruments, the recorder is quite easy to play, making it a good starting instrument for children or other aspiring musicians. They come in all kinds of colors and sizes, so there is always one that suits you.
To step
Method 1 of 4: Get started
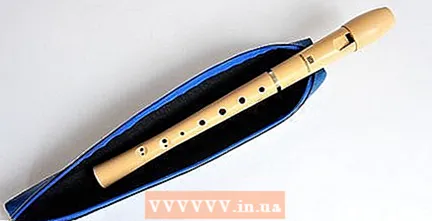 Buy a recorder. If you are a real beginner, you can buy a cheap plastic recorder first. Plastic recorders are often used to teach children to play the recorder because they require very little maintenance.
 - Once you get the hang of the basics and still enjoy playing, you can buy a slightly more expensive wooden version. Wooden recorders have a nicer sound than their plastic counterparts, but they are a bit more difficult to maintain.
- You can buy both wooden and plastic recorders at a music store or on the internet.
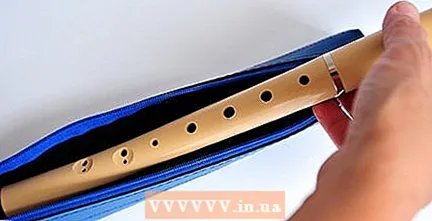
 Assemble the recorder. A recorder often consists of three parts: the top part with the mouthpiece, the middle part with the holes for the fingers and the bottom part, in the shape of a bell. Gently twist the parts together.
 - The bottom part should be slightly twisted so that the hole is slightly to the right when you look down while playing on it.
- Some recorders have one or two parts, especially those used in schools.
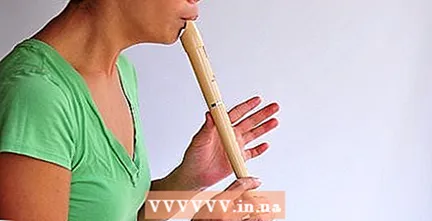
 Learn how to hold the recorder. Grab the recorder and hold the mouthpiece to your lips. Hold it gently between your lips and keep the balance with your fingers. Your left hand should be at the top, your right hand at the bottom.
 - The back with the one hole should be turned towards you. The front is turned away from you.
- Do not bite or let it touch your teeth.
Method 2 of 4: Mastering the basics
 Practice blowing the recorder. Blow the recorder to get an idea of what it sounds like. You have to blow gently. Think about blowing bubbles when doing this. Blowing gently, with a constant flow of air, is one of the trickiest but most important techniques when starting to play the recorder.
 - If you blow too hard, you will get a sharp, unpleasant sound. By blowing gently you get a more musical sound.
- Breathe from the diaphragm and make sure that the puffing is done evenly. Then you keep the sound consistent.
 Learn the correct tongue technique. When you play a note on the recorder, you have to turn the sound on and stop with your tongue. Put your tongue against the roof of your mouth behind your teeth. The sound has to start and stop here.
 - To do this, try saying the word "does" while playing the note. This is the tongue technique that allows you to make a clear beginning and end to a tone.
- Be careful not to actually say the word "does" out loud when you play. You should only use it to master proper tongue technique.
 Play the first note. The first tone most people learn is the B. For this you have to cover the hole at the back with your thumb. Now take your left index finger and place it on the top hole closest to the mouthpiece. Use your right thumb to balance the recorder. Now blow gently through the mouthpiece and say "do". Well done! The tone you just played was a B.
 - If no sound comes out, or if it beeps, make sure your finger and thumb cover the entire hole and that they lie flat on it.
- Another reason it can squeak is if you blow too hard.
- Keep practicing the B until you get used to it.
 Understand the fingering chart. A simple fingering chart is used to display the notes on a recorder. The fingering chart consists of the numbers 0 through 7, where 0 represents the thumb of your left hand, 1 your index finger of your left hand, 2 the middle finger of your left hand, and so on.
 - For example, the B you just played can be displayed on the fingering chart like this:
- 0 1 - - - - - -
- The numbers represent the holes that are covered, while the dashes represent the holes that remain open. In this case, 0 represents the thumb covering the hole at the back, and 1 represents your left index finger covering the top hole.
- For example, the B you just played can be displayed on the fingering chart like this:
 Learn the notes you can play with your left hand. The first notes you learn to play with your left hand are B (which you have just played), A and G. The next two notes with your left hand are C "and D". The apostrophe means they are high notes.
 - To play the A: Use the same fingering as for the B, but now put your left middle finger on the second hole from the top. The fingering chart for the A is: 0 12 - - - - -
- To play the G: Use the same fingering as for the A, but now put your left ring finger on the third hole from the top. The fingering chart for the G is: 0 123 - - - -
- To play the C: Cover the hole in the back with your left thumb, and place your left middle finger on the second hole from the top. The fingering chart for the C "is: 0 - 2 - - - - -
- To play the D: Leave the hole in the back open and put your left middle finger on the second hole from the top. The fingering chart for the D "is: - - 2 - - - - -
 Learn the notes you play with your right hand. The first notes you learn with your right hand are the E, D and F #. The next two tones are the F and C. These two tones can be a bit tricky for beginners, as there must now be a lot of holes completely closed while you play.
 - To play the E: Cover the hole at the back with your left thumb, cover the top three holes with your left index, middle, and ring fingers and place your right index finger on the fourth hole from the top, and your right middle finger on the fifth hole from the top. The fingering chart for the E is: 0 123 45 - -
- To play the D: Use the same fingering as with the E, but now put your right ring finger on the sixth hole from the top. The fingering chart for the D is: 0 123 456 -
- To play the F #: Use the same fingering as for the D, but now take your right index finger off the fourth hole from the top, leaving the rest of the fingers. The fingering chart for the F # is: 0 123 - 56 -
- To play the F: Cover the hole at the back with your left thumb, put your index, middle and ring fingers of your left hand on the top three holes, the index finger of your right hand on the fourth hole, the ring finger of your right hand on the sixth hole and your little finger of your right hand on the seventh hole. The fingering chart for the F is: 0 123 4 - 67
- To play the C: When you play the C, all seven holes are covered. Your left thumb covers the hole at the back, the index, middle, and ring fingers of your left hand cover the top three holes, and the index, middle, ring, and little finger cover the bottom four holes. The fingering chart for the C is: 0 123 4567
 Practice a few simple songs. Once you've mastered all the notes, you can already play a few simple songs:
 - Kortjakket is always ill:
- D D A A B B A
- G G F # F # E E D
- Three times three is nine:
- E E E E E G G
- F F F F A G G
- E E E E E G G
- A G F D C
- Mieke has a lamb:
- B A G A B B B
- A A A
- B D 'D'
- B A G A B B B
- A A B A G
- Kortjakket is always ill:
Method 3 of 4: Continue with some more advanced techniques
 Practice the treble. This can get a bit trickier. To play notes above the high D, you need to use a technique where you squeeze the thumbhole halfway. Cover 2/3 of the thumb hole with the tip of your thumb. Tighten your lips a little more and blow a little harder than usual.
  Learn the semitones. A semitone is a sound that lies between one note and the next, like the black keys on a piano. You have already learned one of the most important semitones, the F #. Two other semitones you need to learn are Bb and C # ".
 - The fingering chart for the Bb is: 0 1 - 3 4 - - -
- The fingering chart for the C # "is: - 12 - - - - -
- You can practice these semitones by playing this short tune:
- D D A A B C # 'D' B A, G G F # F # E E D
 Work on your vibrato. Once you have mastered the tones, you can start working on the vibratory technique. A vibrato makes the tones resonate, giving you a dynamic effect. There are several ways to achieve this:
 - Use your diaphragm to create vibrato. Control the flow of air entering the recorder by tightening and squeezing your diaphragm. Say "heh heh heh," but don't cut off the airflow completely.
- Control the vibrato with your tongue. Say "there is there" so you can control the airflow with your tongue.
- Use your fingers to produce vibrato. While not useful for long-lasting vibrato, you can use this method to create a small vibration. Switch very quickly between fingering two adjacent notes. Do not set the tone with your tongue every time, but play, for example, very quickly in succession A B A B A B A.
 Use glissando. You do this by quickly sliding your fingers off the recorder, so that you get a sliding sound.
Method 4 of 4: Maintaining the recorder
 Clean your recorder after every play. It is important to keep your instrument clean for hygienic reasons and to keep the recorder in good condition.
 - A plastic recorder can be put in the dishwasher or in the sink with soapy water. Take the parts apart before washing and make sure to rinse off any soap residue.
- You can clean the mouthpiece with an old toothbrush or pipe cleaner.
- Let the recorder dry completely before playing it again.
- You have to take apart a wooden recorder and carefully dry it with a soft cloth.
 Keep the recorder in a box. Keep the recorder in a box when you are not using it to prevent damage to the labium (the edge where the air is blown against the top), because if it breaks, your recorder can no longer be used.
  Protect the recorder from extreme temperatures. Protect your instrument from sudden changes in temperature or direct sunlight, and never leave it in a hot car or near a heat source. This is especially important with wooden recorders, but actually it applies to any instrument.
  Know how to deal with a blockage. Droplets of condensation in the wind channel can clog the recorder. You can prevent clogging on both wooden and plastic recorders by warming the mouthpiece between your hands, under your armpit, or in your pocket before playing.
 - If water does collect in the wind channel, cover the labium with one hand and blow forcefully into the wind channel. Then excess moisture should come out.
- If the recorder is still clogged, you can clean the wind channel by dissolving one tablespoon of unscented dish soap in three tablespoons of water. Pour this into the recorder, through the labium or through the bottom and let it work for a while before pouring it off. Let the recorder dry completely before playing it again.
Tips
- If you hear a lot of squeaking noises, make sure you are not blowing too hard and that the holes are well covered with your fingers. If it keeps squeaking, you may need to blow a little harder, or reposition your fingers a little bit until the tone comes out right.
- Tighten your lips a bit more in the high tones and less in the low tones.
- Keep your back straight when you play, then the sound will be nicer.
- Don't waste your money on music lessons if you don't really want to learn to play the recorder.
- If you don't get a nice sound when you blow on, the recorder may also be too wet. Cover the hole at the top with your hand and blow hard, or dry it with a rolled up cloth.
- Be very careful when playing the recorder.
- Clean your recorder every day.
- After playing 5 times, put a little grease on the thread around the middle part. You can also use petroleum jelly.
- Listen to classical music such as from the Renaissance, then you often hear recorders.
- If, after learning to play the recorder, you want to learn to play a different instrument, a clarinet is a good choice because you hold and blow it in much the same way.
Warnings
- Don't bite the recorder. Then it will not last long.
Necessities
- A recorder
- Sheet music
- Music stand (optional)
- CD to guide you (optional)
- Pipe cleaner
- Box (a sturdy box, or a bag)


