Author:
Tamara Smith
Date Of Creation:
19 January 2021
Update Date:
1 July 2024
Content
- To step
- Method 1 of 3: Learn how to read a staff
- Method 2 of 3: Learn how to interpret notes
- Method 3 of 3: Learn how to play the music
- Tips
Learning to play the piano is challenging and time-consuming, but it is definitely rewarding. Although it is difficult to replace lessons, it is possible to teach yourself to play the piano. Read below for a first introduction to piano sheet music, as well as other music reading guides for more information.
To step
Method 1 of 3: Learn how to read a staff
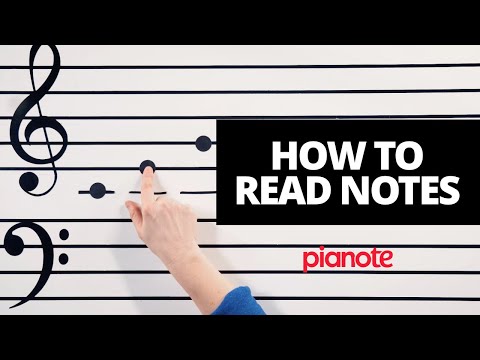
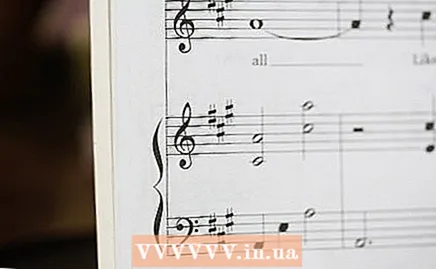
 Know what the lines and gaps stand for. When you look at sheet music you see five lines with four spaces in between. These are together called the staff. Both lines and the gaps are used as locations for notes, with the location of the notes determining the pitch. Which pitch is assigned to a line or gap is determined by the clef, which is discussed below.
 - Lines and spacing can also be placed above and below the normal five lines, where necessary to indicate a note.
- Learn to recognize the keys. Clefs have different shapes, and are located at the beginning of a staff, indicating which pitches are on which line or space on the staff. They are usually recognizable because they are large and extend over all five lines. Although several keys exist, you only need two for reading piano music:
- A treble clef or treble clef is the clef or symbol that you will usually associate with music, so it will look familiar to you. It looks like a hyphen (the "&" symbol) in the distance. The lines from the bottom to the top indicate the following notes: E, G, B, D, and F. The spaces from the bottom to the top indicate the following notes: F, A, C, and E.
- A bass clef or F clef looks something like an inverted C with two dots between the bow. The lines from the bottom to the top indicate the following notes: G, B, D, F, and A. The spaces from the bottom to the top indicate the following notes: A, C, E, and G.
- A treble clef or treble clef is the clef or symbol that you will usually associate with music, so it will look familiar to you. It looks like a hyphen (the "&" symbol) in the distance. The lines from the bottom to the top indicate the following notes: E, G, B, D, and F. The spaces from the bottom to the top indicate the following notes: F, A, C, and E.
 Recognize the omens. The accidentals indicate which notes are being changed. The whole or normal notes are indicated with the letters (A B C D E F G), but there are also half steps between those notes, which are indicated with a # (sharp) or b (flat). The sharps and flats at the beginning of the staff indicate the key, and the lines or spaces on which they appear indicate that any note in that spot should be played with either that sharp or flat.
 - Extra sharps and flats can also appear later in the music, and are then placed next to the note to be changed.
- A sharp means that the note is raised by a semitone, while a flat means that the note is lowered by a semitone.
- A sharp for a note is the same as a flat for the next note.
- Sharps and flats are indicated on the piano by the black keys on the piano. This is discussed below.
 Recognize the indicated tempo. The tempo, indicated by two numbers at the beginning of the staff, tells you how many beats there are in a measure. The bottom number indicates what kind of note gets 1 tap (which corresponds to the note indicated below it) and the top number indicates how many of these beats are in a measure (or part of the music).
 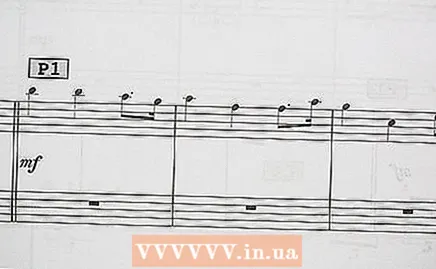 Learn about the sizes. If you look at the staff, you will periodically see vertical lines (barlines) through the horizontal lines of the staff. The space between these lines is called a measure. Think of a bar as a musical phrase, and the line as the dot at the end of this phrase (although you don't have to stop before moving on to the next bar). Measures help to divide the music and, together with the time signature, determine how many beats a particular note will receive.
Method 2 of 3: Learn how to interpret notes
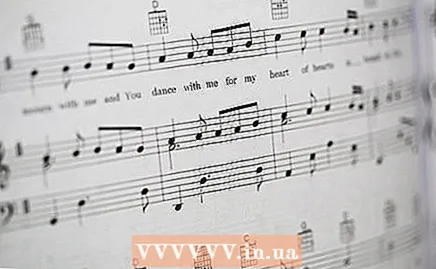
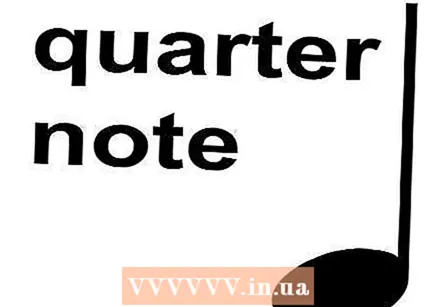
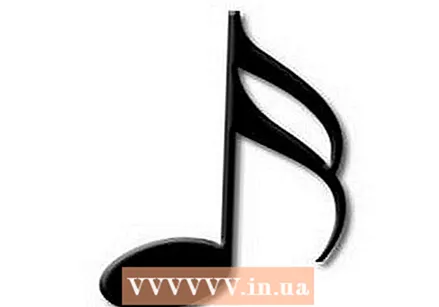
 Learn the parts that make up a note. Nuts consist of several parts. Like the lines and circles that make up the written English language, the lines and circle of notes change how those notes functions in the musical sense. Understanding the parts of notes is necessary to understand how they sound.
 - The head is the ball of the nut. The head can be open or completely black. The location of the head indicates the pitch at which the note should be played.
- The stick is the line that is attached to the head. It can point up or down (depending on the position of the head on the staff), and has no effect on the music.
- The flag is the small tail that some nuts have on the end of the stick. There can be one or two flags.
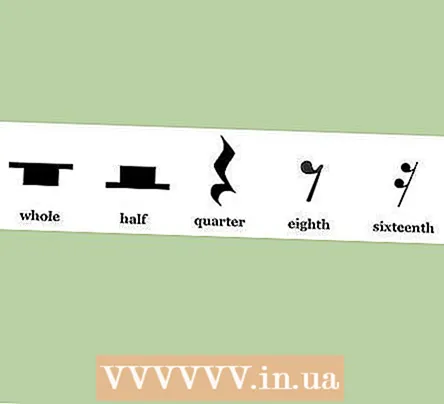
- Learn about the types of nuts. There are several commonly used notes that can be created by making adjustments to the parts of a note. There are also rests, which show that no noise is made for a certain period of time. Here is a list of the most common nuts:
- A whole note: A whole note is indicated by an open head without a stem. These are indicated by a 1 in the time signature.

- Half note: Half note is indicated by an open head with a stem. These are indicated by a 2 in the time signature.

- A quarter note: A quarter note is indicated by a closed head with a stem. These are indicated by a 4 in the time signature.
- An eighth note: An eighth note is indicated by a closed head with a stem and a flag. These are indicated by an 8 in the time signature.

- A sixteenth note: A sixteenth note is indicated by a closed head with a stick and two flags.
- Concatenated notes: Eighth and sixteenth notes can be joined by making a value line of the flags connecting the notes into a group. These are indicated by a 16 in the time signature.

- A whole note: A whole note is indicated by an open head without a stem. These are indicated by a 1 in the time signature.
 Learn about the tranquility. There's no elegant way to put it: the quarter rest looks like a wavy line. The eighth rest looks like a diagonal line with a tail, while the sixteenth rest has two tails. A whole rest looks like a bar in the top half of the middle open space, while the half rest is in the bottom part.
Method 3 of 3: Learn how to play the music
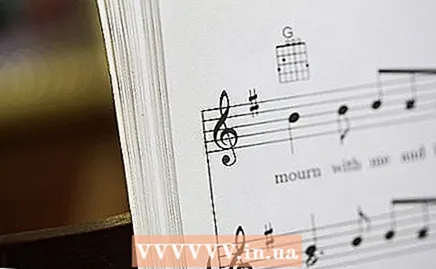
 Learn about the left hand and right hand staff. When you look at sheet music for the piano, you will notice that there are two staves that are connected at the beginning of each line. These two lines indicate which notes should be played with which hand. The upper staff indicates which notes are played with the right hand and the lower staff indicates which notes are played with the left hand.
  Learn about the notes on your piano. Each key, both white and black, represents a specific pitch, and just like the repeated pattern of the keys, the notes are also repeated. Look at your piano and you will see two black keys close together and then three black keys close together. Starting with the first of two keys and moving on to the next key (including the white keys), these are the following notes: C # / Db, D, The B, E, F, F # / Gb, G, G # / Ab, A, A # / Bb, B and C. The bold notes indicate the black keys.
 - Sticking labels on the keys until you've learned them can be helpful.
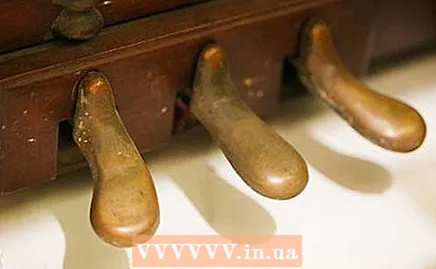 Use the pedals when indicated. If you have a regular piano (and not a keyboard) you will see a set of pedals at the bottom, near your feet. The left pedal is called the "una corda" pedal, the center pedal is called the "sostenuto or damper" pedal, and the right pedal is the "sustain" pedal.The most commonly used pedal is the sustain pedal; the sheet music tells you when to use it:
 - The sustain pedal should be pressed when the indication "Ped. ---- * ’is indicated below a note, and should be released at the asterisk. Alternatively, horizontal, vertical or angular lines can also be indicated. A horizontal line means that the pedal should be pressed, an angle means that the pedal should be released briefly, and a vertical line means that the pedal should be released.
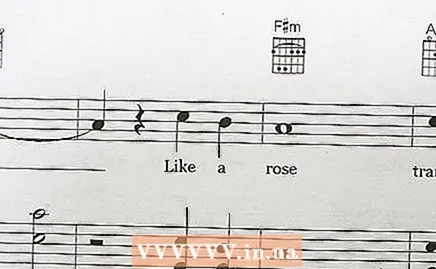 Read the music notation. Reading sheet music is like reading a language. Think of a staff as the sentence and the notes as the letters. Combine your knowledge of the staff with your knowledge of notes and start playing the music you see on the page. You won't be very good at it at first, but as you become more adept, you will get better and better.
  Take it easy. When you first start playing the piano, take it easy. Over time, your hands will get used to the movements and it will become easier to play without looking at your hands all the time. Play the songs very slowly at first until you feel you can do it and are ready to pick up the tempo.
  Practice. Reading and playing sheet music correctly and fluently takes time and practice. Don't get discouraged if you don't get the hang of it right away. If it were a simple skill to learn, people wouldn't be as impressed if you can do it right! Practice every day and ask for help when you can.
 - Your school's music teacher may be able to help you learn to play the piano. You can also ask people around you, such as someone at the church you are attending, or who can help you.
- If you find it difficult to get better at this, consider taking a class. Piano lessons don't have to be expensive. Many conservatory piano students offer discounted lessons, and sometimes cheap lessons are available at community centers.
Tips
- Use mnemonics to remember the order of the notes.
- Proficient sheet music readers learn the skill to read ahead. It is good to learn to read ahead while playing, otherwise it may be difficult to understand the information you are reading in time and you will keep stumbling on it.


