Author:
Charles Brown
Date Of Creation:
2 February 2021
Update Date:
1 July 2024

Content
- To step
- Method 1 of 3: Using Google Chrome
- Method 2 of 3: Using Safari
- Method 3 of 3: Using Firefox
- Tips
- Warnings
In this article, you can read how to post photos to Instagram via the web browser on your PC. Although you can unfortunately no longer post new photos to Instagram with the Instagram app for Windows 10, you can publish photos (within all operating systems) by adjusting a number of settings from Chrome, Firefox or Safari.
To step
Method 1 of 3: Using Google Chrome
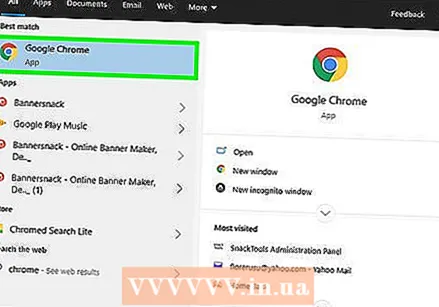 Open Google Chrome on your computer. Usually this option is in your PC's Start menu, and if you have a Mac, it is in the Applications folder.
 - This method allows you to put photos on Instagram, but unfortunately you do not have access to the tools to edit them.
 Click on the menu ⋮. This button is located at the top right of the Chrome screen. A drop-down menu will then appear.
 - If you don't see the menu icon, click View at the top of the screen, then click Developers and finally on Developer Tools. Then proceed to step 5 all at once.
 Choose More utilities. This option is almost at the bottom of the drop-down menu.
  click on Developer Tools. You will find this option almost at the bottom of the menu. A window will open with all kinds of codes on the right. That's the Developer Tools window.
  Click on the "mobile" icon. You can find this icon at the top left of the Developer Tools window. It looks like a cell phone overlapping a rectangle. The icon then turns blue, and the browser window appears on the open page and looks like it would appear on a smartphone or tablet.
 - If this icon is blue, it means that the mobile view is already activated.
 Go to https://www.instagram.com. If you already signed in to Instagram on your computer, you will now see your news feed the way it looks when viewed from your smartphone or tablet.
 - If you are not already signed in, click Sign in and follow the on-screen instructions to sign up.
 click on +. This button is located just below the center of the page. This will open the Explorer (on Windows) or the Finder (on a Mac) window on your PC.
  Choose a photo. You may first need to open the folder where the photo is stored.
  click on To open. This button is at the very bottom right of the window. This is how you load the photo in Instagram.
  Edit the photo. When you upload photos via Chrome, you only have a limited number of options for editing your photo. You can click the rotation icon in the lower right corner of the preview to rotate the photo, or click Filter on the bottom left and choose one of the available filters.
 - Depending on your computer's security settings, you may not see the "Filters" bar. You can then try to disable any privacy and / or adblock extensions and see if that makes a difference.
 click on Next one. To do this, click on the blue link at the top right of the "New Post" page.
  Add a description. Click on the "Add caption ..." text field and enter a description of your photo here.
 - If you want to add a location to your photo, or tag another Instagram user in your post, click the appropriate option on the screen.
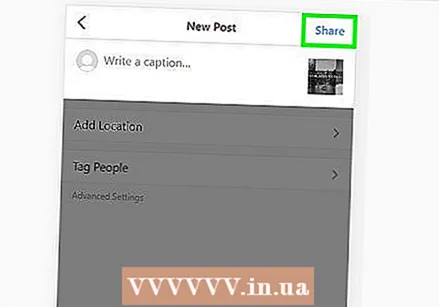 click on Share. To do this, click on the blue link at the top right of the page. Your photo will now be posted on your Instagram page.
 - When you're ready to return to the normal view of your browser, click the X in the top right corner of the developer tools panel.
Method 2 of 3: Using Safari
 Open Safari. You can do this by clicking the blue compass icon in your Mac's Dock. Usually this icon is at the bottom of the screen.
  Activate the "Develop" menu. Skip this step if you already see a menu entitled "Develop" in the toolbar at the top of the screen. If not, activate the menu as follows:
 - Click the Safari menu at the top of the screen.
- Click Preferences ....
- Click on Advanced.
- Check the box "Show developer menu in the menu bar".
- Close the Preferences window.
 Press ⇧ Shift+⌘ Cmd+N.. This will open a new private window in Safari.
  Click on the menu develop. This button is at the top of the screen.
 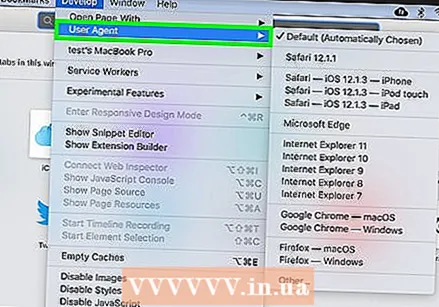 Select the User agent. It is one of the first options in the drop-down menu. By selecting it you open another menu.
  click on Safari - iOS 12 - iPhone. If a more recent version is available, click on it. Safari will then reload in the mobile view.
 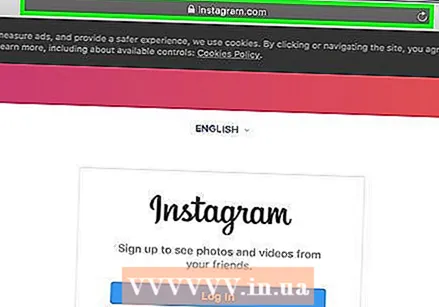 Go to https://www.instagram.com. This will take you to the Instagram login page.
  Log in to your Instagram account. Follow the instructions on the screen to sign up. Once you have signed up, you will be presented with your Instagram feed.
  click on +. This button is at the bottom center of the page. A Finder window will open.
  Select the photo you want to post. If the photo is in a different folder, open that folder first to find it.
  click on Select. You can find this option at the bottom right of the window. This is how you attach the photo to a new post.
  Choose a filter (if desired). Within this version of Instagram you can use fewer tools to edit your photo than on a smartphone or tablet. You can edit your photo with one of the available filters by clicking on the filter of your choice.
  click on Next one. To do this, click on the blue link at the top right of the page.
 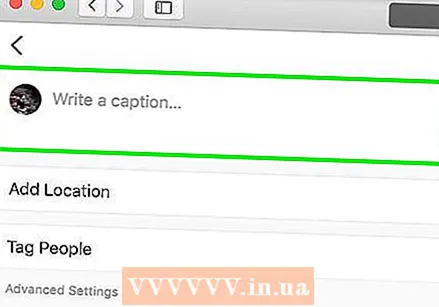 Add a description. Click on the "Add Description ..." field and enter a caption for your photo there.
 - If you want to add a location or tag another Instagram user, click the appropriate option on the screen.
 click on Share. To do this, click on the blue link at the top right of the page. This is how the photo ends up on your Instagram page.
 - To return to normal Safari view, click the Develop menu, choose User Agent, then select Default.
Method 3 of 3: Using Firefox
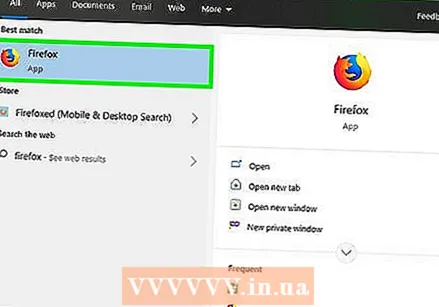 Open Firefox. On a PC with Windows you will find this option in the Start menu. On a Mac, it is usually located in the Applications folder.
  Press the keys Ctrl+⇧ Shift+P. (on a PC) or on ⌘ Command+⇧ Shift+P. (on a Mac). A private screen will then open.
 - You can also click the ☰ button at the top right of the Firefox screen and then click the New Private Screen button.
 Click on the menu ☰. This option is in the top right corner of the Firefox screen.
  click on Web developer. It is one of the last options in the menu.
  click on Web console. This option is at the top of the menu. A new panel will appear at the bottom of Firefox with all kinds of codes in it. This panel is called the Web console.
  Go to https://www.instagram.com. This will open the Instagram Login page.
  Click on the "mobile" icon on the Web console. This option is almost at the very top in the corner of the Web console; in the form of a panel at the bottom of the screen. It looks like a miniature iPhone overlapping a square. You will then see the mobile version of the login page, as it were.
 - You can also simply use the keys for this Ctrl+⇧ Shift+M. (in Windows) or ⌘ Command+⌥ Option+M. (on a Mac). If this key combination does not work, click on the Web console first.
 Click on the menu Accessibility. You can find this option at the top of the page. You will then be presented with a list of a number of different types of smartphones and tablets.
  click on iPhone 6/7/8. In fact, you can choose any of these models. In this way you simply determine the type of screen you will see.
 - If you see a message at the top of the page stating that your changes will not be saved until you reload, right-click on a blank spot on the page to open the context menu, then click the Refresh button (a rotating circular arrow).
 click on login. To do this, click on the blue button near the center of the page.
  Log in to your account. Enter your credentials to sign up, or click Continue with Facebook to sign up via Facebook.
  click on +. You can find this option at the bottom of the page. This will open the File Explorer window (on a PC) or the Finder (on a Mac) on your computer.
 - You may have to scroll down to get it +sign at the bottom of the screen. If so, make sure that while scrolling down, your cursor is not on the "screen" of your iPhone in the middle of the page.
 Choose a photo. You can do this by opening the folder where the photo is stored and then clicking once on the photo.
  click on To open. This option is in the lower right corner of the window. Your photo will be attached to a new post.
  click on Filter. To do this, click on the tab below the photo. A list of filters will appear with which you can edit your photo.
 - If you don't see this option, your privacy settings may be blocking this tool. Please disable any add-ons in your browser and try again.
 Choose a filter. The photo preview will now be displayed with your chosen filter.
  click on Next one. It's a blue link at the top right of the "New Post" page.
  Add a caption. Click on the "Add Caption ..." text field and enter a caption for your photo there.
 - If you want to add a location or tag another Instagram user, click the appropriate option on the screen.
 click on Share. To do this, click on the blue link at the top right of the page. This way the photo will be placed on your Instagram page.
 - To return your browser to normal display, click the X in the top right corner of the Web Console.
Tips
- If you'd rather not post photos to Instagram via your browser, you can use Gramblr instead. Gramblr is a free program that you can use on a PC with Windows as well as a Mac.
- BlueStacks is another free tool that allows you to download the Instagram mobile app to your PC and use it from there.
Warnings
- Unfortunately, Instagram for Windows 10 does not allow you to post photos from your computer. With the Instagram app for Windows 10, you can only send photos taken with your webcam to other users in a private message, or add them to your story.
- You can post larger photos on Instagram by cropping them within Instagram itself or by creating a profile mosaic on an iPhone or a smartphone with Android.


