Author:
Eugene Taylor
Date Of Creation:
16 August 2021
Update Date:
22 June 2024
Content
- To step
- Method 1 of 4: Using standard image editing software
- Method 2 of 4: Using conversion software
- Method 3 of 4: Converting images on a mobile
- Method 4 of 4: Manually modify the file
- Tips
- Warnings
- Necessities
There are many different file extensions for image files. The format of the file determines the software that can be used to open or edit the file, and the file extension (that which comes after the period) determines the format. Most people who work with images / photos will have to convert these files to a different format at some point, so knowing different ways to go about this is helpful! JPEG (this is the same as JPG) is a well-known extension for images, and one you'll probably want to create yourself at some point.
To step
Method 1 of 4: Using standard image editing software
 Open the image file. If you want to convert an image file to another format, the standard image editing software of your operating system is often the easiest solution. In Windows you use "Paint" and on the Mac "Preview".
 - Note: JPG and JPEG are different names for the same file extension. Look in the selection menu of your software to find these extensions.
- There are several other programs that also work fine - open the image in the software you are most familiar with; but if you are not sure, double click on the file to see which default option is on your computer.
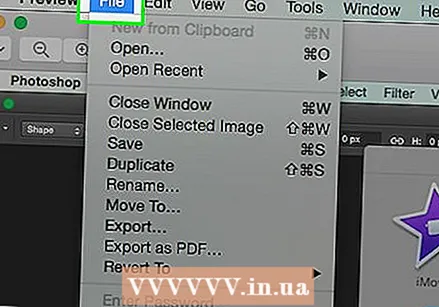 Select "File" from the main menu. You should now be presented with a drop-down menu with options for the image file.
  Save to export the image file. The new format will be applied automatically when you save a new version of the file. This is useful, because this way you keep the original, in case something goes wrong and you want to go back a version. You will need to use an option like "Save As" or "Export" (on the Mac) to complete the process.
 - In some software versions, you must first "duplicate" the file (make a copy of it) and then save the copy in the new format.
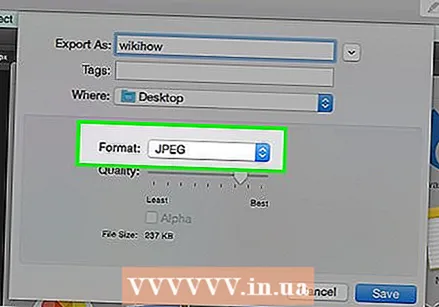 Rename and convert the file. A window should now appear allowing you to change the file name and the file extension / format. Within the menu associated with the "Format" or "Save as Type" option, you should be presented with about 12 options, including ".jpeg" (also known as ".webp").
 - Change the name of the file or the location of the file, if desired. For example, you can place the image on your Desktop for easy access.
- If you cannot find the desired extension in the drop-down menu, try other image editing software (eg Photoshop), or try a different method.
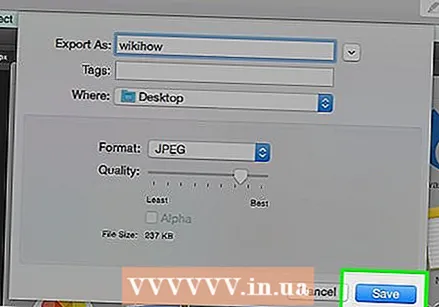 Save the file. When you have finished changing the file name, extension and location on your computer, click "Save". This is what will actually convert the file to the new extension, as a copy of the original.
 - Software like Preview can also convert multiple files at the same time - just select the files you want to convert and right click on them for more options.
Method 2 of 4: Using conversion software
 Look for the right software. For most common file conversions, the standard image editors can usually do the job. If not, search the internet for the right software to help with the conversion. Use search terms such as "extension_A to extension_B" where you enter the desired file extensions in the search term.
 - For example, a search term like "doc to pdf" or "jpg to gif" will give you several free conversion options.
 Upload your image files. Most conversion services are offered for free and without the need to download any software. Look for an option where you can upload an image file for conversion.
 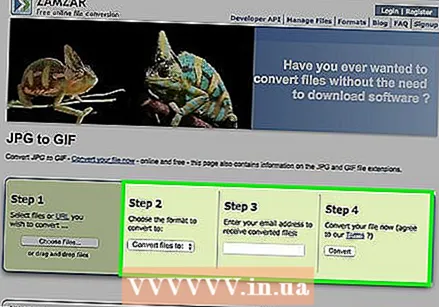 Follow the instructions. Sometimes a conversion site will ask you for an email address and the completed file will be sent to you. At other times you have to wait a while, after which you can download the file immediately.
 - Beware of websites charging you money for this or wanting more private data from you before converting your files - remember that there are many free options, and in most cases you don't need to transfer more data than you want. e-mail address.
Method 3 of 4: Converting images on a mobile
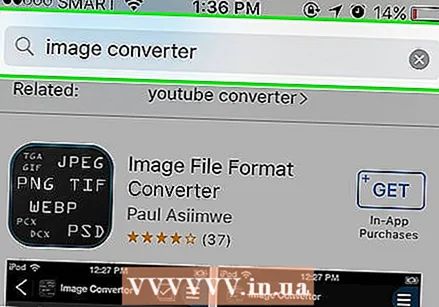 Research conversion apps. There are several options available in both the Android and the iOS app store. Read the user experiences carefully before you download anything, both to find out the quality of the app and to make sure that your desired conversion can be done.
 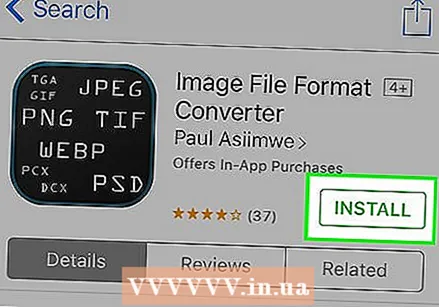 Download an image converter app. If you have selected one, download the app. You should also download your image file (if you haven't already) and find out where it is on your device. Some apps can find your images automatically, and others require you to indicate where the file is.
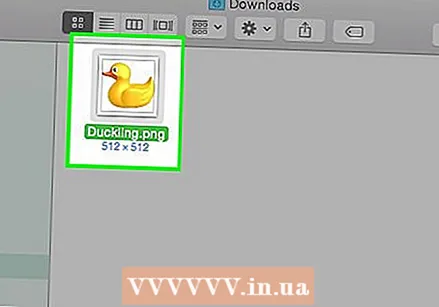
  Convert your image. Once downloaded on your mobile device, the conversion of the image with an app should be done simply by opening the app and following the instructions.
Method 4 of 4: Manually modify the file
 Find the file. As far as image files are concerned, you can often indicate this change by simply renaming the file with your keyboard (i.e. removing the original extension and typing another one). This is usually a good idea when the current file extension makes it impossible to open the file (indicated by an error message such as "invalid file format").
 - The computer uses file extensions as an abbreviation to find out which software to use to open the file. Be careful with this and always make a backup of your file before attempting this.
- This method can degrade the image quality of the image. Usually it is better to use "Save As" in your image editing software.
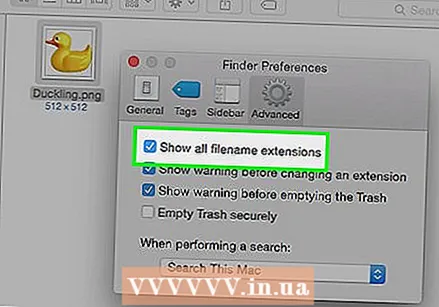 Make the file extension visible. Depending on your system settings, the file extensions (the 3 letters after the period after the file name) are not always visible in the standard view. In Windows, you need to adjust the "View" tab under "Folder Options". You can find these under "Appearance and Personalization". On a Mac, find "Finder Preferences> Advanced" to make the extensions visible.
 - For more detailed information on file extensions and how to make them visible, read the article Changing a file extension on wikiHow.
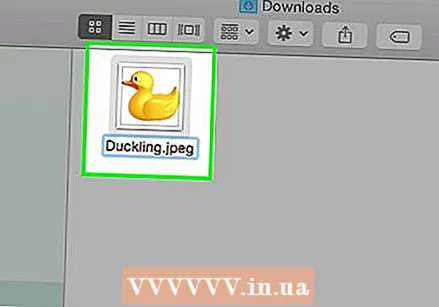 Rename the file. Right-click your image file and select "Rename". Delete the old extension and add the new extension instead.
 - For example, if the name of the file is "myimage.png", you can rename it to "myimage.webp" and from now on your computer will treat it as a ".webp".
Tips
- File extensions are not case sensitive, although it is standard to write them in lowercase.
- .webp and .jpeg mean the same thing and can be interchanged on modern operating systems. The difference is due to an old restriction on some systems where an extension could not contain more than 3 letters.
Warnings
- Be careful NOT to overwrite the original image - always make a backup copy first, or save it under a new file name, which will also make a copy.
Necessities
- An image file for conversion
- A computer
- Image editing software (Paint, Preview, Photoshop, etc ...)


