Author:
Alice Brown
Date Of Creation:
23 May 2021
Update Date:
1 July 2024
Content
- Steps
- Method 1 of 3: Barrel Knot
- Method 2 of 3: Surgical Cord Knot
- Method 3 of 3: Loose knot
- What do you need
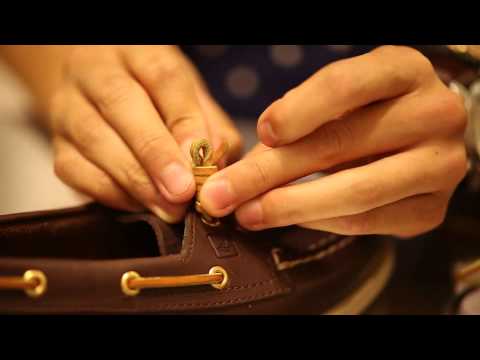
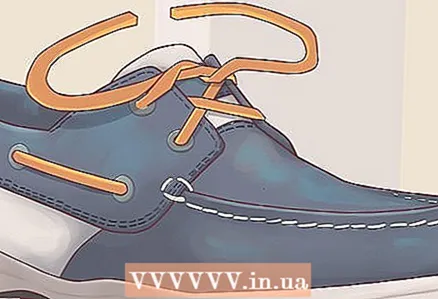
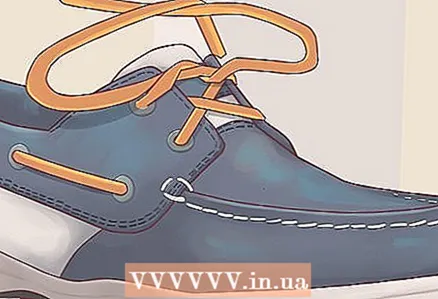
Most of Sperry's boots have leather laces that are notoriously difficult to lace up tightly. You may find that a simple knot is not enough. The most common knot for Sperry is the snake knot, but for a more traditional and pompous style, you can also try a more secure knot such as a surgical knot or a loose knot. Here are some ways you can tie Sperry's shoelaces.
Steps
Method 1 of 3: Barrel Knot
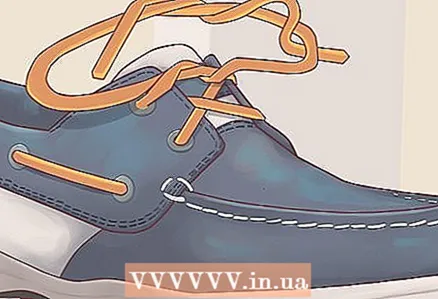
 1 Fold the left lace into a loop. Bend a 2 - 2.5 "(5 - 6.35 cm) section above you to create a 1 - 1.25" (2.5 - 3 cm) loop at the base of the lace closest to the boot.
 - The loop should be clamped just above the shoe lace hole. Do not loop further along the lace.
- Leave the right lace alone. In this method, each lace must be tied separately, not together.
- Leave enough lace at the end of the loop.
- This method is the most common and classic for tying Sperry. It is also called the serpentine tassel knot, boat knot or Eastland knot.
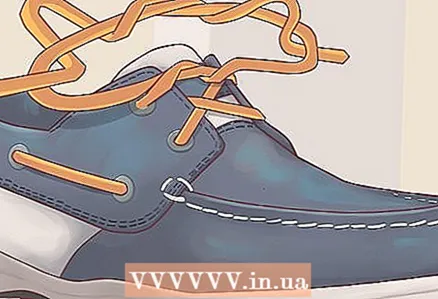
 2 Twist the loop slightly. Twist the loop at the base a little to secure it.
 - You need to twist the loop once or twice. The idea is to make a closed loop instead of an open loop.
 3 Wrap the rest of the lace around the buttonhole. Take the hanging end of the loop and wrap it along the length of the loop until it comes to the top.
 - The lace can be wrapped around the front or back of the buttonhole. The direction doesn't matter.
- The first turn should be as tight as possible to the bottom of the loop.
- The second turn should be immediately above the first, with little or no clearance. The remaining turns should be just as tight to each other.
- Wrap the lace as tight and tight as possible to form a tight coil.
- You will have four to seven turns.
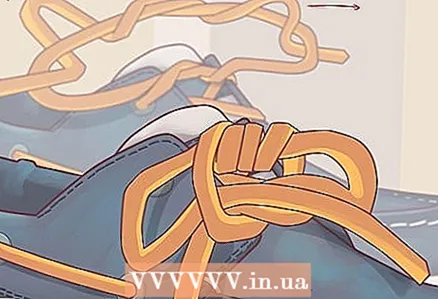
 4 Pass the end of the lace through the loop. Pass the end of the dangling string through the open top of the loop.
 - There shouldn't be a lot of extra lace at this stage, but there should be enough length to work easily.
 5 Push the knot down. Pull the end of the cord upward, while pushing the spool down parallel to the boot, tightening it.
 - Alternatively, you can pull the spool up by pinching the top of the loop and securing the free end. Correct anyway.
 6 Repeat with the right lace. Make a loop from the right lace and wrap the rest of the lace around the loop. Thread the end of the string through the end of the loop and tighten the spool to secure the knot in place.
 - When done, you should have two straight, tight coils hanging from the sides of your Sperries.
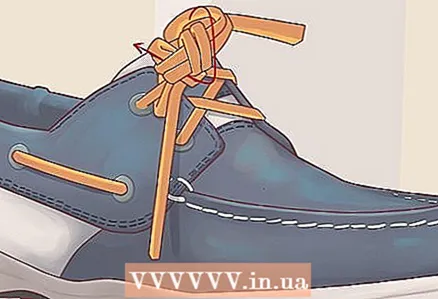
Method 2 of 3: Surgical Cord Knot
 1 Cross the two laces. The left lace should cross over or in front of the right lace.
 - The left lace will now be the right end and the right lace will be the left end. The next steps will deal with laces according to these concepts.
- Note that the first few steps will seem like standard knot tying. It is also called the Tibetan knot or Sherpa knot.
- The surgeon's knot is the most common of the "Safe" shoe knots. It is also called the Tibetan knot and the Sherpa knot.
 2 Wrap the right end around the left. The right end should already be at the top of the left end. Flip it over the left end and bring it to the starting point of the loop.
 - The right end should now be at the back of the laces opening right next to the boot.
 3 Pass the right end through the hole and pull out. Insert the right end through the newly formed hole. Pull this end up and to the right while pulling the left end up and to the left to tighten the laces together.
 - The right end should come out on the front right side.
 4 Make a loop with the right end. Bring the 2-inch (5-cm) portion of the right end together, rolling it back towards you to form a loop.
 - This loop should be as close to the boot as possible. Don't push it further along the lace.
 5 Walk the left end around the new loop. Take the yellow end and pass it behind the right loop. Bring it over and around the front of the hinge, the left end is now in front of the hinge.
 - Note that there should be a hole between the ends of the laces, the loop and the starting knot at the base of your boot.
 6 Pass the left end through the hole. Thread the left end through the newly formed hole as you would with a standard knot.
 - Pass the left end through the hole in place along the lace closest to the hole itself. Do not thread the lace through the hole at the end.
 7 Make a free loop with the left end. Continue to pull the left lace through the hole to form a new loop on the right side. Do not pull this loop tight.
 - This is the point at which the knot differs from the standard knot.
- Note that the left end will now be the right loop and the right end will be the left loop. The rest of the instructions will refer to laces in this way.
 8 Wrap the right loop around the left loop. Draw the end of the right loop over and opposite the left loop.
 - The right buttonhole lace should be in front again.
- There should still be a hole between your laces.
 9 Thread the right loop through the hole. Pull the right end of the right loop back through the hole a second time.
 - The right hinge should return to the back side again.
 10 Tighten the knot. Pull out the hinges to secure the knot.
 - The finished knot should be tight and closed. It should be wrapped twice around the center.
Method 3 of 3: Loose knot
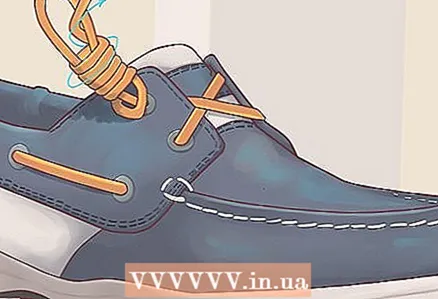
 1 Cross the laces to form an "O" shape. The left lace should cross over the right lace.
 - The left lace is now the right end and the right lace is the left end.
- The first few steps of this knot will look like a standard knot tying or a surgical knot.
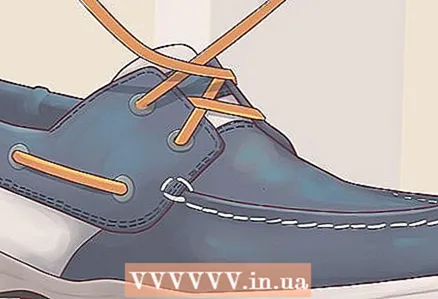
 2 Wrap the right end around the left end. Pass the right end over the left and thread it from the bottom into the hole between the two laces.
 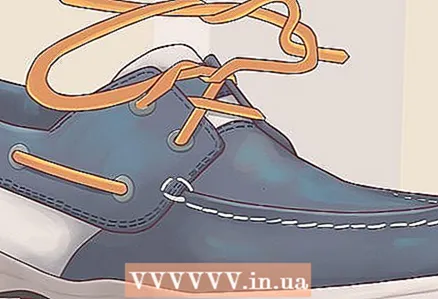 3 Thread the right end through the hole and pull. Thread the right end into the hole.
 - Pull the right end up and to the right. Meanwhile, you also need to thread the left end up and to the left. This movement will hold the laces together.
 4 Cross the laces to form another small "O". The right end should go over the left end.
 - The right end will become the left lace again, and the left end will become the right lace.
 5 Wrap the left lace in an "O" shape. Make a small loop on the back of the left lace. Pass this loop through the "O", thus wrapping it around.
 - The left lace or left loop should remain on the left and in front.
 6 Repeat this process with the right lace too. Make a loop from the right lace and slide it from the front "O" to the back, wrapping it around the "O".
 - The right lace should remain on the right side and be placed in the back.
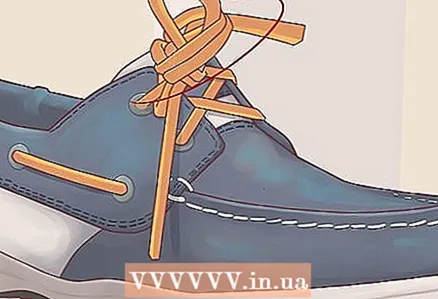
 7 Pull the loops to tighten the knot. Pull the loops out to secure the laces in place.
 - The finished knot should be wrapped twice around the center. It should be tight and closed.
What do you need
- Sperry's boots
- Laces


