Author:
Helen Garcia
Date Of Creation:
16 April 2021
Update Date:
26 June 2024

Content
- Steps
- Method 1 of 6: Decoupage
- Method 2 of 6: Using paraffin wax
- Method 3 of 6: Using Glycerin
- Method 4 of 6: Using the microwave
- Method 5 of 6: Using a book
- Method 6 of 6: Using wax paper
- What do you need
- Using wax paper
- Using paraffin wax
- Using glycerin
- Decoupage
- Using the microwave
- Book use
The beauty of autumn leaves is not just about the fall. Some drying methods can cause loss or discoloration of the leaves. However, there are numerous ways to help maintain color and shape for a long time. After reading this article, you will learn how to dry autumn leaves so that they will delight you in the cold season, when the trees outside are bare and unsightly.
Steps
Method 1 of 6: Decoupage
 1 Choose brightly colored leaves. Collect freshly fallen leaves that are bright and soft enough. The leaves may be slightly dry, but not to the point where they break or curl around the sides. Choose whole leaves. Avoid torn or slightly damaged leaves.
  2 Cover the leaves with adhesive on both sides. For decoupage, a white adhesive is used, which becomes invisible when it dries. You can purchase the adhesive at a store that sells craft and craft supplies. Use a sponge brush to apply the adhesive. Place the leaves on a piece of newspaper to dry.
 - In most cases, decoupage should be done on the same day the leaves are harvested. If you postpone this activity, the leaves will dry out and become brown and brittle.
- If the leaves are very wet, or if you plucked them directly from the tree without waiting for them to fall, they should be dried for a few days. To do this, place the leaves inside a large book.
- 3 Wait for the adhesive to dry completely. It shouldn't stick to your fingers. It should also become completely transparent on the leaves.
 4 Repeat on the other side. Turn the leaves over to the other side and apply adhesive to them. When the other side is dry, the leaves are ready to use. This method allows you to maintain the color and shape of the leaves over a long period of time.
Method 2 of 6: Using paraffin wax
 1 Take fresh leaves. Collect freshly fallen bright leaves. A paraffin wax coating will give the leaves a beautiful shine. Dry each sheet with a paper towel before moving on to the next step.
  2 Melt paraffin wax in a disposable container. Melt 450 g of paraffin wax in a disposable container by heating it over low heat.
 - To melt the paraffin wax faster, cut it into large pieces and spread them evenly over the bottom of the disposable dish.
- If you don't have a disposable paraffin wax melting pot, use a muffin pan that you don't plan on using for cooking anymore. Wax can ruin the shape, so do not use the utensils you are cooking in.
 3 Remove the melted wax from the stove. Be very careful as the melted wax is very hot. Place it gently on your work bench.Make sure the wax container does not tip over. This is especially important if you have pets or children in your home.
  4 Dip each sheet into the melted wax. Hold the leaf by the handle and dip it in the wax several times. Make sure that both sides of the sheet are completely covered with wax. Keep your fingers away from hot wax to avoid scalding. Repeat the above steps for the rest of the leaves.
  5 Spread the leaves to dry. Place each waxed sheet on waxed paper and leave in that position until the wax hardens. Let the leaves dry for several hours in a draft-free room. After the leaves are dry, they should be effortlessly peeled off the paper. Thanks to this method, the shape and color of the leaves are preserved for a very long time.
 - For safety reasons, cover your work table with newspaper, and then add wax paper. This prevents the wax from reaching the worktable. If wax gets on the table, it will be very difficult to remove it.
Method 3 of 6: Using Glycerin
 1 Choose fresh leaves or a small twig with leaves. If you want to dry a whole twig with autumn leaves, choose this method. Choose a twig with leaves that are firmly attached to it.
 - This method can slightly change the color of the leaves. The yellow will become more saturated, and the reds and oranges will become more vivid.
- If possible, look for branches that are already fallen instead of plucking them from the trees. Remember that doing this can damage the tree.
- Do not take branches with sick or frostbitten leaves. This method will not work if the leaves have been caught in frost.
 2 Cut off the end of each branch. Hit the end of each branch with a hammer to reveal the fresh tree. This should be done so that the branch absorbs glycerin better. Otherwise, it will not reach the leaves.
 - If you want to dry only the leaves, without the twig, you can skip this step.
 3 Dilute the glycerin solution. It can be purchased at the store. To prepare the solution, mix 530 ml of liquid vegetable glycerin with 2 liters of water in a large container.
 - Glycerin is a natural substance obtained from plants. This leaf storage process is environmentally friendly.
- If you want to dry the twigs with leaves, add four to five drops of dish soap. This makes the glycerin easier to penetrate into the wood. For best results, use a colorless, odorless dishwashing liquid. Alternatively, you can use a liquid surfactant that can be purchased at a hardware store.
 4 Place the twigs and leaves in the solution for three to five days. The branches and leaves will need to absorb the glycerin for three to five days. Place the container with the solution and twigs in a dark place.
 - If you want to dry the leaves without branches, place the leaves in the solution. Make sure that they remain under the glycerin solution and not on its surface. Pour the solution into a saucepan and place the leaves in it. Place a plate or lid on top so that the leaves are completely submerged in the solution.
 5 Remove the twigs and leaves from the solution. The color of the leaves will become brighter. In addition, they will become more elastic. You can use the whole twig or individual leaves to make various fakes.
Method 4 of 6: Using the microwave
 1 Place fresh leaves between two paper towels. This is a good way to dry leaves for fakes. However, be aware that the color of the leaves may become dull. Place fresh leaves on a 2-ply paper towel. Cover them with a single layer towel on top.
 - Use freshly fallen leaves that still bend well. Do not use leaves with curled ends, torn or stained leaves.
- For best results, leave some space between the leaves to prevent them from sticking together.
 2 Dry the leaves in the microwave. Place the leaves in the microwave and heat them for 30 seconds. Then continue heating for 5 seconds.
 - Fall leaves usually need to be heated for 30 to 180 seconds before they are completely dry.
- Be very careful when placing the leaves in the microwave. If you leave them in the microwave for too long, they can catch on fire.
- If the leaves look burnt, chances are you've overexposed them in the microwave. If the leaves curl around the edges, they probably haven't been in the microwave long enough.
 3 Leave the leaves overnight. Place the leaves in a dark, draft-free place and leave them for at least overnight and for a maximum of 2 days. If you notice that the leaves are starting to fade, they urgently need to be treated.
  4 Spray the leaves with acrylic spray. Leaves need to be processed on both sides. Wait for the leaves to dry. Then they can be used to make fakes.
Method 5 of 6: Using a book
 1 Place the leaves between two sheets of paper. Unfortunately, using this method, you will not be able to preserve the color of the leaves. Place the leaves between two sheets of heavyweight printing paper.
 - Use heavyweight printing paper, not thin tracing paper. Otherwise, the leaves may stain.
- Spread the leaves in one layer. Do not stack the leaves on top of each other, otherwise they may stick together.
- Choose leaves that are in good condition. They should be freshly fallen and moist. The cuttings should not be dry or curled.
 2 Place a heavy book on the paper. To avoid stains on the book and work surface, place tissue paper or toilet paper between the sheet of paper and the book. They will absorb moisture from the leaves.
  3 You can also dry the leaves directly in the book, but in this case, you should only use an old book, which will not be a pity, as stains may remain. Place the leaves between the pages of the book. For best results, place each sheet at least 20 pages apart.
 - Use a telephone directory if you have one.
- Place a heavy object on top of the book. This will leave the leaves flat and dry. You can use other books, bricks, or any other heavy object.
 4 Check the condition of the leaves after a week. They must be dry. If they are still not dry, continue drying for a few days.
Method 6 of 6: Using wax paper
 1 Choose fresh leaves. Use damp, bright and freshly fallen leaves. After the procedure, the leaves will become shiny.
 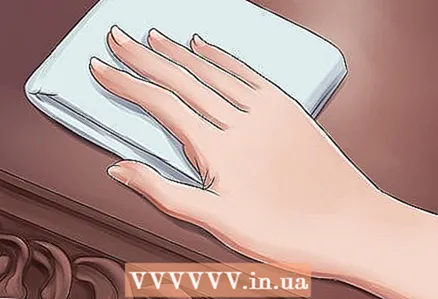 2 Dry the leaves. Place dry leaves between two paper towels. Arrange the leaves in a single layer so there is space between them. Iron paper towels on each side. Iron each side for 3-5 minutes.
 - Drying the leaves early will help them retain their color and quality after covering the leaves with wax paper.
- Do not use the steam function on the iron while drying the leaves. The steam will return moisture to the leaves. Use the dry ironing function.
- Feel the leaves after ironing them for 3 to 5 minutes. If the sheet is still not dry enough, iron it for a few more minutes on each side.
 3 Place dry leaves between sheets of waxed paper. It doesn't matter which side of the wax paper you use. Both sides are soaked in wax. Arrange dried leaves in one layer. Make sure there is free space between the leaves. This will allow the two sheets of waxed paper to stick together.
  4 Place wax paper between two sheets of writing paper. You can also use other thick paper. Make sure there is still space between the leaves and they are in one layer.
  5 Iron the waxed paper. Use a hot iron to iron the sheets on each side.Do not hold the iron in one position to avoid burning the wax. Iron one side for 3 minutes, then gently turn the sheet over to the other side and repeat on the other side.
 - Do not use the steam function on the iron. Use the dry ironing function.
- Be careful when turning over hot paper. If you have sensitive skin, wear gloves to protect your hands.
 6 Wait for the wax to cool. The wax will melt and cover the surface of the leaves. Wait for the wax to cool before moving on to the next step.
  7 Trim the leaves along the outline. After the procedure is complete and the paper has cooled down, remove the heavy sheets of paper. Cut the leaves along the outline with scissors or a blade.
 - Leave a small amount of wax paper along the outline of the sheet. This will ensure that the sheet is tightly coated with the waxed paper.
- You can also try removing the wax paper from the leaves. A small layer will still remain on the leaves, and this should be sufficient for storage.
What do you need
Using wax paper
- Freshly fallen leaves
- Wax paper
- Paper towels
- Writing paper
- Iron
- Scissors
Using paraffin wax
- Freshly fallen leaves
- Paraffin wax
- Disposable baking dish
- Bake
- Wax paper
- Newspaper
Using glycerin
- Freshly fallen leaves or branches with leaves
- Liquid glycerin
- Water
- Dishwashing liquid
- A hammer
- Large capacity
Decoupage
- Freshly fallen leaves
- Adhesive
- Sponge brush
Using the microwave
- Freshly fallen leaves
- Paper towels
- Microwave
- Acrylic spray
Book use
- Freshly fallen leaves
- 2 sheets of writing paper
- 2 sheets of paper towels
- Big book or other heavy object


