Author:
Bobbie Johnson
Date Of Creation:
8 April 2021
Update Date:
1 July 2024
Content
- Steps
- Method 1 of 2: Registering a Single DLL File
- Method 2 of 2: How to re-register all DLLs
- Tips
- Warnings
In this article, we will show you how to register a DLL file that creates the path from the file to the Windows registry. Registering a DLL file can fix startup problems for some programs, but most DLL files either cannot be registered or are already registered. Keep in mind that you cannot register DLL files that are specific to the Windows system because they are essential for the stable operation of Windows, and Windows updates fix outdated or faulty DLL files.
Steps
Method 1 of 2: Registering a Single DLL File
 1 Check out how this method works. To register a DLL file, you can use the "regsvr" command and the name of the DLL file (if the file supports this command).A path will be created from the Windows registry to the DLL file, making it easier for the system to find and use the file.
 - Typically, this method is used to register DLL files that are third-party programs and that interact directly with system utilities (for example, the command line).
 2 Understand the "entry point" error. If the DLL file is already registered, it does not support the regsvr command, or its code does not allow you to connect to the Windows registry, you will receive the error message “The module [DLL name] was loaded but the entry point DllRegisterServer was not found”. DLL file name] loaded but DllRegisterServer entry point was not found). If this message appears on the screen, you will not be able to register the DLL file.
 - The entry point error is not so much a problem as it is a confirmation that the DLL does not need to be registered.
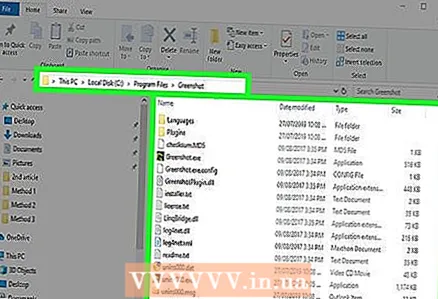 3 Find the DLL file you want to register. Navigate to the folder with the desired DLL file and find it.
 - If the DLL file belongs to an installed program, open the folder with that program (for example, C: Program Files [program name]).
 4 Open the properties of the DLL file. Right click on the DLL file and select Properties from the menu. A pop-up window will open.
  5 Find the name of the DLL file. In the text box at the top of the Properties window, you will find the full file name.
 - Most DLL files have complex names, so leave the Properties window open to copy the name later.
 6 Copy the path to the DLL file. Hold down the left mouse button and drag along the text that appears in the "Location" line, and then click Ctrl+Cto copy the path to the DLL file.
  7 Open the start menu
  . Click on the Windows logo in the lower left corner of the screen.
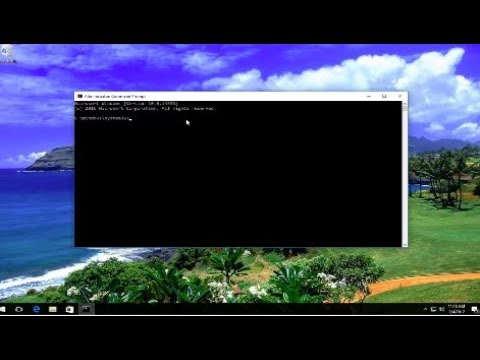
  8 Find Command Prompt. Enter command line in the start menu search bar. A command prompt icon appears at the top of the Start menu.
  9 Open Command Prompt as Administrator. For this:
 - right click on "Command Prompt"
 ;
; - click "Run as administrator";
- click "Yes" when prompted.
- right click on "Command Prompt"
 10 Change to the directory with the DLL file. Enter cd, press the space bar, press Ctrl+Vto insert the path to the DLL file and then click ↵ Enter.
 - For example, if the DLL file is located in the SysWOW64 folder, which is located in the Windows folder, the command would look like this: cd C: Windows SysWOW64
 11 Enter the command "regsvr" and the name of the DLL file. Enter regsvr32, press the space bar, enter the name of the DLL file (along with the .dll extension) and press ↵ Enter... If the DLL file can be registered, the registration confirmation screen appears.
 - For example, if the DLL file name is "usbperf.dll", the command will look like this: regsvr32 usbperf.dll
- To copy the name of the DLL file, reopen the folder with the DLL file (the Properties window will open), highlight the file name and click Ctrl+C... Then paste the name into the command line - to do this press Ctrl+V.
- If the DLL file is already registered or cannot be registered, an "entry point" error is displayed instead of a registration confirmation.
 12 Try unregistering the DLL file and then re-registering it. If entering the "regsvr" command results in an error that is not an entry point error, unregister the DLL file and then re-register it; for this:
 - enter regsvr32 / u filename.dll and press ↵ Enter... Replace "filename" with the name of your DLL file;
- Enter regsvr32 filename.dll and press ↵ Enter... Replace "filename" with the name of your DLL file.
Method 2 of 2: How to re-register all DLLs
 1 Check out how this method works. If you create a list of all the DLL files that are stored on your computer and then run it as a BAT file, you can automatically register all the DLL files. Use this method if you don't know which file to register.
  2 Open the start menu . Click on the Windows logo in the lower left corner of the screen.
  3 Find Command Prompt. Enter command line in the start menu search bar. A command prompt icon appears at the top of the Start menu.
  4 Open Command Prompt as Administrator. For this:
 - right click on "Command Prompt" ;
- click "Run as administrator";
- click "Yes" when prompted.
- right click on "Command Prompt"
 5 Change to the Windows directory. Enter cd c: Windows and press ↵ Enter... The Command Prompt will now execute commands in the Windows folder.
  6 Create a file with a list of DLL files. Enter dir *. dll / s / b> C: regdll.bat at the command prompt and then press ↵ Enter... A file will be created with the name and location of each DLL file, which is located in the Windows folder.
  7 Close the command prompt. After the screen displays the text "c: Windows>" (under the command you entered), close the command prompt.
  8 Find the file with the list of DLL files. This can be done using Explorer:
 - open Explorer window
 (click ⊞ Win+E);
 - click "This PC" on the left side of the window;
- double-click on the system drive of your computer (C :);
- scroll down and find the "regdll" file.
- open Explorer window
 9 Copy the file to your desktop. For this:
 - click on a file to select it;
- click Ctrl+C;
- click on the desktop;
- click Ctrl+V.
 10 Open the copied file in Notepad. Click on a file on your desktop to select it, then:
 - right-click on the "regdll" file;
- click "Change" in the menu.
 11 Eliminate unnecessary DLL files. This is not necessary, but it will shorten the time it takes to register DLL files. Remove all lines that contain the following text:
 - C: Windows WinSXS: the bottom quarter of the list contains lines with this text;
- C: Windows Temp: you will find lines with this text next to the section that had lines with "WinSXS";
- C: Windows $ patchcache $: lines with this text are quite difficult to find. So press Ctrl+F, enter $ patchcache $, and then click Find Next.
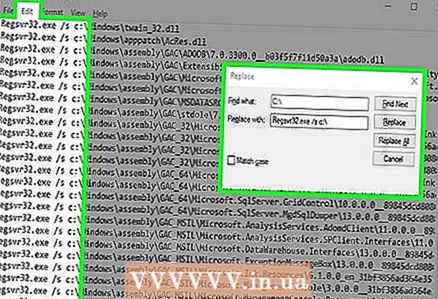 12 Add the "regsvr" command to each line. To do this, use the "Find and Replace" function of Notepad:
 - click "Edit";
- click "Replace" in the menu;
- enter c: in the "What" text box;
- enter Regsvr32.exe / s c: in the text box "What";
- click "Replace All";
- close the window.
 13 Save your changes and close Notepad. Click on Ctrl+Sto save your changes, and then click the X in the upper-right corner of the Notepad window to close it. Now you can run the "regdll.bat" file.
  14 Run the file. Right click on the "regdll.bat" file, select "Run as administrator" from the menu and click "Yes" when prompted. The process of registering all available DLL files will begin; this process can take a long time, so do not turn off the computer (plug the laptop into an electrical outlet).
  15 Close Command Prompt. Do this when the process is complete. The computer DLLs should now be registered.
Tips
- Unregister the DLL file if you are going to delete it, because each DLL file you register is given a read-only status.
Warnings
- DLL files are required for Windows to function properly. Although it is almost impossible to delete the system DLL file, if it happens, the system will be disrupted.
")


