Author:
Janice Evans
Date Of Creation:
26 July 2021
Update Date:
1 July 2024

Content
- Steps
- Part 1 of 4: How to cut the figurines
- Part 2 of 4: How to Prepare Your Workplace
- Part 3 of 4: How to Create Drawings
- Part 4 of 4: How to Think Creatively
- Tips
- What do you need
Painting with sponges with children is easy and fun. Various shapes can be cut out of the sponges to stimulate the child's imagination. Master the basics and start decorating a variety of surfaces from posters to bedroom walls.
Steps
Part 1 of 4: How to cut the figurines
 1 Take a regular kitchen sponge. Kitchen sponges have small and large pores, so choose the one that suits your needs. Make sure the sponge doesn't have a hard coating on one side, otherwise it will be difficult to cut.
 - Use several sponges of different colors to match the color of the paint.
- Do not use sea sponges if you want to cut out certain shapes as they are too lumpy. At the same time, they allow you to get excellent clouds!
 2 Wash and dry the sponge. New store sponges do not need to be washed, but the kitchen sponge will be dirty. The old sponge should be washed with hot water and soap. Rinse the sponge until all the foam is gone and then dry.
 - The sponge must be completely dry so that the marker lines remain on it.
 3 Use a cookie cutter and a marker to trace the shapes of the figurines onto the sponge. If the shape is not too large, then two figures can be obtained from one sponge. You can also draw all the paths by hand.
 - Simple shapes like hearts and stars are more convenient than complex shapes like snowflakes.
- If you need to make a complex figure like a flower, then the bud, leg and leaves should be drawn separately.
- You can also use teaching forms - letters, numbers, circles or squares.
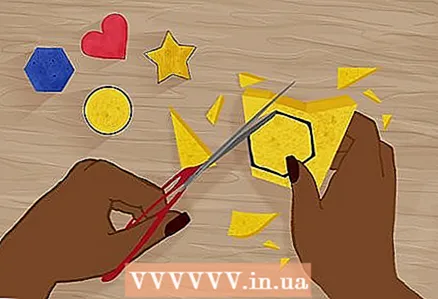 4 Cut the sponge with scissors along the contours. Try to make short cuts, otherwise the edges of the sponge will be jagged. Scraps can be thrown away or turned into geometric shapes!
 - An adult should do this step, even if the child helped you draw the shapes.
- Different flower elements like bud, stem and leaves should be cut separately.
 5 Purchase additional painting sponges. Check out your local craft supply store for a selection of sponges. Choose a few options that you don't need to cut.
 - Spongy brushes have a tapered tip and are good for creating lines and stems.
- Round flat brushes are great for creating polka dots.
- Sea sponges are too large and suitable for creating clouds.
Part 2 of 4: How to Prepare Your Workplace
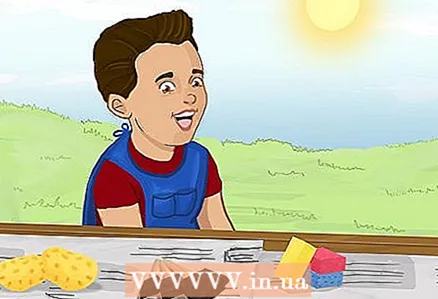
 1 Choose a location that is easy to clean. It is easy to get dirty with sponges when painting, so choose an area that can be easily washed. It is best to paint outdoors in warm and sunny weather, so that the paints dry faster, and your child will be inspired by the whole world around him.
 - You will need a table to draw. Make sure there are no valuables around to get dirty.
- Outdoors, you can use a garden table or put your child on a paved path.
 2 Cover your work surface with newspaper. Use 2-3 layers of newspaper in case your child spills paint or water. You can also cut and unfold a plastic or paper bag, an inexpensive plastic tablecloth, or heavy parchment.
 - An inexpensive plastic tablecloth can be purchased from the baking and party decoration section.
 3 The child should be dressed in clothes that are easy to wash. Usually, baby paint can be washed off, but there is always the risk of staining. If the child is not very neat, then it is convenient to use an apron or overalls.
 - When using acrylic paint, choose clothes that you don't mind getting dirty.
- If the child is wearing a jacket with long sleeves, then they must be rolled up.
- Long hair is best done in a braid or ponytail.
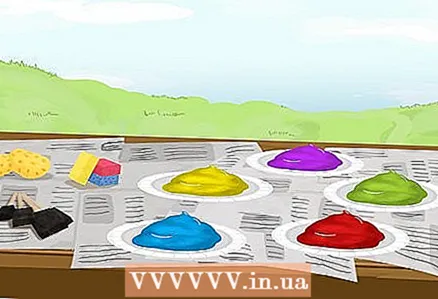 4 Pour water-soluble paint onto the palette. Use tempera, poster or acrylic paint. The area of the ink stain should be large enough for the child to comfortably dip the sponge. Apply one paint color to one palette.
 - As a palette, you can use paper plates and nylon lids.
- Thick paint should be thinned with water so that it is evenly absorbed into the sponge.
- Look for paints that say “easy to clean” or “for kids”.
 5 Spread the paper out on a flat surface. If desired, the corners of the paper can be glued with tape or pressed down with flat stones. Use whatman paper, printing paper, or cardboard. You can even buy a huge sketchbook.
 - In the case of an album, it is better to tear off the sheets before drawing, so as not to accidentally wet the rest of the pages.
- You can also paint on fabric. Thick and heavy fabrics like tarps or canvas work better than thin, lightweight cotton.
- If you want to decorate a piece of clothing, then bring an apron, bag or T-shirt. Work with acrylic or fabric paint.
Part 3 of 4: How to Create Drawings
 1 Dip a sponge into the paint. With one hand, grasp the edges of the sponge and dip it into the paint. Press the sponge against the paint so it is evenly soaked, but not so hard that the paint comes out from the top.
 - Make sure the entire underside of the sponge is in contact with the paint.
 2 Lift up the sponge and press it against the paper. Press down on the sponge hard enough to leave a print, but not hard enough to spread the ink onto the paper.
 - Usually, you only need to lightly touch the paper with the entire surface of the sponge. Do not squeeze out the sponge.
 3 Lift up the sponge and examine the drawn element. The texture of the paint will be slightly uneven. This is the main point of painting with sponges. Depending on the size of the pores, white dots may be visible on the mold!
 - Sprinkle a little gloss over wet paint for a shimmery effect!
 4 Repeat the steps to print the new shapes on paper. There should still be enough ink on the sponge to make 1-2 additional prints. The image will become less and less clear each time. Subsequently, the sponge will need to be dipped again into the paint on the palette.
 - First, use a regular uncut sponge and light paint to create the background. In this case, wait until the paint is completely dry, and then continue painting.
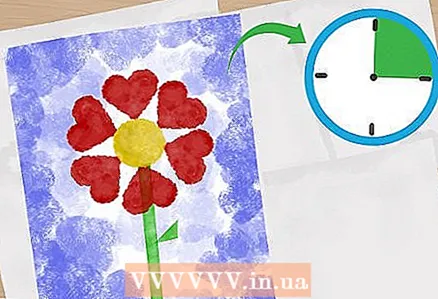
 5 Create intricate designs using different shapes and colors. Wash the sponge in water before using new flowers. It is enough to squeeze out excess water and do not wait until the sponge is completely dry.
 - If the figures are to overlap, then wait for the first layer to dry.
- For example, paint the center part of the flower with a round sponge and yellow paint, then the petals with a round sponge and red paint, and at the end add a green stem with a thin rectangular sponge.
 6 Let the paint dry. It all depends on the weather and the amount of paint used. Usually the paint dries in 10-15 minutes. If the process takes too long, place the drawing in a warm, sunny place or use a hair dryer.
 - In the case of fabric paint, heat shrinkage may be required. Cover your design with a tea towel and press down with a warm iron. Read the directions on the paint bottle.
Part 4 of 4: How to Think Creatively
 1 Apply paint to a sponge and paint with strokes on paper. This is a good alternative to the usual sponge painting. Turn the sponge over and add a few drops of a different color of paint to the center of the sponge. Flip the sponge back and press it against the paper. Brush on the paper to see the final result!
 - Drops of paint should be located next to each other and in contact.
 2 Draw with your fingers if your child is not afraid to get dirty. Let your child do some work with your hands! It is enough to dip your fingers into the paint to add a few new dots and colored stripes to the drawing.
 - Make sure the paint is non-toxic first. Usually all paints for children are non-toxic, but it is better to read the information on the label.
 3 Create unusual designs with stencils. Place a stencil on the paper or draw outlines with masking tape. Apply paint with a sponge and leave to dry. When the paint is dry, remove the stencil or masking tape.
 - You can also use white crayon, and paint on top with watercolors with a sponge.
 4 Use a paper plate as a canvas to make an apple. Using a sponge, apply red paint to a white paper plate. Let the paint dry and cut the stalk out of brown paper and the sheet out of green paper. Fasten all the elements with stationery glue or a stapler.
 - This method allows you to create different figures from oranges to the sun or turkey.
 5 Sponge the Easter eggs. Use a sponge to decorate Easter eggs instead of the awkward liquid dyes. You can make a stand or hold an egg while your child draws, as young children usually find it difficult to do two things at the same time.
 - First, blow out the yolks and whites that can be used.
- If you want to paint whole eggs, you should hard-boil them first and use non-toxic paint.
 6 Decorate a wooden toy chest with your children. Paper and fabric are not the only materials for painting! Take a wooden chest or toy box and apply paint with large sponges. Acrylic paint works best for such a project, but you can also use leave-in tempera paint.
 - Tempera paint must be marked "indelible", otherwise the drawing will be short-lived.
Tips
- Use sponge painting for educational purposes. Cut out letters or numbers so your child learns the alphabet or counts to ten.
- Help your child remember colors and geometric shapes!
- You can hold the sponges with clothespins to avoid getting dirty.
What do you need
- Sponge
- Cookie molds
- Marker
- Scissors
- Foam trays or paper plates
- Water
- Paper
- Non-toxic paint


