Author:
Virginia Floyd
Date Of Creation:
5 August 2021
Update Date:
22 June 2024

Content
Beaded weaving is similar to the usual weaving of beads with only minor differences. We will tell you how this is done. To enlarge the images, click on them.
Steps
 1 Learn the terminology.
- The warp threads are long strong longitudinal threads threaded into the machine.
- Weft thread is the thread on which the beads are placed and then weaved above and below the warp threads.
- The pin is a round wooden stick located at both ends of the machine.
 2 Understand the difference between regular beading and weaving. In particular, be careful not to pierce the warp threads with the needle when threading the weft with beads, otherwise you will not be able to tighten the warp on the weft thread later.
 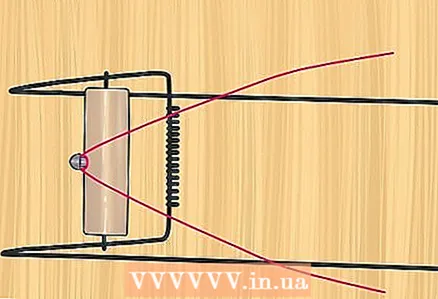 3 Secure the warp thread to the machine. Tie one end of the string to a pin on the pin.
 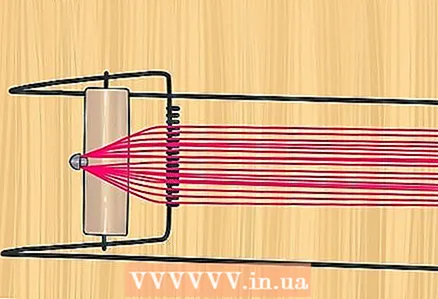 4 Pull the warp threads onto the machine so that you can later remove them from the pin without the need for trimming.
- Draw the thread up through the machine and hook into the pin on the opposite pin.Make sure the thread is in the appropriate grooves on the top of the machine and is pulled as straight as possible.
- Pull the thread through the machine again at the top and hook onto the pin. Be sure to always guide the thread through the separate grooves. Continue winding the thread around the machine until you get the number of warp threads you want to work with, which will determine the width of your piece. The width of the product also depends on the size of the beads used. If your beads are larger than the distance between the warp threads, go back and rewind the warp thread on the machine, passing one groove between the turns of the thread.
- Wind the thread around the pins in one direction. This is necessary so that after removing the work from the machine, a tangled lump of warp threads does not turn out.
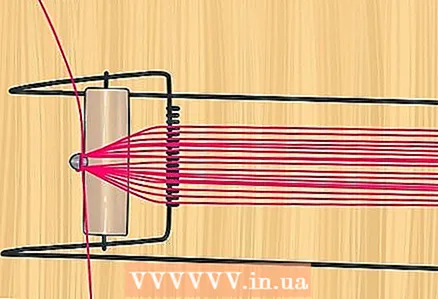 5 Tie the free end of the warp thread to a pin on the opposite side from where the start end is tied.
- It is this method of winding the warp thread that is extremely important for this work.
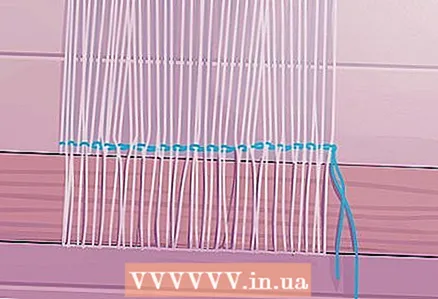
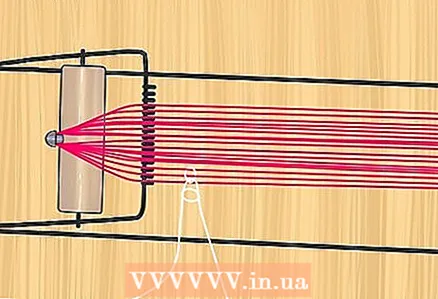 6 Insert the weft thread into the needle and tie one end of it with a double knot to the warp thread. In this case, the warp threads are enough to weave 8 beads.
 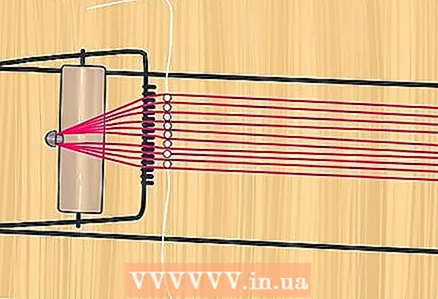 7 Place 8 beads on the needle and pull them UNDER the warp threads. With your free hand, spread the beads between the warp threads.
 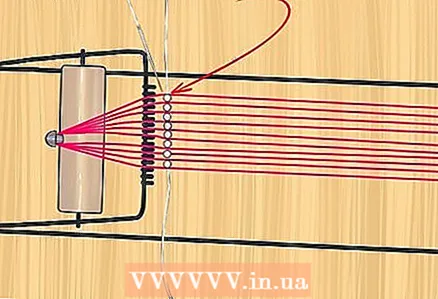 8 Pass the needle through the beads in the opposite direction ABOVE the warp threads. Be careful not to sew the warp threads with the needle.
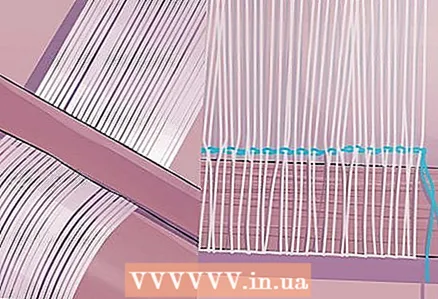
  9 Continue to weave with beadsuntil the work reaches the desired size. You may need additional weft thread, in which case simply repeat the original thread tying procedure. When finished, pull the weft thread back and forth through several rows. Make sure the last row is securely fastened to prevent the beads from scattering.
 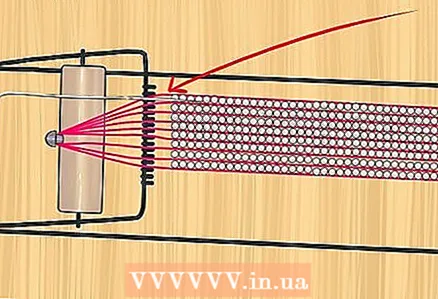 10 Insert the starting end of the warp thread into the needle and thread it through the first row of your weave for a neat look. The weaving itself is over. Only the final procedures remained.
  11 Loosen one pin slightly and twist it towards work so that the warp threads can be removed from the pin.
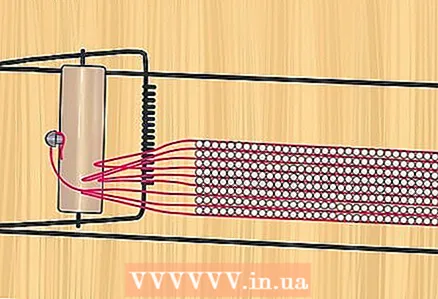 12 Remove the warp threads from the pintrying not to pull them. Cut off the knotted end just at the knot.
 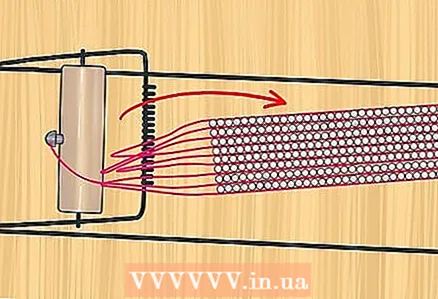 13 Gently lift the work above the machine and it will automatically slide off the pin on the opposite side. Again, cut off the knotted thread just outside the knot.
 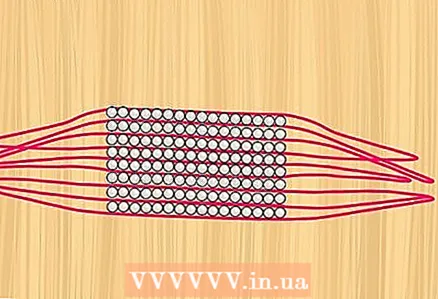 14 Now you should have the loops of the warp threads hanging from both ends of the work.
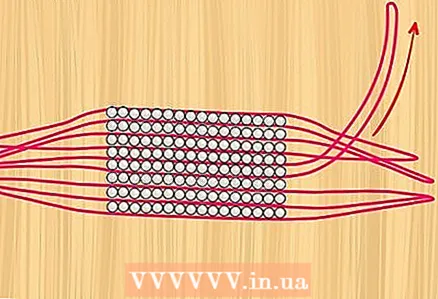 15 Start working from the center or near the center of the threadso that at both ends of the work there are subsequently long enough tails of the warp thread to which the fastener can be attached.
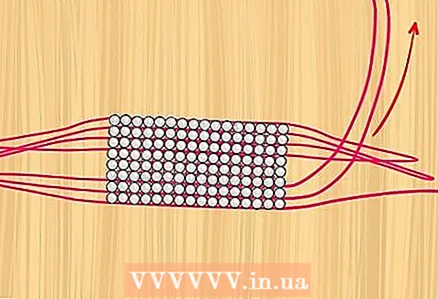 16 Take a firm grip with one hand and start pulling out the center thread. Then proceed to pulling the thread on the rows adjacent from the center.
 - The thread tension should be even. Do not overtighten the thread, because of this, the work can go in waves. If you accidentally overtighten the thread, just straighten the work. After pulling the thread on each successive row, the thread itself will become longer and longer. Continue in this manner until you have completely pulled the threads at the ends of the work.
- The threads will be fully extended when all the loops are pulled into the rows of beads. As you can see in the image, the left thread is pulled over the beads.
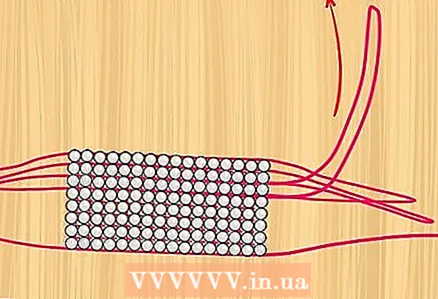 17 Continue the procedureuntil you pull out both ends of the thread.
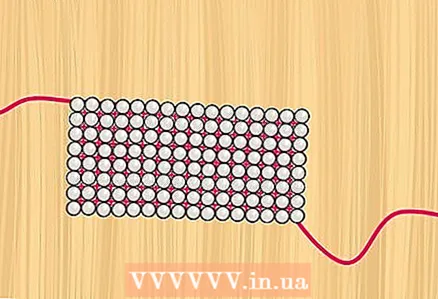 18 Thread ends use to attach the clasp and complete the artwork in the manner of your choice.
Tips
- Avoid sewing the warp with a needle, use a thin line (0.2 mm) for the warp and fine beading for the weft. In this case, the threads become less noticeable in the work, and there is no need to select their color to match the beads, which is difficult when using beads of different colors.


