Author:
Gregory Harris
Date Of Creation:
7 August 2021
Update Date:
1 July 2024
Content
- Steps
- Part 1 of 3: How to Remove the Axle End Nut
- Part 2 of 3: How to Remove the Wheel and Brake Assembly
- Part 3 of 3: How to remove and install the CV joint shaft
- Warnings
- What do you need
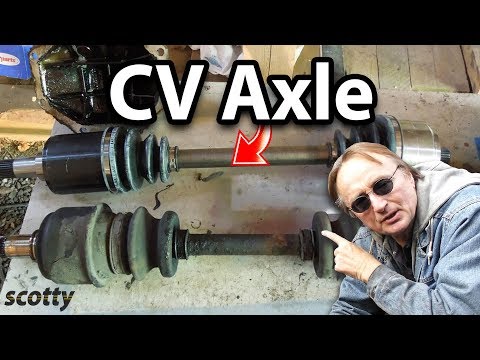
On the CV joint shaft of front-wheel drive cars there are covers and assemblies that can deteriorate, perforate, or grease can leak from them. In order for your car to function properly, you need to change them occasionally. Fortunately, you can do this yourself.
Steps
Part 1 of 3: How to Remove the Axle End Nut
 1 Remove the cap. Remove the axle nut before jacking up the machine. First remove the cap of the wheel where you want to remove the CV joint shaft. On cars with rims, instead of a hub cap, there may simply be a cap in the center of the wheel.
  2 Remove the cotter pin from the axle nut. If your vehicle has a cotter pin that secures the axle nut, you will need to remove it. The cotter pin resembles a hair clip, with the ends bent back for fixing.
 - Before pulling out the cotter pin, you will need pliers to straighten the bent ends.
- If the cotter pin does not pull out, try sprinkling it with a penetrating lubricant (WD-40), available from your hardware store or auto dealership. This lubricant should also help when removing the axle nut.
 3 Remove the axle nut. By removing the cotter pin, you can remove the axle nut. It will take a lot of effort to remove the nut, so it is much safer to first unscrew the nut, and then raise the car with a jack.
 - Unfortunately, the axle nuts do not come in standard sizes, so the size of the head that is right for you will depend on your vehicle. If, before proceeding with the repair, you want to clarify the size, then you can find it out by contacting a certified dealership in the sales department of spare parts for cars of your brand.
Part 2 of 3: How to Remove the Wheel and Brake Assembly
 1 Jack up the appropriate side of the vehicle. It is necessary to raise the car so that the wheel can be removed. Check your vehicle manual for the exact location where the jack will be installed. Try to select a location under the frame rather than under the more fragile part of the car.
 - Before jacking up the vehicle, double check that the vehicle is in the parking position (with an automatic transmission) and that the parking brake is applied.
 2 Place the vehicle on jack stands. Once you raise the vehicle enough to support the support, lower it onto it, because the support is more stable than just a jack.
 - If you have any questions about using a jack, read our article "How to use a jack" for more information.
 3 Remove the wheel. When you remove the cap, you will have access to the clamping nuts holding the wheel. Remove the nuts and wheel in the same way as if you were changing the tire.
 - If you need advice on this issue, you can read the article "How to change a tire".
 4 Remove the brake caliper. After removing the wheel, the brake caliper and brake disc are clearly visible. The caliper body is a large piece attached to the outside of the disc.
 - The caliper is attached to the back of the disc with bolts in the support bracket. The exact configuration depends on the make and model year of your vehicle. 17mm bolts are commonly used as the support bracket.
- Since the caliper is connected to the car's brake line, you need to loosen it instead of letting it sag. You can easily hang the caliper from a short cushion cable to get it out of sight without putting too much stress on the brake line.
 5 Unscrew and remove the outer steering rod from the steering knuckle. An outer tie rod is simply a shaft attached to the steering knuckle that sits behind the disc. This part will probably be bolted on with another 17mm bolt.
 - Like the axle nut, this bolt can be pinned.
- Using a penetrating lubricant, the pin and bolt can be easily removed.
- The tie rod may still be tightly tightened in the steering knuckle even after the bolt has been removed. Feel the knuckle with a hammer (hit the knuckle where the shaft passes, not the threaded part of the link) to remove it.
 6 Unscrew the hub from the strut cup. Two more 17mm bolts connect the hub to the strut cup. After you unscrew these bolts, the hub should be connected to the axle shaft only through the center hole and there should be no difficulty in removing it.
 - Since these are ordinary bolts, it is necessary to secure the head of the bolt when loosening the nut, otherwise it will scroll.
Part 3 of 3: How to remove and install the CV joint shaft
 1 Pry up the CV JOINT. Move further down the shaft and you will see the actual joint where it goes into the gearbox. You can pry on the CV joint at the joint with a small pry bar or a sturdy flat screwdriver.
 - If the shaft does not immediately give in, try twisting it back and forth until you can rip it off.
- When you remove the CV joint shaft, a little transmission fluid may leak out - this is normal. You can substitute some container to collect it.
- It is possible that in your car the shaft runs through an inserted part called the wishbone. You can remove the retaining strap from the inner boot to make it easier for you to pull out the shaft.
 2 Insert the new CV joint shaft into the gearbox housing. In the same way as you took out the old CV joint shaft, insert the new one in the same place in the gearbox housing. The rod will rotate until it is aligned with the body.
 - There is a small C-shaped clip on the shaft and you can feel it when it snaps into place.
- If the shaft is not at the correct level, you can use a rubber mallet to gently push it into place.
 3 Insert the axle shaft through the hub assembly. The new shaft also needs to be inserted in the center of the hub assembly in the same place from which you pulled the old shaft out.
  4 Re-fasten the knots in the same sequence as you removed them. From the hub assembly to the strut cup, secure all previously removed bolts. Connect the outer track rod to the steering knuckle and then attach the caliper.
 - Old cotter pins can become brittle and should be replaced with new ones.
 5 Replace the wheel. By this time, you can put the wheel back (just as if you were changing tires).
 - When the wheel is secured, you can lower the vehicle from the jack and retract the jack stand.
 6 Tighten the axle nut. Finally, you can tighten the axle nut when the vehicle is back on the ground. Make sure the parking brake is still applied when tightening.
 - It is a good idea to clean the shaft threads with a brake cleaner if grease gets on it when you put it through the hub.
Warnings
- Always take precautions when working under a vehicle. Double check that the parking brake is engaged and the jack stands are in the correct locations to create a safe working environment.
- When buying a new CV joint shaft, contact your authorized dealer in the spare parts department. They are by no means universal, so you need a shaft that will be compatible with your vehicle.
What do you need
- Jack
- Lifting supports
- Needle nose pliers
- Penetrating grease (WD-40)
- Socket wrench set of suitable size for clamping nuts, axle end nuts, brake caliper mountings and so on.
- Pry bar
- Split pins
- Brake cleaner


