Author:
Mark Sanchez
Date Of Creation:
2 January 2021
Update Date:
1 July 2024

Content
- Steps
- Method 1 of 3: How to check with an autoscanner
- Method 2 of 3: How to check with a multimeter
- Method 3 of 3: How to replace the HORN
- Tips
- What do you need
Most vehicles are now equipped with an Exhaust Gas Recirculation (EGR) valve to reduce emissions. Some signs may indicate problems with the EGR valve: a failed emission test, intermittent idling, or accidental changes in engine speed. If you are in doubt about the serviceability of the ROG, there are several ways to check this.If the EGR valve is defective, you can replace it by following the tips below and using the necessary tools.
Steps
Method 1 of 3: How to check with an autoscanner
 1 Check the EGR valve with an autoscanner. Autoscanner reads information from on-board diagnostics, OBD-II system version. This system collects information from sensors located in the engine. If the sensor detects any malfunction, it will report it to OBD-II as an error code. An autoscanner will allow you to read this code. The autoscanner connects to the OBD-II diagnostic connector, which is usually located under the dashboard.
  2 Locate the OBD-II connector. The OBD-II connector is usually found in the steering wheel area under the dashboard. If you cannot find it, the owner's manual contains the exact location information.
  3 Turn the ignition key to the ON position. Insert the key into the ignition and turn it to the ON position, but do not start the engine. You only need to start up the electrical systems.
  4 Connect the autoscanner to the OBD-II diagnostic connector. The autoscanner will ask you to fill in some information about your vehicle. Typically, information is required about the make, model, engine and year of manufacture of the vehicle.
 - Most auto scanners are powered by a car battery and do not need a separate power source.
 5 Read the results. The autoscanner will show all error codes reported by OBD-II. If the result is between P0400 and PR409, the EGR valve may be defective.
Method 2 of 3: How to check with a multimeter
 1 Check the EGR valve with a multimeter. A multimeter checks the wiring in the car. The multimeter has several settings, but for this test you need to select the voltmeter mode. The meter has two wires with metal clamps - black (negative) and red (positive) that connect to the wiring in the motor.
 - It is recommended to use a digital multimeter for this check. The DMM will only show the test results. An analog multimeter is more difficult to read because the top reflects every possible result of its range.
 2 Set the multimeter to voltmeter mode. Uppercase "V" denotes voltage mode. The volt range is between the two bold lines.
  3 Find the EGR valve. Consult your owner's manual for the exact valve location as it may vary depending on the make and model of your vehicle. Once you find the valve, look for the electrical connector above it. There is a circuit in this connector that needs to be tested.
 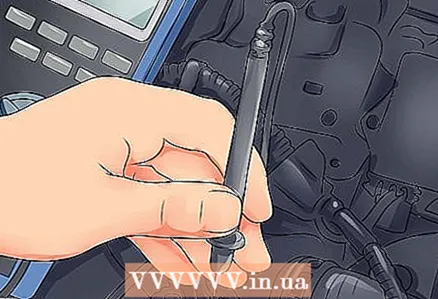 4 Clamp the multimeter probe leading to circuit "C". Each circuit on the horn is labeled "A" through "E".
 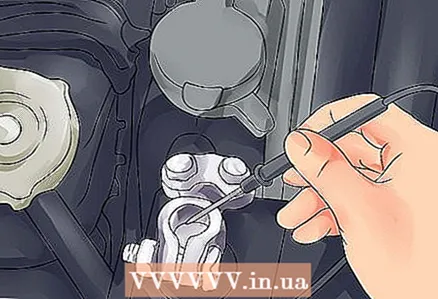 5 Clamp the negative multimeter lead in the motor to ground. The simplest and closest place to ground is the negative terminal on the vehicle's battery.
 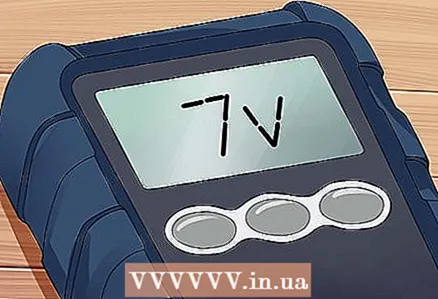 6 Look at the readings. If the meter reads above 0.9 volts, then something (most likely combustion products) is blocking the EGR valve. If the meter shows little or no voltage, then the EGR valve is most likely defective. If the reading is between 0.6 and 0.9 volts, then the EGR valve is working properly.
Method 3 of 3: How to replace the HORN
 1 Buy an EGR valve that is suitable for the make and model of your vehicle. Consult the owner's manual to select the correct valve. If you cannot find a suitable EGR valve, look in the parts catalog or contact an auto parts store employee.
  2 Let the engine cool down. Wait a few hours before getting into your car. It is very easy to injure yourself when working with a hot engine, so let it cool for a few hours.
  3 Disconnect the battery. Loosen the clamps on the two battery terminals with a wrench.Wait at least 5 minutes after disconnecting the battery before working on the engine. The system needs to be completely discharged.
 - Always wear appropriate protective equipment before working on the engine.
 4 Find the HORN. The EGR is usually located at the top or rear of the engine. Refer to the owner's manual if you need help finding it.
  5 Disconnect the vacuum line. Twist and pull on each line until they slide off the EGR valve. Each line connects to a specific port. Label each line to make it easier for you to plug them back in.
 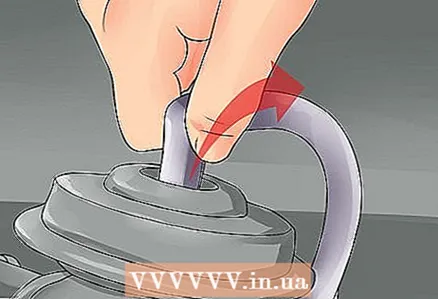 6 Disconnect the electrical cable. The electrical cable is located at the top of the EGR valve. Grasp the power cord with your hand and pull it out.
 - If the electrical cable is secured with a retainer or clip, press down with a flat screwdriver and then release.
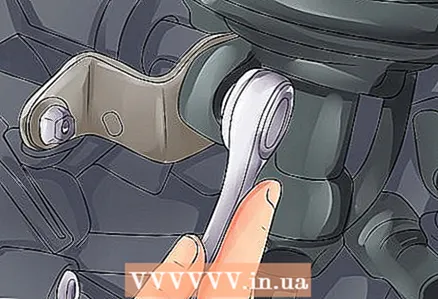 7 Use a wrench to unscrew the bolts on the EGR valve mounting. Apply a spray lubricant to the bolts because they tend to be very tight.
  8 Take out the old EGR valve. Now, having unscrewed the bolts, manually remove the valve from its mount.
 - Inspect the valve for signs of flue gas buildup. Sometimes this build-up leads to valve failure. If you find buildup, clean it and reinstall the valve. Check the valve again to see if it works after cleaning.
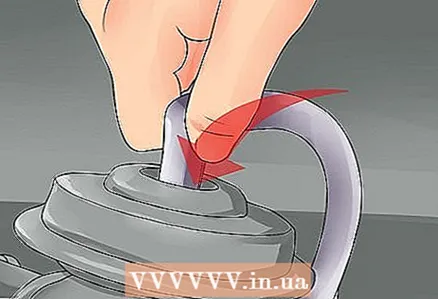
 9 Clean valve base and channels. Use an awl or similar to remove any carbon deposits. Clean up any debris or build-up on the shell of the gasket.
 - Use a carburetor or intake system cleaner to remove carbon deposits.
 10 Install a new EGR valve. First, thread the bolts through the EGR and spacer to the mount. Then tighten the mounting bolts with a Hinge Allen wrench when you secure the EGR valve to the engine.
 - When purchasing a new valve, check to see if it comes with a new gasket. Otherwise, you will need to buy it separately.
 11 Reconnect the electrical cable. Connect the cable back to the top of the EGR valve by hand.
  12 Connect the vacuum line. Reconnect the line by hand. Try to fasten it tightly to prevent leakage.
 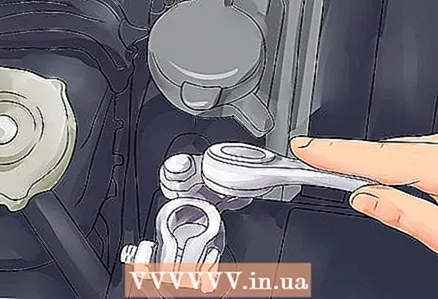 13 Connect the battery. Attach the wires from the engine to the battery terminals. Tighten the bolts with a wrench.
  14 Clear the auto scanner data. If you have used an autoscanner to check the EGR valve, clear any error codes associated with the valve. Then check again for any errors.
 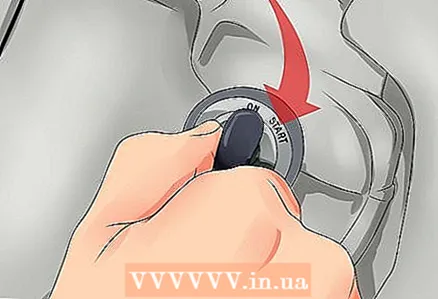 15 Listen for a leak. Start the engine and listen for leaks near the EGR valve. Two possible leaks: vacuum hose or exhaust pipe. Take a ride on your car to make sure it works as it should. Pay close attention to the idle speed and gas mileage of the vehicle, as poor performance in these areas indicates that the EGR valve is faulty.
Tips
- Refer to the owner's manual and write down the security code for your car radio, disc player, or display device. By disconnecting the battery, the radio will restart and lock, and you need this code to unlock it.
- Always wear safety glasses when working near a vehicle.
What do you need
- Spray lubricant
- Swivel socket wrench
- Protective glasses
- Exhaust gas recirculation valve
- Autoscanner
- Multimeter
- Awl
- Flat screwdriver


