
Content
- Steps
- Part 1 of 3: Preparing the racket
- Part 2 of 3: Stretching Technique
- Part 3 of 3: Setting up the racket
- Tips
- What do you need
Tennis rackets are made to withstand heavy use on the court, absorb sunlight, water droplets and handle a tennis ball that hits the racquet at high speed. The strings are the most important part of the racquet, and taking good care of them will have a positive effect on the quality of your play and the durability of the racket. Depending on your playing style and how often you use the racket, it is important to re-string the racquet at least twice a year. In this article, we'll show you how to learn how to prepare your racket for string hauling and apply the correct hauling technique.
Steps
Part 1 of 3: Preparing the racket
 1 Find a suitable stringing machine. Many sports clubs and sporting goods stores have looms that they use to string their strings. It costs 1,500-3,000 rubles per racket. The machine itself, depending on the quality, costs from 15,000 to several hundred thousand rubles.
 - If you play tennis several times a week, buy racket strings for 500 rubles cheaper, and soon you will be able to buy your own stringing machine for the saved money. The Gamma X-2 is a common table-mounted model with a two-point attachment system and drop weight tension. It is the cheapest and highest quality machine for string tuggers.
- If you play several times a year or just on weekends, it probably doesn't make sense to invest in your own stringing machine. Pay to have your strings tugged when they are loose, or find a machine that lets you tug the strings yourself for free.
 2 Measure the strings. Start by cutting 10-12 cm of a new string from the spool. To string the strings on a standard 237 square centimeter racket with a standard cross-section, you will most likely need about 11 meters. It is usually better to cut off more strings and then discard the excess than to start pulling on and then realize that the string is too short and you need to start over.
 - When you tug the strings for the first time, count how many strings you need for all the knots, and next time cut exactly as many as you need. Start with a string that is too long and then figure out the ideal length.
 3 Prepare the racket for the hauling. After the strings have broken or you decide that they need to be changed as soon as possible, use a sharp knife to cut the old strings. Start with the strings in the center of the racket and slowly work your way up to the outer strings.
 - Check the rubber grommets of the racket rim for wear and replace them with new ones if necessary.
 4 Secure the racket to the stringing machine. The fixing procedure will be slightly different depending on the machine you are using. Fasten the head and neck of the racket with the special mounting brackets and clamp a vise to securely hold the racket. Adjust the string tension as instructed.
 - The six-point attachment system distributes tension evenly throughout the racquet, but whichever machine you use, you need to check that all clamps are securely attached to the racquet. They should be tight enough not to slide out when you swing the handle, but not tight enough to bend the rim of the racket.
Part 2 of 3: Stretching Technique
 1 Choose which system you will use to pull the strings, one or two strings. Any racket can be dragged in two ways. You can use the same string for the horizontal and vertical strings, or you can use two separate strings. Some tennis players believe that single-string hauling will extend the life of the racket, but with the correct hauling technique, it is better to use two-string hauling.
 - It is important to start pulling the intersecting strings from the end of the racquet (called the head) and move towards the edge of the racket, near the handle (called the throat). This is because when you pull the strings, the racket can bend, since the throat is weaker than the head, it is better to start hauling at the top and move down. It is difficult to do this with one string, and on some racquets it is impossible.
 2 Stretch the main string. The main string runs parallel to the longitudinal axis of the racket. Insert the string through the holes on the head of the racket, pull it down through the neck and back to the head.
 - Attach the end of the string to the handle and move the rod to a horizontal position. To do this, you may need to change the length of the string that you originally threaded into the racket. Twist the rod and stretch the string according to the characteristics of your racket.
- Use the second clamp to secure the second string and disengage the first string. Continue threading and pinching until you have threaded through all holes. Anchor the next string and uncouple the previous one.
 3 Tie the main strings. When you have secured the main strings, loosen the string tension and tie the ends of the strings securely. Use long tongs and a small awl if necessary.Tighten a tight knot at the end of one of the vertical strings. Cut the excess string.
  4 Stretch the crossing strings. When you have drawn the last line of the main vertical strings, tie it and begin to stretch the transverse strings. The intersecting strings run parallel to the longitudinal axis of the racket. Insert the string into the hole, usually the larger rings on the side, and stretch over the main string to the other side of the bezel. Tighten as tight as you tightened the main strings and secure the first string. Continue threading the strings until you have pulled everything.
 - If you are going to use two strings, tie a cross string to the main string at the head and then pull it back through the large eyelet at the edge of the headband. This is usually done.
- Try to keep the cross strings from rubbing against the main strings as little as possible. If you wear the main strings and don't use them, the racket and strings will last you less.
 5 Tie the cross strings. Pull the last cross string back into the ring and tie tightly to the main string. Tie with fine tweezers. Loosen the tension on the strings and cut the excess string. Then remove the racket from the holder.
Part 3 of 3: Setting up the racket
 1 Decide how much tension you want on the strings. Most racquets have a recommended tension that ranges from 23 to 32 kg. Within these limits, players sometimes adjust the string tension to tune the playing spot on the racquet to suit their individual playing style.
 - For more ball control, the strings need to be pulled tighter. Tight strings enhance contact and precision. For a harder hit, a lighter string tension is recommended. Stretch the strings with different strengths and play both ways to find out which suits your racket and your playing style best.
 2 Use different strings. Experiment with different brands of strings until you find strings that are strong and springy. Most tennis strings are made from a durable synthetic fiber, Kevlar. Zyex, due to its good springiness, is also used for tennis racket strings. The following materials are also available:
 - Nylon strings - the cheapest and most popular strings due to their flexibility and resonant impact.
- Synthetic and Kevlar strings - best suited for players with a hard hit and those with a habit of breaking strings. These sturdy strings provide ball control and are good at taking heavy hits.
- Natural fiber strings - the most expensive, fragile and brittle, but very popular among professional players for their elasticity, naturalness and good contact with the ball.
 3 Consider using shock absorbers and string guards on your racquet. Small plastic plates can be inserted at the intersection of the strings to act as a barrier to protect the strings from friction and prolong the life of the racket. For players who frequently serve overhead twists, it is very convenient to have force absorbers on the strings that increase the ball's spin and weaken the strings. Try them on the court and see what happens.
 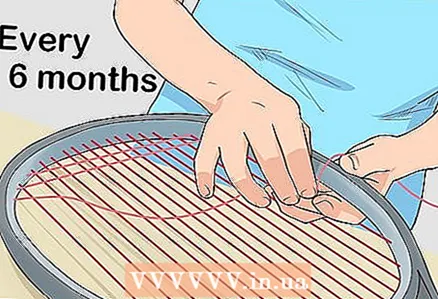 4 Pull the strings on the racket as many times a year as you play tennis a week. If one of the strings snapped, obviously it's time to tug the strings, but how about doing it regularly? It will be helpful to tug the strings as many times a year as you play once a week. If you play twice a week, tug the strings every six months, and so on. Strong players and those with a hard hitting are likely to need to tug their racquets more often than regular players. Specialist Answer Question
 When should you tug on a tennis racket?

Peter Fryer
Tennis Instructor Peter Fryer is a tennis coach and writer based in Derry, Northern Ireland.Shortly after graduation, he became a professional coach and taught tennis for over 13 years. He has been running the Love Tennis Blog since 2010, collaborating with the BBC and national media. SPECIALIST'S ADVICE Professional tennis player Peter Fryer responds: “The general rule is that string-stringing should be done exactly as many times a year as you play tennis a week. So the racket for sure will last longer and will provide effective work».
Tips
- The best way to keep your racket as efficient as possible is to keep it in a dry, cool place when you are not using it, and monitor the condition of the strings.
- Use string fuses to extend the life of your strings. These are small plates that are inserted where the strings intersect to reduce friction.
What do you need
- Tennis racquet
- Knife
- Strings
- Stringing machine


