Author:
Helen Garcia
Date Of Creation:
16 April 2021
Update Date:
1 July 2024
Content
- Steps
- Part 1 of 3: Preparing for a drywall repair
- Part 2 of 3: Applying Putty
- Part 3 of 3: Primer and Paint the Wall
- Tips
- Warnings
- What do you need
Drywall is easily damaged. He may suffer from a drill, hammering nails, or just accidentally dropping objects on him.Small holes in drywall can easily be covered with putty, a compound specifically designed to seal cracks and holes. After applying the putty, the plasterboard wall can be repainted and it will look like new again.
Steps
Part 1 of 3: Preparing for a drywall repair
 1 Use a filler to seal holes in drywall with a diameter of less than 10 cm. Putty can cover holes about the size of your palm. To repair holes larger than 10 cm, you will need to additionally use a mesh or wire base.
  2 Purchase a light putty from a hardware store. The putty can have different densities and weights and can be sold in containers of different sizes. A light putty can be used to seal small holes in drywall.
 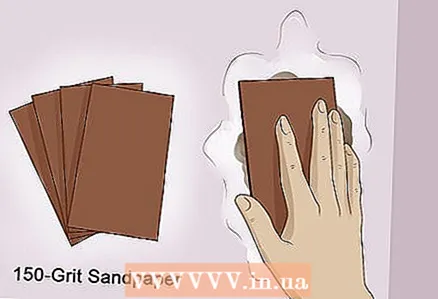 3 Sand the drywall around the hole with 12-H grit sandpaper (P100). Drywall consists directly of gypsum and the front and back sheets of cardboard. When drywall is damaged, these materials delaminate, and small fragments of them may even stick out of the wall. If you leave these pieces as they are, the putty will not adhere properly to the drywall. Therefore, if the materials are severely delaminated, be sure to sand the drywall area around the hole with 12-H grit sandpaper (P100).
 - Place a piece of sandpaper over the hole and rotate it clockwise and counterclockwise several times. This will make the area to be repaired slightly smaller than if you rubbed the surface from side to side.
- If the drywall is not severely damaged, you can use 8-H grit sandpaper (P150).
- If you are patching up a small defect, such as a nail hole, you can simply push through the drywall with your thumb or the handle of a screwdriver, and then putty the hole along with the dent around it.

Norman raverty
Home Renovator Norman Raventy is the owner of San Mateo Handyman, a home renovation service in the San Francisco Bay Area. Has been engaged in joinery and carpentry work, home renovation and remodeling for over 20 years. Norman raverty
Home Repair SpecialistExpert advice: “If you don't have sandpaper at hand, you can use a regular sponge, or rather its abrasive side (you need to moisten the sponge first). The sponge will help collect residual dust and prevent clutter! "
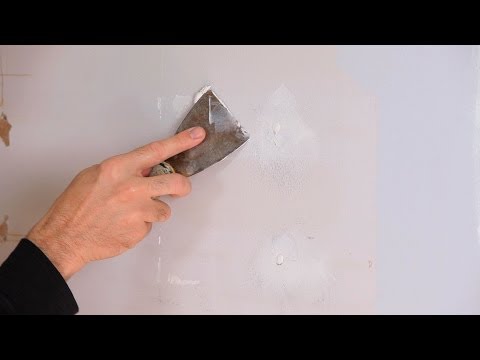
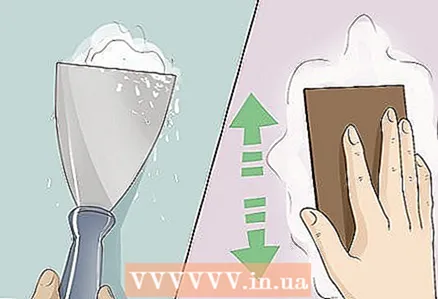
 4 Scratch the area to be repaired with a putty knife to level it. After sanding the drywall, gently scrape the drywall with a spatula to remove any remaining material debris. Keep the trowel tilted against the wall and move up and down. Be careful not to accidentally enlarge the hole in the drywall when working with the trowel.
 - Don't worry about removing old paint around the hole. Later, you will paint over the repaired drywall area.
Part 2 of 3: Applying Putty
 1 Pick up some putty with a putty knife and spread it over the hole. The amount of putty used will depend on the size of the hole in the drywall. It should be enough to cover up the hole itself and capture the cleaned area around it.
 - When applying the filler, work in an even radial motion against the hole in the wall.
- If desired, you can use two spatulas at once: one with a narrow blade and one with a wide one. With a wider spatula, scoop the putty from the container, and with a narrow one, apply it to the wall. In this case, a wide spatula will serve you as an analogue of a palette.
- If you don't have the right size trowel on hand, you can use an old plastic business card or gift card.
- Be sure to close the container with putty after you take the amount of putty you need from it. If the putty dries out, it will become unusable.
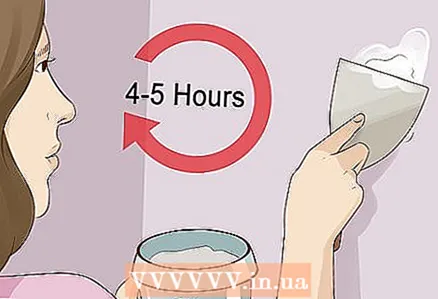
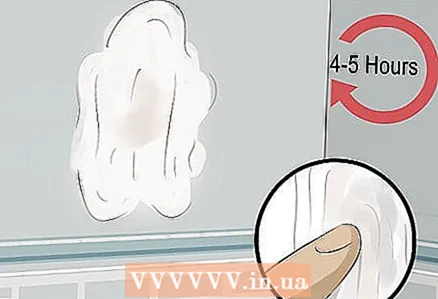 2 Let the putty dry for 4-5 hours. The amount of time it takes to dry depends on the size of the hole, the amount of putty used and its specific brand. When the putty is dry, sand it off with sandpaper before applying a second coat.
 - To make sure the putty is dry, touch it with your finger.
 3 Cover the hole with a second coat of putty. You may need to apply several coats of the filler before the hole is completely sealed. Once the first layer of putty is dry, use the same amount of putty to create the second layer. Use a putty knife to coat the hole and the surrounding area with a putty.
 - Wait 4-5 hours for the putty to dry before applying another coat.
 4 Apply a third layer of putty when the second is completely dry. Usually three coats of putty are enough to seal the hole in the drywall. By this time, the area to be repaired is usually completely covered with putty and becomes very strong.
 - You can always apply a fourth coat of putty if you deem it necessary. However, three layers should be sufficient. Otherwise, you can overdo it, and everything will end with the formation of a convex protrusion from the putty on the surface of the drywall.
- If you have drywall with a textured grainy surface, brush the last wet layer of putty with a sponge brush to create a texture similar to the rest of the wall.
 5 Remove excess filler with a spatula and sandpaper. After applying all the necessary layers of putty, scrape off the excess from the wall with a spatula. To get a flat surface, hold the trowel at an angle to the wall and scrape off excess filler with a blade. This will facilitate further work with primer and paint.
 - If there is a lot of excess putty on the wall, be careful with the putty knife to not scrape off too much material. In this case, it is better to use fine-grained emery paper and with its help gradually align the layer of putty with the plane of the rest of the wall.
Part 3 of 3: Primer and Paint the Wall
 1 Cover the floor with polyethylene before painting. Before starting work with primer and paint, cover the floor with plastic to protect it from accidental drops. Move any furniture away from the area to be repaired or also cover it with plastic.
 - If necessary, tape the floor and ceiling skirting boards, door hinges and the like with masking tape.
 2 Primer on completely dry filler. If the hole being repaired in the drywall wall was small, you probably won't need to repaint the entire wall. Nevertheless, if several holes were repaired in different places on the wall at once, it would be wise to repaint it completely. Use a roller or brush to prime the area of the wall to be painted.
 - If you will be painting an entire wall, carefully sand the area repaired with the putty. Apply one coat of primer over the putty and let it dry. Then start coloring. You do not need to prime the entire wall surface unless you intend to change its color.
- Apply the primer with smooth, measured strokes with a roller or brush.
 3 Allow the primer to dry completely for three hours. The primer may feel dry to the touch within an hour after application. However, this does not mean that it is already ready for coloring. It will take about three hours for the primer coat to dry completely.
 - If the room is cool or very humid, the primer may take an extra hour to dry.
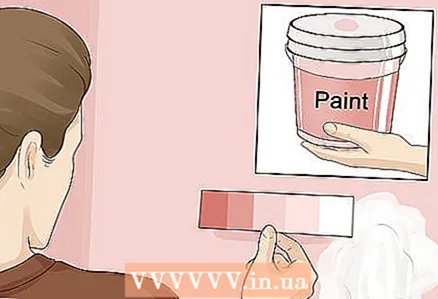 4 If you are not going to repaint the entire wall, use paint in the same tone as the old paint. It is unwise to repaint the entire wall due to the repair of one small hole. Check your garage, shed, or closet for any paint that was originally painted on the wall.If paint is not available, check with your local hardware store or paint specialty store for help finding the right color.
 - If possible, take home paint swatches and place them against the wall to find the exact color you want.
- If you can't find the exact color, you will probably need to repaint the entire wall.
 5 Apply the first coat of paint to the drywall. When the primer is dry, apply the first coat of paint to the wall with a roller or brush. You can work with a flat brush with either a smooth or a rounded edge. If you are going to repaint an entire wall, you better use a paint roller.
 - If you only need to paint over a small area of the wall that has been putty, you can use a small brush or sponge brush to paint over the area.
 6 Let the first coat dry for 4-5 hours. For the paint to adhere well to the surface, it is very important to let it dry completely before applying the second coat. The paint dries a little longer than the primer. Place a paper towel over the paint to test it. Then examine the napkin. If there are no traces of paint on it, then the paint has dried.
 - The paint can be left to dry overnight. This is guaranteed to allow it to dry before applying the second coat.
 7 Apply a second coat of paint to the wall. When the first coat of paint is dry, apply a second coat of paint to the wall with even, measured strokes. After applying the second coat of paint, you will immediately know if you need another coat. It is possible that you will need a third coat of paint in order to completely hide the putty.
 - If you are going to apply a third coat, allow the second coat of paint to dry for 4-5 hours.
Tips
- Do not use a putty that contains dry lumps, as this will create even more problems for you.
- If the hole is too big to just cover it up with putty, seal it with masking tape so that there is a depression. Then cover the hole with putty on top of the tape.
- If the putty does not stick to the surface to be repaired or starts to bubble, add some wood glue to the wet putty.
- If you accidentally drop putty on the floor, carpet or furniture, it is best to leave it to dry. The putty loses moisture quickly. Once it is dry, you can simply remove it.
Warnings
- Be sure to use a putty, and not similar products, such as sealants.
- Wash the spatula immediately after work, as the putty dries quickly. Never use a dirty or deformed trowel.
- Very large holes or missing pieces of drywall must be repaired with plaster.
What do you need
- Putty knife
- Putty
- 12-H grit sandpaper (P100)
- Polyethylene
- Masking tape
- Primer
- Brush or roller
- Spongy brush
- Dye


