Author:
Virginia Floyd
Date Of Creation:
10 August 2021
Update Date:
22 June 2024
Content
- Steps
- Method 1 of 3: Drying DIY Leaves
- Method 2 of 3: Drying Herbs and Tea Leaves
- Method 3 of 3: Skeleton Leaves
- Tips
- Warnings
- What do you need
The leaves are often dried to decorate crafts or to preserve herbs for cooking. There are many ways to dry leaves, so take the time to figure them out and find the one that works best for your purposes. Fortunately, the resources of most of the ways are easy to get from the comfort of your home.
Steps
Method 1 of 3: Drying DIY Leaves
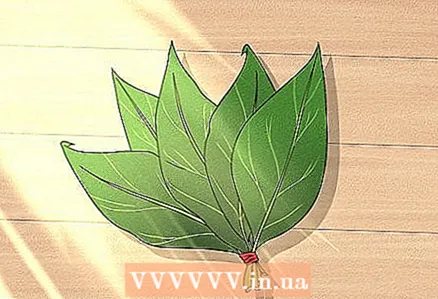 1 Air dry the leaves if they don't need to be flat. Place the leaves in a shallow container or tie them in a bun. Expose to the sun for a few days and check to see if they are dry. Sunlight will dry out the leaves, but the edges may curl. These leaves cannot be used for crafts, but they are great for dry flower arrangements.
 - Not leave the leaves in direct sunlight if you want to preserve the full richness of the natural leaf's greenery. Direct sunlight will discolor and diminish the vibrancy of vivid colors.
- Air currents from a window or from a hair dryer will dry the leaves faster.
 2 Smooth the leaves and dry in a slow but easy way. Place one large or several small leaves between two paper towels so that the leaves do not overlap. Open a large book, like an encyclopedia, and place paper towels with leaves between the pages. Close the book and lay it flat in some place out of sight. Place other books or place a heavy object on top. Check once a week to see if the leaves are dry and change paper towels if they are damp.
 - If the leaves are wet with rain, pat dry with paper towels. Add an extra layer of paper towels if the leaves are very damp, or if you are worried that the pages of the book will not stain.
- If you are drying several different leaves in the same book, leave at least 3 mm between the leaves in which the leaves are stacked to ensure sufficient weight for each leaf.
 3 Use a flower press instead of quick drying. You can purchase a large flower press and place leaves in it, or make one yourself out of plywood and cardboard. It will cost more and require more materials than the book method, but air circulation can increase the drying speed and the process will only take a few days.
 - Place the leaves between two paper towels. Place the paper towels between two sheets of absorbent paper or several extra sheets of paper towels. Place all these layers in a flower press, close it and tighten. Check every few days to change wet towels until the leaves are dry.
 4 Dry a large, thick sheet in the microwave. Place a thick sheet between two layers of paper towels on a plate in the microwave. Place a plate and a small cup of water inside and turn on for 30 seconds. If the leaf is still not dry, turn it on again for 10 seconds and so on, checking the leaf between turns.
 - Attention: The leaf can easily catch fire in the microwave, so this method should only be used for large, thick leaves. A cup of water helps prevent fires because some of the microwave's energy is used to heat the water.
 5 Iron the fresh leaves with an iron to preserve the color. This method is best for fresh leaves that have not yet discolored or begun to dry, although you should pat dry with a towel if they are damp. Place one sheet between two layers of waxed paper, and place a towel on top of the waxed paper. Heat the iron and run it over the towel, pressing for 2-5 minutes or until the side is dry. Flip the wax paper layers over, cover again with a towel and iron again.
 - Attention: This procedure should be done by an adult, as children can burn themselves with a hot iron.
- Make sure the iron is not set to steaming.
- After ironing the sheet, cut the waxed paper around the sheet and carefully peel off each layer. The wax will remain on the surface of the sheet and protect it from discoloration.
 6 You can preserve the texture of large evergreen leaves with water and glycerin. The leaves will turn brown, but their structure and elasticity will remain for a long time. This method works especially well for wide, evergreen leaves like magnolia leaves. Mix one part glycerin and two parts water in a shallow bowl, and dip the leaves into this bowl so that they are completely covered with liquid. The leaves can be used after about 4 days, or leave them in the solution for a few weeks to preserve them forever.
 - This method works due to the fact that water is replaced in the leaves with glycerin, which, unlike water, does not evaporate.
- If the leaves float up, cover them with a paper plate or other object that you do not mind getting wet, so that it keeps the leaves below the surface of the liquid with its weight.
- If the liquid level is below the level of the leaves, add more water and glycerin.
Method 2 of 3: Drying Herbs and Tea Leaves
 1 Rinse off any dirt from fresh herbs. If the bunch of fresh herbs looks clean and dust-free, you don't need to wash it. Of course, if you've just picked them from the garden, they are likely to have dust and dirt on them. Rinse the herbs gently under running water and shake to shake off the water.
 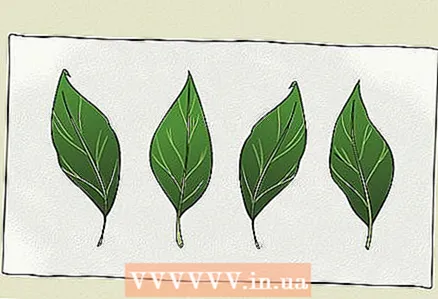 2 Spread the herbs to evaporate before using any method. If you washed the herbs or they were wet, you must first remove the excess moisture. Spread them out on a paper or clean kitchen towel to allow water droplets to drain off the surface of the greenery.
  3 Dry some herbs or tea leaves quickly in the microwave. If you want to use herbs right now, use this method to dry a small handful at a time. This method is also suitable for tea leaves that have just been used to brew tea. For other materials, place small leaves or pieces of grass between two dry paper towels. Operate the microwave for 30 seconds at a time until the leaves are brittle, paying special attention to signs of fire.
 - Juicy, fleshy herbs like mint and basil are not easy to dry in the microwave unless they are already partially dry.
 4 Dry thick or tough herbs by hanging them indoors. You can start with herbs that contain a little moisture and can dry out in a few weeks. Tie the grass into a bunch and hang with the bases of the stems facing up.This should be done in a dark, enclosed space, as sunlight can adversely affect the color and aroma of herbs.
 - Herbs in this category tend to have hard or thick leaves. This is rosemary, parsley, sage and thyme.
- If you want to dry herbs with soft, fleshy leaves in this way, hang them in small bunches inside paper bags. Punch holes in the bottom of the bag and hang it in a well-ventilated place to help dry herbs faster and prevent mold from forming.
 5 Dry fleshy or soft plants in a low oven. Plants with soft, succulent leaves must be dried quickly, otherwise they will become moldy. Pull the leaves off the stem and place them between two paper towels so that they do not touch each other. You can do up to five layers this way, alternating between leaves and paper towels. Place them on a safe plate in the oven and set the oven to the lowest setting. This drying can take up to 8 hours.
 - Turn the control knob of the oven until the indicator lamp comes on or the light comes on.
- This method is well dried. basil, sage, Bay leaf and mint.
 6 After the herbs are dry and brittle and crumbly, place them in an airtight container. Crush herbs between your fingers before storing or adding to food. Store dried herbs in an airtight container in a cool, dry and dark place to keep their aroma longer.
 - Dried herbs have a stronger flavor than fresh herbs. If the recipe contains fresh spices, and you want to replace them with dried ones, then use 1/3 of the indicated amount, or 1/2 of the indicated amount if it is basil.
- Tea leaves can be dried immediately after using them in the teapot. The microwave drying method above works well for small amounts, longer drying times can lead to mold growth. Dried tea leaves are used in the same way as herbs or to eliminate unpleasant odors in the home.
Method 3 of 3: Skeleton Leaves
 1 Choose leaves with thick, well-defined veins. In this case, you will remove most of the leaf, leaving only a network of veins in the base. For projects like this, it is best to choose tough leaves that hold their shape in different directions. Freshly fallen maple or oak leaves are good at work, as are waxed leaves like ivy or magnolia.
 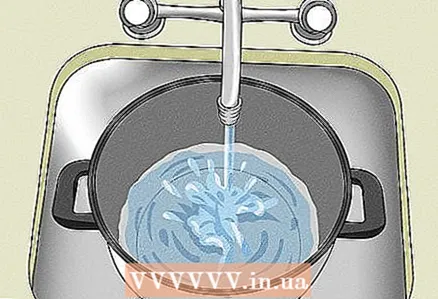 2 Pour one liter of water into a saucepan. You can use a smaller pot if there are few leaves. If so, reduce the amount of the other ingredients listed below proportionately, or just use all of them at half size.
  3 Put on gloves. The mixture you will be preparing can be harmful to the skin, so wear latex or rubber gloves before mixing with other ingredients. After finishing work, do not forget to wash all tools with detergent under running water; do this without removing your gloves.
  4 Add some baking soda or soda ash. These chemicals can be found in grocery stores or pharmacies. Whichever one you use, 2 tablespoons (or 30 grams) will suffice. Any of these chemicals will slowly turn the leaf into pulp until only the stem and veins are left.
 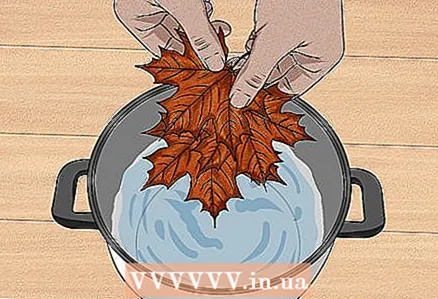 5 Place the leaves in a saucepan. Place as many leaves as you can gently stir in a saucepan without spilling any liquid.
  6 Bring to a boil. Leaves can be simmered or brought to a boil and then reduced to heat. The mixture should bubble slightly.
 - Try to keep the temperature at 80 ºC whenever possible.
 7 Leave the mixture on low heat until the leaves begin to decay, stirring occasionally. Depending on the thickness of the sheet, this can take a whole day or a couple of hours.Stir occasionally with gentle movements, checking to see if the leaves are soft and decaying.
 - As it boils away, you will need to add more water. If desired, the mixture can be changed every four hours to speed up the process.
 8 Transfer the decaying leaves to a pot of cold water. For these purposes, glassware is suitable - it will make it easier to see what you are doing. Using a spatula or other tool, carefully place each sheet on a flat dish so that it does not come into contact with others.
  9 Use a small, stiff brush to remove any remaining pulp. The leaves should be thin, with adhering remnants of a mushy layer. Gently and slowly remove the pulp from the leaves, leaving only a network of veins or, depending on the structure of the leaf, a thin translucent layer.
 - You may need to rinse the leaves one or more times under a stream of cold water during this process to rinse out any remaining pulp.
 10 Wash all used materials without removing gloves. Wash the saucepan, dishes in which the leaves were boiled, and other items that have come into contact with the boiling mixture. Use soap and warm water.
  11 Leave the leaves to dry. You can air dry them on paper towels, dry them gently between the pages of a book, or use a flower press. In a day or two, you will have a unique opportunity to decorate your craft projects with dry leaf. Due to their transparency, these leaves work especially well on glass surfaces.
Tips
- When drying the leaves with an iron, use a material as a barrier between the surface of the iron and the top layer of wax paper. A kitchen towel works well for this because it does not interfere with heat transfer, which allows the waxed paper to create a strong outer layer and does not interfere with the sheet being flattened down. In addition, the towel will protect the hot surface of the iron from melted wax.
- You can buy glycerin, baking soda, or soda ash at drug stores, some grocery stores, and industrial stores.
Warnings
- Always watch the leaves that are being dried in the microwave very carefully. If they start to smoke or turn black, turn off the stove. If there are still parts that are still dry, use another method to dry them completely, such as a press.
What do you need
- Paper towels
- Heavy books or
- Glycerin and water or
- Microwave or
- Iron and wax paper or
- sunlight
For the skeleton of the leaves
- Pan
- Water
- Baking soda or soda ash
- Glass dish
- Spatula and / or stirring tool
- Small hard brush


