Author:
Mark Sanchez
Date Of Creation:
4 January 2021
Update Date:
1 July 2024

Content
- Steps
- Part 1 of 3: Prepare a piece of land
- Part 2 of 3: Plant and Grow Beans
- Part 3 of 3: Harvest and Store Beans
Beans are often grown in vegetable gardens, and since most varieties of beans do not need a lot of space, they can also be grown in the back garden. Asparagus beans are one of these species because they grow upward rather than outward. These nutritious beans are a good source of fiber, calcium, iron and vitamins A and C and are often seen growing in vegetable gardens. Asparagus beans also have some advantages over bushy beans: they produce more beans than bushy beans, they have tastier beans, and are more disease resistant.
Steps
Part 1 of 3: Prepare a piece of land
 1 Determine the right time to plant. Like most types of beans, asparagus beans are planted outdoors in spring when there is no risk of frost. As a rule, this time falls in mid to late spring. You can start planting asparagus beans when the ground temperature rises to 16 ° C.
 - Most types of beans are very sensitive to cold and frost-resistant, which is why it is so important to plant them in late spring.
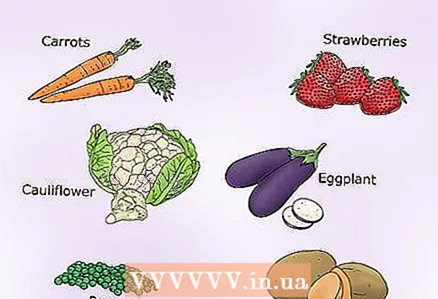
 2 Choose the perfect location. Asparagus needs a lot of sunlight to grow well and produce a rich harvest, so choose an area with good lighting throughout the day. Do not plant beans next to fennel, onions, basil, beets, or kale. The following plants go well next to asparagus beans:
 - carrot;
- Strawberry;
- cauliflower;
- eggplant;
- potato
- peas.
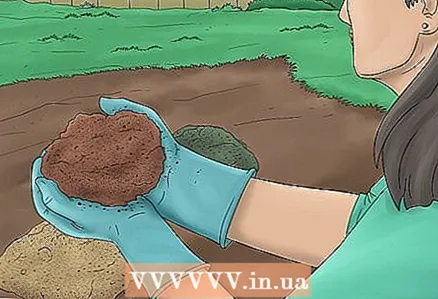 3 Prepare the soil. The ideal pH for asparagus beans is 6–6.5 units. It also needs a well-drained soil enriched with organic material. To set the stage for this type of bean, you need to do the following:
 - Mix well-drained soil such as silt or loam with seasoned compost.
- Add manure or shredded bark to compacted soil (clay or peat moss) to improve drainage.
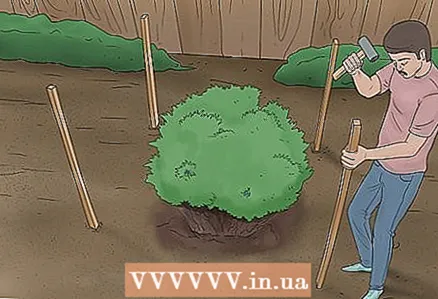
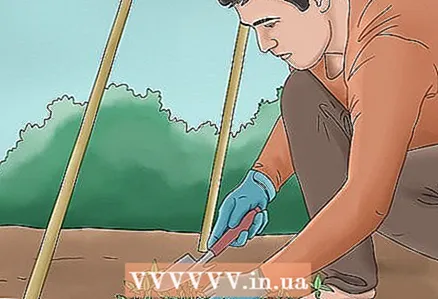
 4 Build a support. Because asparagus beans grow very tall, they need support to grow. The support is easier to build before planting. In addition, this way you will not harm the plant and its roots. A trellis, wigwam or pyramid, stakes, fine wire mesh, or a tomato cage work well as a support for asparagus beans.
 - Tomato cages are available at many home and garden stores.
- Garden hedge panels and pyramidal trellises can be found at many garden supply stores.
- Also try to build a wigwam or pyramidal trellis yourself by tying bamboo stakes with ropes.
Part 2 of 3: Plant and Grow Beans
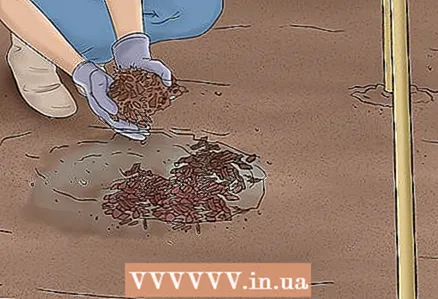
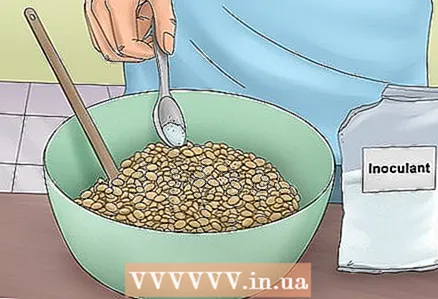 1 Add bioinoculants. Asparagus beans, like most other legumes, require nitrogen-rich soil for good growth. To do this, it is better to add nitrogen-fixing bacteria to the beans before planting.
 - Note that you do not need to plant the beans to grow asparagus beans.
- To plant the beans, soak them in warm water for five minutes. Drain and place the beans on a damp towel. Sprinkle them with bioinoculant powder just before planting.
- Legumes are often inoculated with an inoculant such as Rhizobium leguminosarumwhich can be purchased at many home and garden stores.
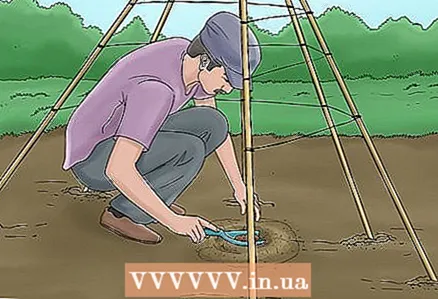 2 Plant beans. Asparagus beans can be planted in piles or rows. The method chosen will depend entirely on the layout of the garden, the type of support erected, and personal preference. Heaps are usually more suitable if you have stakes or wigwams, while rows work well with trellises.
 - To plant the beans in piles, wear gloves or grab a shovel and form small mounds of soil at the base of the wigwams or stakes. Each embankment should be 15 cm in diameter and 5 cm in height. Divide them 76 cm apart. Make a 2.5cm hole in each mound and place one bean in it. Sprinkle some earth on the beans.
- To plant the beans in rows, pick up the soil with your hands or a shovel and use it to make long rows 76 cm apart. Punch holes in the rows for the beans, 10 cm apart. Place a seed in each hole and sprinkle lightly with earth.
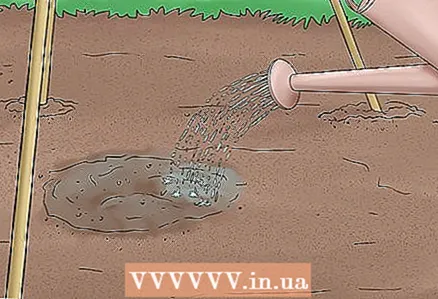 3 Remember to water regularly. During periods of active growth (for example, during germination and emergence of pods), plants need sufficient water for growth. During planting and pod emergence, the soil should be evenly moist. Make sure your plants get 2.5 cm of water weekly.
 - When the beans are sprouting but still have no pods, let the soil dry between one watering and the next.
 4 Add mulch when leaves appear on the seedlings. A layer of mulch on top of the ground will help it better retain moisture, regulate temperature, and protect the seedlings. When the second set of leaves appears on the seedlings, sprinkle an 8 cm layer of mulch on the ground.
 - Mulch will also prevent weeds from growing in your garden. This is very important because asparagus beans have very small roots and the proximity of weeds can harm the plant.
 5 Remove weeds regularly. If weeds do appear next to the beans, try to pull them out immediately. Pull the weeds by hand to avoid damaging the bean roots.
 - The weed removal process is especially important in the first six weeks after planting.
 6 Alternate crops in your garden. If you are planting asparagus beans year after year, be sure to rotate your crops. Beans should not be planted in the same area (or in the area where legumes were grown) for two years in a row, as they will deprive the soil of certain nutrients. In addition, diseases can also remain in the soil.
 - Beans deprive the soil of certain nutrients, but they also add nitrogen to the soil as they grow. That is why, after beans, it is advised to plant plants that need nitrogen-rich soil, for example, cruciferous plants, which include cabbage, broccoli, cauliflower, kale and others.
Part 3 of 3: Harvest and Store Beans
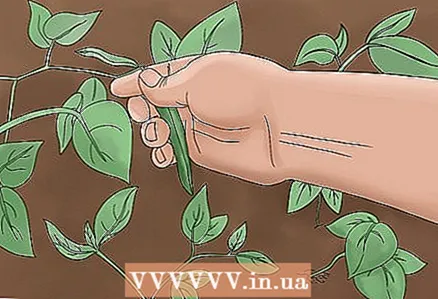 1 Harvest the beans. The first bean pods will be ready for harvest 50–70 days after planting. If you pick the beans every few days as they mature, the plant will continue to produce new pods for several more days or even weeks.
 - The pods are ready to harvest when they are long, crispy and firm. Be sure to pick them off before the beans become meaty on the inside.
- Harvest the beans from the dry plant to prevent the spread of bacteria. Wait until the end of the morning or the beginning of lunch, if necessary, for the morning dew to dry.
 2 Eat fresh beans within four days. To enjoy fresh beans, eat them on the day of harvest, or store them in the refrigerator for a couple of days. All beans that you do not eat during this time must be prepared for long-term storage.
 - Add fresh beans to salads, sandwiches and other dishes if you want to eat them raw, or cook them.
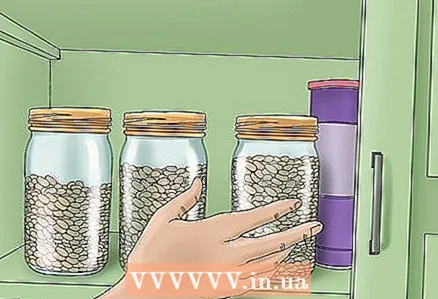 3 Store leftover beans. If you are not going to eat all the beans at once, freeze or canned them. For best results, prepare your beans for several hours after harvesting.
 - To freeze the beans, you first need to boil them in water for 3 minutes. Then submerge it in ice cold water for another three minutes. Dry the beans thoroughly, place them in ziplock bags and put them in the freezer.


