Author:
John Pratt
Date Of Creation:
12 April 2021
Update Date:
1 July 2024

Content
- To step
- Part 1 of 3: Making a rope with a simple twist
- Part 2 of 3: Making rope with a reverse wrap
- Part 3 of 3: Working plants to make rope
- Tips
Rope is made by twisting or braiding multiple strands or yarns together to get a stronger and more durable material. Rope has long been an extremely important tool for humans, as it is used for tying, knotting, pulling, dragging and lifting. The art of rope making is very old, but nowadays many people would much rather go to a hardware store or an outdoor sports store to buy a piece of rope than make it by hand. Still, it is a very useful skill to master. Rope can be made by hand or by machine, and it can be made from many materials such as natural plant fibers, plastic, paper, string, threads, or basically anything that can be cut into strips.
To step
Part 1 of 3: Making a rope with a simple twist
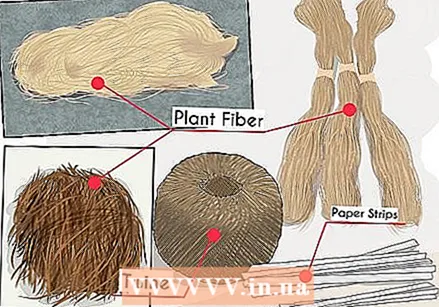 Choose the material. Rope can be made from a wide variety of materials, many of which you may have around the house, yard, or campground. Depending on what you have at your disposal, you can make rope from:
 - Plant fibers such as grass, hemp, flax, straw, bark, nettles, yucca, and any other fibrous or vine-like plants.
- Twine, cord, thread, or even dental floss.
- Plastic or paper bags, cut into strips.
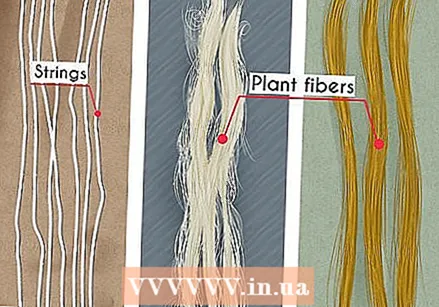 Cut or collect the threads. These can be blades of grass, or strings, or strips of bark, depending on what you are making twine from. Make sure all wires are about the same length and thickness. For a thicker rope you need more wires; for a thinner string, start with about six pieces of string.
 - If you are working with a material like threads, where you cut lengths, remember that your rope will get shorter as you twist it together.
- With materials such as grass and other plant fibers, you can easily connect more lengths of wire later to make the rope longer.
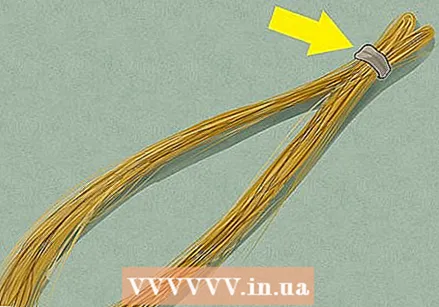 Tie the wires together. Arrange the strands so that they are all lined up, and tie a knot at one end to hold them together. Then divide the bundle into two equal parts.
 - When you have divided the sections, the bundle will lie in a V-shape, which is attached to the knot.
 Twist the two sections together. Grab a section in each hand and start twisting all the threads tightly and evenly in the same direction. It doesn't matter if you go clockwise or counterclockwise, as long as it is always in the same direction.
 - As you turn, the two strands begin to wrap around each other to form a rope.
 Add extra wires to make a longer rope. With ropes made of plant fiber or grass, it is particularly easy to connect more lengths of fiber and thus make a longer rope.
 - When you get to the end of the first bundle, grab two more pieces of wire that are the same thickness as the original two.
- Overlap the tails of the original wire sections with the heads of the new sections, making sure that the tops of the heads actually extend beyond the tails so that the new wires are anchored in place.
- Continue spinning. Eventually, the twisting will wrap the new and old parts around each other, giving you extra length on the rope.
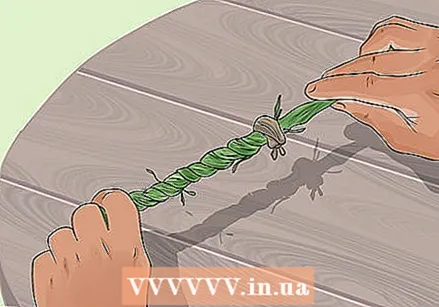 Tie off the rope. When you are done twisting the threads together and have a suitable length rope, tie another knot in the end to keep the rope from fraying.
 - If you're working with nylon or something similar, you can burn the ends to fuse them together and keep them from falling apart.
 Trim away the excess. Especially with grasses and plant fibers, trim away the excess sticking out of the rope, especially where you have other pieces attached.
 - To make an even stronger rope, repeat this process, then twist those two ropes together using the same method to make an even thicker rope.
Part 2 of 3: Making rope with a reverse wrap
 Choose the material and collect the threads. The reverse wrap is another way of twisting the threads of the rope together, although it is very similar to the simple twisting motion, and it also starts with picking out and collecting the material.
 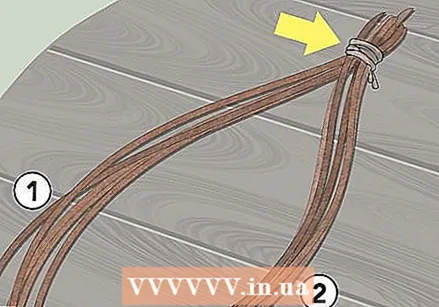 Tie a knot and divide the threads into two sections. As before, you want your strands to be tied together into a single bundle and then divided into two sections that join together at the knot.
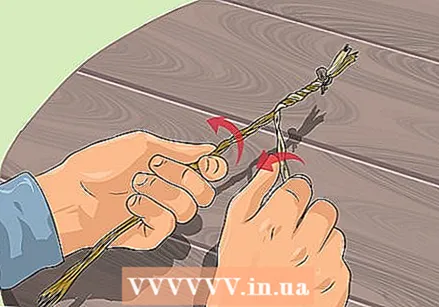
 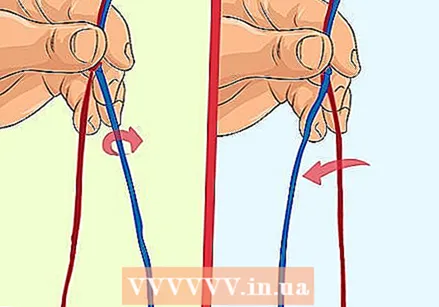 Flip and wrap the sections. To do the reverse wrap, hold the top of the threads (near the knot) in your non-dominant hand. Now take the section furthest from you with your dominant hand.
 - Turn the section away from you once. Then bring it back to you across the other section, grabbing it with your non-dominant hand and securing it (as if you were braiding with only two sections).
- Grab the new section in your dominant hand and repeat the twisting and wrapping.
 Tie the ends together. Alternate the two sections to the end of the strands, turning away from you and then crossing the sections, securing the string in place with your non-dominant hand as you go. When you reach the end, tie the ends to secure the cord.
Part 3 of 3: Working plants to make rope
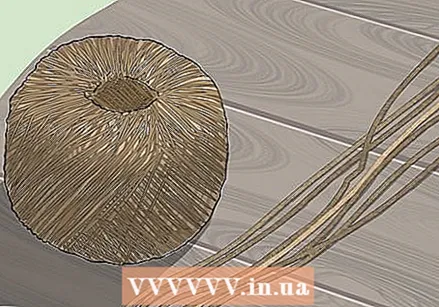
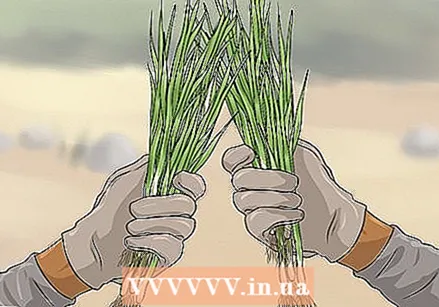 Prepare the grass. Preferably use tall and hardy blades of grass for a stronger rope, and the higher the grass, the less connecting work you will have to do to make a longer rope. Gather the grass and divide it into two piles. Turn one stack over so that the roots are at the other end, and place them on top of the other stack so that half of the ends are at one end and the other half at the other end.
 - You turn the grass in the opposite direction, so that thicker grass stems are evenly distributed over the rope.
- When you've made a pile, grab a thick or thin handful of grass, depending on what diameter you want for your rope. Tie a knot in one end and continue making your rope.
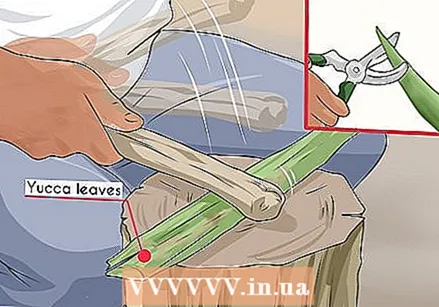 Edit yucca. To make fibers for threads from yucca leaves, cut the leaves off the base of the plant and trim the pointed tip. Place the blade on a flat surface and hit it gently with a stick or rock. As you beat the leaves, the fibers of the plant will begin to separate. Work your way up the length of the blade until all of the fiber separates.
 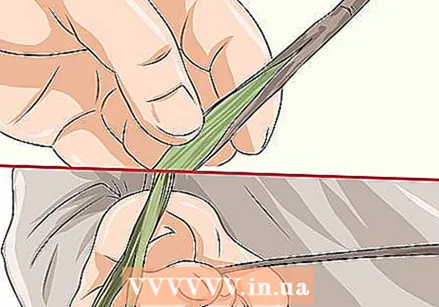 Use nettles. Look for nettles that are tall and dry. Cut a few off and let them dry out for a few days. Then use a rock or stick to press against the stems and open them. As the stems open, begin to peel strips of green fiber from the woody interior of the stem. Set the strips aside, and when you are done you can use them for twine.
 - This method also works for other woody plants that are tough but break open easily.
Tips
- You can also make basic twine by braiding three strands together and knotting the ends.
- It is also possible to make rope from three strands. Tie the end of each piece around something sturdy, such as a hook on the wall. Grab the other ends and slowly start twisting all the pieces into one cord. When you are done twisting, press the center point with your finger and bring the two ends together. Slowly wrap the two halves around each other, then tie them together at the top and bottom with a knot.


