Author:
Bobbie Johnson
Date Of Creation:
4 April 2021
Update Date:
1 July 2024

Content
If you see or feel leaks around your chimney, or notice water stains on the ceiling, you may need to replace the waterproofing joints on your chimney. You should reinstall the chimney trim (flashing or backsplash made of metal sheets) on the chimney before changing the roof or when you notice that the existing waterproofing is damaged or completely corroded. All the necessary parts for improving the waterproofing of the chimney can be purchased at a hardware or hardware store. Alternatively, you can take the shape of a stamping shop and adjust your waterproofing apron to fit your chimney. Use our tips to install a waterproofing apron.
Steps
 1 Remove the old waterproofing. Scrape off the old waterproofing and make a base with cement, hammer and chisel.
 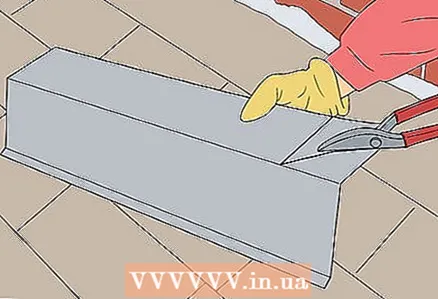 2 Cut off the base of the waterproofing apron.
- Use metal scissors to cut the backing you ordered from a stamping shop or shop. Cut the apron to fit the front of the chimney.
- Wrap one side of the waterproofing around one corner of the chimney.
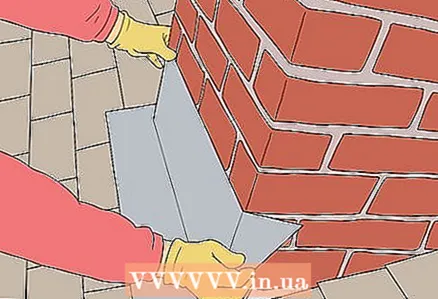 3 Secure the bottom of the waterproofing.
- Fit a waterproofing trim in front of the chimney. The part of the insulation that lies close to the roof must overlap the roof tile. The curved corner should fit to the 1st corner of the chimney.
- Using metal scissors, cut out the trim where the other side of the chimney rests against the waterproofing.
- Place the trimmed waterproofing apron around the chimney.
- Drive 4 galvanized roof nails into the part of the apron that is close to the roof. Drive nails evenly spaced apart.
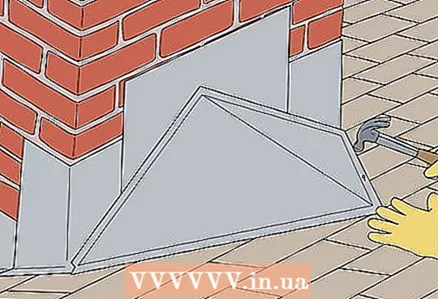
 4 Fasten the corner and insulation transition.
- Fit a 20.3 cm square waterproofing piece above the front corner of the flue.
- Set aside the waterproofing apron for now.
- Apply a small amount of sealant to where the roof and chimney meet at the corner of the chimney.
- Place the support waterproofing on top of the sealant and on the chimney.
- Drive two roofing nails into the trim and into the roof.
- Secure the tile over the corner waterproofing with a hammer and a roofing nail.
- Place the second 20.3 cm apron piece close to the chimney. The waterproofing finish must partially overlap the tile that covers the first waterproofing element.
- Fasten the tile over the second waterproofing element with a nail.
- Repeat the process until you have gone all the way around the chimney.
 5 Secure the pipe clamp.
- Fit a pipe clamp around the back of the chimney.
- Attach it with a hammer and roofing nails to the roof. Insert roofing nails into the clamp and roof every 15.2 cm.
- Place the tile over the flat part of the pipe clamp.
- Nail the roof tile and pipe clamp to the roof.
 6 Install the overlapping apron.
- Use a circular saw to cut grooves in grout-filled seams. The grooves should be 2.5 cm deep. Saw to match the height of the overlapping apron.
- Fit the front overlapping apron around the front of the chimney.
- Place the overlapping apron around the front of the chimney.
- Secure the overlapping apron by pushing the apron flange fully into the mortar.
- Drill a hole on each side of the front of the chimney.
- Drive the plastic anchor bolts into the holes.
- Repeat the procedure around each side of the chimney. Make sure that each new piece of the overhead apron overlaps the previous one.
- Apply sealant along the grout-filled joints to keep the apron airtight.
Tips
- Measure the chimney dimensions and roof slope before ordering apron elements from a sheet metal company.
- Wear safety goggles and work gloves when installing the apron.
What do you need
- A hammer
- Chisel
- Pre-ordered chimney apron and pipe clamp
- Metal scissors
- Galvanized Roofing Nails
- Tiles
- Sealant
- A circular saw
- Drill
- Plastic anchor bolts


