Author:
Bobbie Johnson
Date Of Creation:
5 April 2021
Update Date:
1 July 2024

Content
- Steps
- Part 1 of 2: Preparing to Install the Wall Safe
- Part 2 of 2: Installing the Wall Safe
- Tips
- Warnings
- What do you need
A wall safe is convenient for storing valuables in a safe and hidden place. The installation process for such a safe is quite simple. However, if you are mistaken when installing the safe, it will not be difficult for burglars to open it and clear it of jewelry.By following the steps outlined in this article, you can set up your wall safe properly and keep your valuables in a safe place.
Steps
Part 1 of 2: Preparing to Install the Wall Safe
 1 Set aside money to buy a safe. On average, wall safes cost $ 50 - $ 350, but there are also more expensive ones. A decent safe can be purchased for $ 150 - $ 300, and the price depends on the characteristics and dimensions of the particular safe.
 - Additional security measures and fire protection increases the value of the safe.
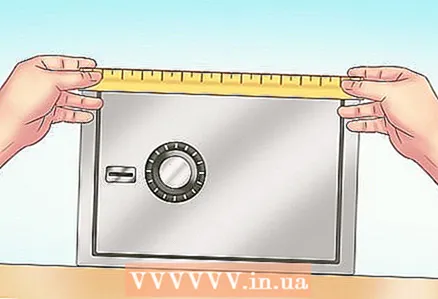 2 Determine the size you need. In most cases, plasterboard walls are 44 x 94 mm with 40.5 cm (16 in) beam spacing. Since a typical wall safe should not exceed these dimensions, choose a safe that is no more than 40.5 cm (16 inches) wide and about 9 cm (3.5 inches) deep. Select the height of the safe so that it can accommodate the valuables to be stored.
 - If you are not sure if the walls in your house meet the given parameters, check their actual dimensions by measuring.
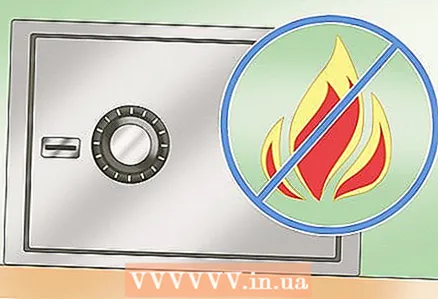 3 Opt for a fireproof wall safe. Fireproof safes will protect your valuables and documents in the event of a fire. The fire resistance of safes is determined by GOST R 50862-2005, and is also experimentally evaluated by various independent companies such as UL (a company for standardization and certification in the field of safety engineering, USA) or Intertek. Choose among fireproof safes that will protect the contents for at least 30 minutes, since most fires in one room last no more than 20 minutes.
 - UL and Intertek classify safes based on the material to be protected and the length of time they provide protection against fire and high temperatures. The class of the safe is indicated on the safe itself or on the packaging.
- Choose a wall safe with a fire rating that matches the material you intend to store in it. Paper should not heat above 176 degrees Celsius (350 degrees Fahrenheit), old tapes and 35mm slides should not exceed 65 degrees Celsius, and CDs and DVDs should not exceed 52 degrees Celsius (125 degrees Fahrenheit).
- In Europe, wall safes are rated according to the Eurograde system.
 4 Determine which access control is preferable for you. Access can be provided by dialing a digital combination, key, key and code at the same time, biometric data (for example, fingerprints). All of these systems are quite effective, and their effectiveness depends on the behavior of the owner of the safe.
 - If you are using a safe for storing weapons, it is better to choose a biometric system, as the key or code can accidentally end up in the hands of children.
 5 Check out the tamper resistance of safes. Some, though not all, wall safes have been burglary tested. For this, the UL classification can be used again. For example, a B4 class safe will withstand attempts to open it with ordinary tools for at least 15 minutes.
 - In most cases, burglars have 8-12 minutes at their disposal, so a B4 class safe will withstand burglary attempts.
- Class B1, B2 and B3 safes are less resistant and can be easily broken with common tools.
- Class B5 means that the safe will resist burglary attempts with standard tools for 30 minutes, while the B6 safe will withstand 30 minutes when exposed to normal tools, torch flame and carbide cutting tools.
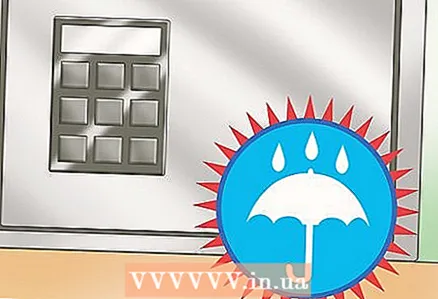 6 Determine if you need water protection. The water resistance of safes is assessed by Intertek and the safes that meet the criteria are labeled “verified”. These safes will protect the contents in the event of a flood or a break in water pipes.
  7 Buy a safe from a specialty store. Wall safes are available at many industrial supermarkets and online stores. However, it is best to do this in a store that specializes in the sale of safes, since there you can discuss the purchase with a specialist and choose the safe that meets all your requirements.
  8 Find a suitable place. Choose it in such a way that access to the safe is not difficult. In addition, the safe should be located away from frequently visited places in the house, such as a toilet, a bathroom; do not place it behind heavy furniture, bookshelves, or in a child's room. Compliance with these rules will make the safe less noticeable and make it difficult for possible robbers to find it.
 - The location of the safe will also depend on the location of the wall beams. When choosing a location for the safe, make sure that it fits between the beams and does not hit them.
Part 2 of 2: Installing the Wall Safe
 1 Determine the locations of the wall beams. You will need to insert the safe into the span between the beams, this will allow you to better hide it by sinking it deep into the wall. To find the beams, use a special device by swiping it along the wall. The device is equipped with an indicator to indicate the presence of a beam.
 - A beam finder is available at your local hardware store.
- If you do not have a special device, you can tap the wall, listening to the sound and determining if it is deaf or relatively loud. A dull sound is usually given by a span located between the beams; if the sound becomes less dull, you are probably in the position of the beam.
- Drive a nail into the wall. In doing so, you will get a feel for whether you are driving a nail into the beam or the gap between them. The holes made in the wall will be covered during the further installation of the safe.
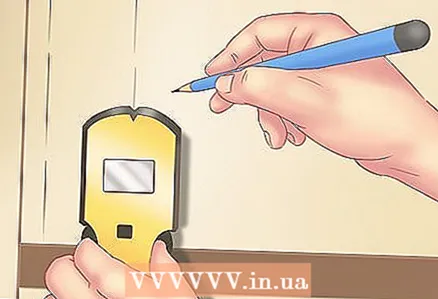 2 Mark the locations of the beams. Mark with a pencil where you identified the wall beams. This will make it easier for you to orientate when you cut the wall section further.
 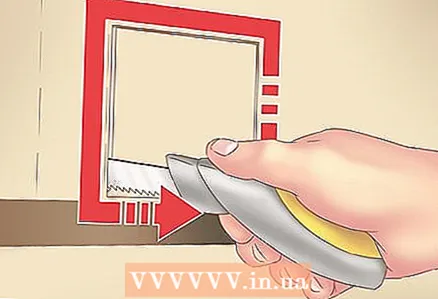 3 Use a drywall saw to cut a small square out of the wall. Once you have determined a suitable span between the beams, you can start cutting the wall. First, cut out a small area large enough for you to get your hand inside the wall.
 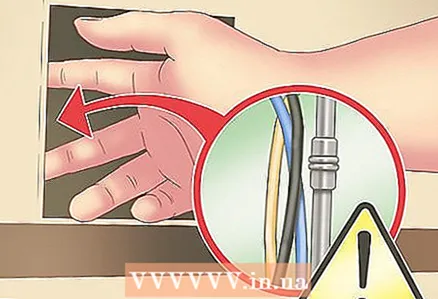 4 Put your hand through the hole and feel for any electrical wiring or water pipes inside. If you grope for wires, you may need to move them to a new location or take extra precautions to avoid hitting them during installation. In the case of water pipes, you will have to find another place for the safe. If the wall is clean, you can continue to carve out a space for the safe.
 - If you run into any obstacle and are not sure that you can safely bypass it or move it to the side, it is better to find another place for the safe.
 5 Measure the intended location and mark the dimensions of the hole required to install the safe. Mark all four corners of the rectangle with a pencil. Use a level when drawing lines between corners. It is important that the top and bottom surfaces of the safe are parallel to the floor line and the sides are parallel to the wall beams.
 - The hole for the safe should be close to the beam so you can attach it to the safe later on.
- Make sure the measurements are correct and the lines are parallel to make sure the hole is straight and the right size.
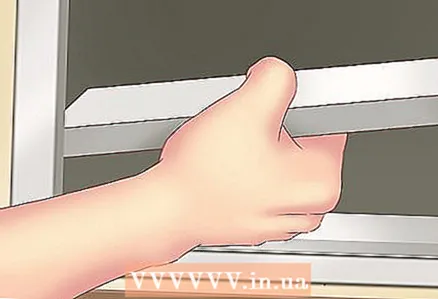
 6 Cut the wall along the lines you have drawn. Use a drywall saw. Start at the bottom edge of the hole, then cut out the side edges. Cut out the top edge last, so the cut rectangle will not fall forward, which can lead to curved lines.
  7 Slide the safe into the cutout hole. Supporting the safe underneath, carefully place it in the rectangular recess. The safe door is the heaviest part thanks to the locking mechanism, so hold it around the corner with your hand so it doesn't swing open and hit you.
  8 Attach the safe to the wall joists by drilling holes in the sides. Drill holes to match the holes inside the safe. Place the screws in them and tighten them tightly.
 - This is an important step in preventing possible burglars from simply cutting the safe out of the wall and carrying it away with all its contents.
 9 Insert the shelves. Place the shelves in the safe in the designated places, making sure they are in the correct position. Some shelves may have cutouts to leave room for a locking mechanism and door hinges; make sure these cutouts are in the correct places.
Tips
- Avoid wall areas near electrical connectors and water pipes, as these areas may also contain wires and pipes.
- You may need to prop up the safe. Cut a piece of wood to measure 44 x 94 mm and to exactly match the distance between the wall joists. Screw it under the safe to the two beams between which it is located. This step is optional, but it will provide additional support for the safe.
Warnings
- Installing a wall safe can be quick and easy. However, if you are not used to manual work, consult an experienced professional you trust.
What do you need
- Device for finding wall beams (if necessary)
- Pencil
- Measuring ruler (tape measure)
- Level
- Electric drill
- Drywall saw


