Content
- Steps
- Part 1 of 3: Installation Highlights
- Part 2 of 3: Fitting the corners
- Trimming inner corners
- Trimming outside corners
- Cutting rounded corners
- Part 3 of 3: Types of Moldings
- Tips
- Warnings
- What do you need
Molding, or pulls, is a decorative piece of wood found in the decoration of rooms in many homes. This term encompasses everything from the very carved and finely detailed finishes in old houses to the one-dimensional and simple flat ones often found in new buildings. In addition to door and window moldings, there are ceiling skirting boards, narrow wall plate shelves, decorative rails against wall damage from chair backs, support moldings and skirting boards. The same techniques are used to install the molding, whether it is a ceiling or support skirting board, or anything in between. You may need to rent a couple of tools for the job, such as a miter box and an air hammer with air hose and compressor.
Steps
Part 1 of 3: Installation Highlights
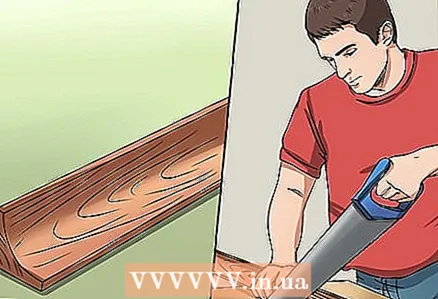 1 Cut the molding into pieces of the desired size. Make sure each piece is cut to the correct size. In the following sections, we will look at this point in more detail.
  2 Locate and mark the locations of the rack profile. It is best to nail the molding to the frame (internal timber support structures in your walls). Find and mark them with a discontinuity detector or other alternative method.
 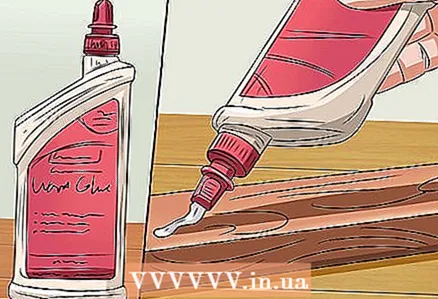 3 Glue the edges. When installing the molding, you must first glue the edges that will contact the wall or ceiling. Do not use too much glue and do not apply it close to the edge, as it may leak out.
  4 Place a section of molding. Once you've applied the glue, place the piece where you want it and tweak it to fit snugly. It will be very useful to mark with a pencil the place on the wall where the line should be located. Use a wall laser if the ceilings are uneven. You can use a utility knife or other suitable tool to trim the top of the molding slightly to fit into ceiling deflections.
 - If the line is long, the ceilings are high and there is no one around to help you, simply place the nail in the wall along the line where the bottom edge of the molding will run, approximately 2.5–5 cm from the end. You can patch the hole later.
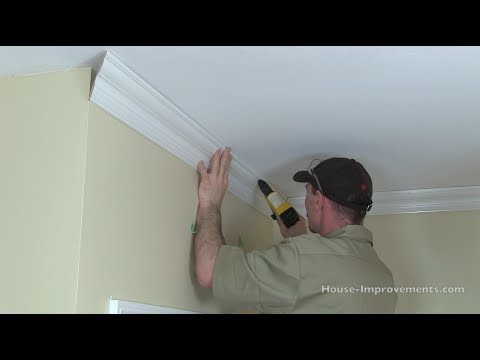
 5 Nail it into place. Place the molding in the right place, hammer in the nail (to determine the length of the nail, add the thickness of the molding, drywall and 1.3 cm to enter the wooden frame) through the molding into the frame closer to the end of the segment. A pneumatic hammer will make the task easier. Try to nail the molding only in those places where the wooden frame or frames, jambs (for example, around windows and doors), as nailing in arbitrary places, you can accidentally touch the pipe or electrical wiring!
 - Do not nail in the last 2.5–3 cm of molding before fitting the next piece to it. This will help bring the pieces closer together.
 6 Carry out finishing work. Use a punch to push hard-sticking nails through. Use wall putty or mastic to fill in and mask the nail holes. Use sealant for gaps between molding and walls. Sealing is especially needed around doors and windows and helps in the fight against moisture. If necessary, cover the flaws of the repair with paint.
Part 2 of 3: Fitting the corners
Trimming inner corners
 1 Measure the line. Measure the distance between the last end of the molding and the corner. Cut a new piece to the same length. Do this for both sides of the corner.
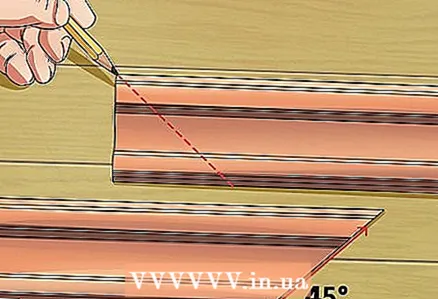
  2 Bevel the ends. Cut the ends of both corner pieces at a 45 ° angle, leaving the long back of the molding to be pressed against the wall. This will bring the two corner lines together.
 - The length on the back side should be greater than the length on the front side. For interior corners, the back of the molding should be equal to the length of the wall you want to trim from the corner to the next length of the molding.
 3 Take the line segments. Apply glue to the sides of the molding that are in contact with the wall or ceiling (be careful not to overdo it with glue) and attach them to the desired location. Make sure both sections are smooth and beautiful.
  4 Drive into place. After the pieces of molding are glued in place, nail them to the frame rails, alternately from the top and bottom of the molding. Be careful not to do this too close to the edges, as this may crack the molding.
Trimming outside corners
 1 Measure the line. Measure the distance between the last line and the corner. Add twice the thickness of the molding plus 2.5–5 cm and cut a piece to that length. Measure and cut pieces for both sides of the corner.
 - Tip: check that the molding matches the wall. Apply it to the wall without glue and mark the back of the molding as close to the corner as possible. This measurement will be more accurate than the one you calculated. For correctness, use a larger dimension.
 2 Cut off the ends. Bevel the ends of both corner pieces at a 45 ° angle, leaving the front or face of the molding long. This should help you line up the two corner lines.
 - The front should be longer than the rear of the molding.
 3 Take the line segments. Apply glue to the sides of the molding that are in contact with the wall or ceiling (be careful not to overdo it with glue) and attach them in the desired location. Make sure both sections are smooth and beautiful.
 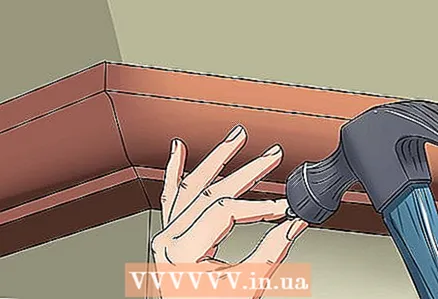 4 Drive into place. After the pieces of molding are glued into place, nail them to the frame rails, alternately from the top and bottom of the molding. Be careful not to do this too close to the edges, as this may crack the molding.
 - At the outer corners, it is also necessary to nail one end of the molding to the other, as this joint is quite thick.
Cutting rounded corners
 1 Perform calculations. Calculate how large the angles should be on the segments. Take the total corner you want to round off (usually 90 °) and divide by the number of lines to round off (45 ° for right angles). If you are going to make the rounds using three pieces of molding, then you will need to cut them off at an angle of 22.5 °.
  2 Measure, cut and roughly estimate the lengths on both sides. Cut the ends of the outer segments at a 22.5 ° angle so that the ends of the shorter inner segment are where the wall bends begins. Place the lines against the wall and mark with a pencil where they end.
  3 Measure the distance between them at the base. Measure the distance between the lines at their bases. This will be your size for the transition.
  4 Cut off the transition. Trim the transition piece at a 22.5 ° angle on each side, leaving the long side on the outside. In this case, it is better to cut off less than more. You can trim more later to fit more accurately.
  5 Attach the transition piece. Attach all parts, glue and nail as usual.
  6 Alternatively, shape the corner as usual and fill in the gap. If you don't like the look of the adapter, you can make a right angle and simply plaster the gap.
Part 3 of 3: Types of Moldings
 1 Install the door molding. Basically, the door and window molding is exactly the same as the wall molding, it is just that the sections are installed in a different direction. Almost the same instructions apply. For doorways, keep in mind - there are several ways to trim corners. You can cut them as indicated above, you can use ready-made decorative corners, or you can design a lintel. All of these options are easier to implement than cutting corners.
 - Don't forget to insert the doors. Make sure there is no overlap on the door with the molding.
 2 Install the window molding. Windows are like doors. The main difference in installing window moldings is the need to be careful with the window frame. Be careful not to overlap the window frame, and make sure you only nail the molding into the timber framed areas in the wall around the window.
 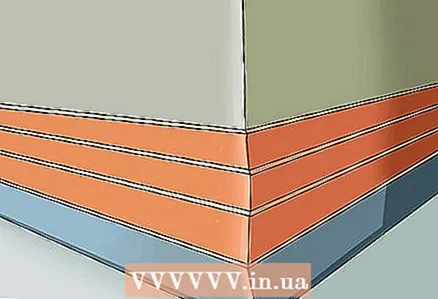 3 Installation of support molding. The support molding, or floor-level molding, is installed in much the same way as anywhere else on the wall. The difference is that you need to use thin blocks or trims, taking into account the presence of carpeting. The molding should not be installed directly on the subfloor. Also, don't forget the skirting board. It is installed just like a wall one, and your floor will look professional and always clean with it.
  4 Installation of protective slats and shelves for paintings on the wall. Wall slats to protect against damage from backs of chairs or for paintings are installed in the same way as wall moldings. Be more careful when placing them in a straight line using a laser. SPECIALIST'S ADVICE
Mitchell Newman
General contractor Mitchell Newman is the head of Habitar Design and its sister company Stratagem Construction in Chicago, Illinois. Has 20 years of experience in construction, interior design and real estate development. Mitchell Newman
General contractorIt is better to use MDF instead of plywood. If you need to install molding along the bottom of the wall, it is better to give preference to MDF (smoother and cheaper material) over plywood, and this will also provide better surface painting.
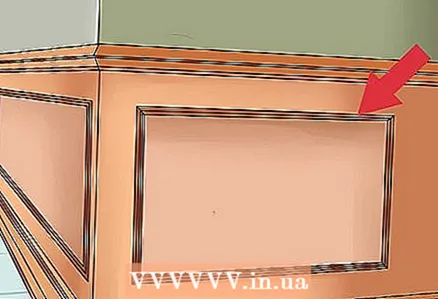 5 Installation of glazed showcases. Showcases are used more like picture frames. Before cutting into pieces, draw everything with a pencil, to save time, make as many pieces of the same size as possible and nail them in the places where the wooden frame passes (to avoid damage to pipes and electrical wiring). To make uneven corners, such as on stairs, simply use the formula mentioned above: take the total angle that needs to be completed and divide it by two (if the rotation is done with two line segments).
Tips
- If you have never dealt with a miter box, ask to show how it works at the rental point. Alternatively, you can search for videos demonstrating the technique of working on it on the Internet.
- It is much easier to install the molding with someone's help, especially for the ceiling plinth.
Warnings
- Do not use nails longer than 5.1 cm to nail down the molding. They can touch pipes or electrical wires.
- Be careful when buying a very long molding, as it often twists and deforms. Inspect each piece carefully before purchasing.
- In many countries, cargo that protrudes outside the vehicle must be marked with the “Oversized Cargo” identification mark. Check local laws before placing anything large in / on your vehicle.
What do you need
- Scaffolding or stepladder
- Measuring tape
- Pencil
- Protective glasses
- Mask for the face
- Molding
- Miter box - a device for cutting at an angle
- Hand saw
- A hammer
- Headless nails
- Finishing nails
- Punch
- Air hammer
- Compressor and air hose
- Sealant
- Masking tape
- Paint or stain


