Author:
Eric Farmer
Date Of Creation:
4 March 2021
Update Date:
1 July 2024

Content
- Steps
- Method 1 of 3: Preparation
- Method 2 of 3: Installing a Sliding Shower Door
- Method 3 of 3: Installing a Swing Shower Door
- What do you need
The final step in installing a new shower is the door assembly, which can be completed in a few hours using the right tools, sizes and work order. The installation process for a swing or slide shower door is very similar, with minor differences described below. Our recommendations will help you find the right tools and equipment to properly complete the task, and also show you how to easily install one type of door or another. Go to Step 1.
Steps
Method 1 of 3: Preparation
 1 Decide on the type of door. There are two types of shower doors commonly used: a sliding door and a hinged door. They work differently, but the installation process for both is almost identical, so your decision should be based solely on personal preference.
 - It is highly recommended to choose a framed shower door. Some shower doors are frameless for a sleeker look, but they are much more difficult to install.
- Some people prefer to use a sliding door for wide openings and a swing door for small openings, since a hinged door is usually narrower and takes up less space.
 2 Remove the dimensions of the door installation site. Using a tape measure, measure horizontally and vertically at the door, across the bathroom or shower opening, and up the wall. Write down the values and take them with you to the store to purchase the correct size kit.
 - Typically, metal shower doors will be slightly longer than the space that needs to be closed. They are designed in such a way that the same kit can be used for different projects. By cutting the guides to size, you can use almost any commercially available kit for your task.
 3 Buy a shower door. Do not forget to bring the measurements you have taken with you so that the consultant can help you choose the correct size kit. The kit should include the glass door itself, guides, rollers and door-to-wall fasteners. The rest of the necessary tools and equipment will be covered in the next step.
 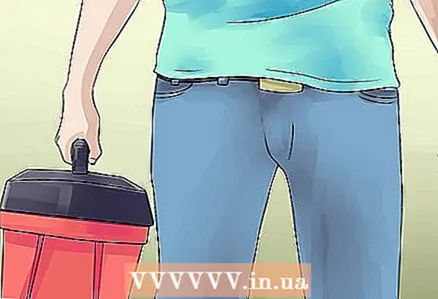 4 Necessary parts and equipment. Shower door kits include a set of metal rails into which the door is installed, so the main part of the assembly process will be the installation of the metal frame. The frame is secured with a metal threshold that sits on the front edge of the tub, two side posts that attach to the tiled walls, and one cross member that connects the posts from above. Most kits are universal, but it is recommended that you attach the parts to the shower prior to installation in order to check that the dimensions are correct. If the parts are too long, you may need to trim them with a hacksaw. You will also need the following tools to complete the task:
 - Silicone sealant and special gun
- Roulette
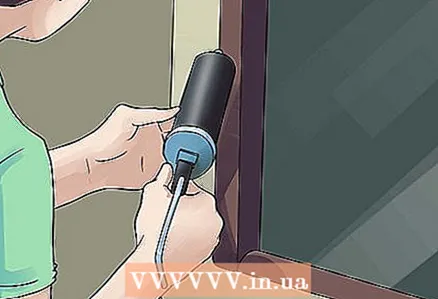
- Electric drill
- Drill bits 4.76 and 5.55 mm (also use a 4.76 mm diamond core bit for drilling tiles)
- Tile screws
- Plastic dowels
- A hammer
- Duct tape
- Marker
- Level
Method 2 of 3: Installing a Sliding Shower Door
 1 Measure and mark the location of the rail. First, the threshold is installed, and then the side posts, therefore, it is recommended to take measurements first, and then carry out the installation. This will make sure your door is level and level. Use a spirit level to check the mark.
 - Mark the desired location for the door sill. Measure the width of the front edge of the tub to find the center. The shower threshold should be centered so that it is securely fastened and positioned exactly against the wall. Measure the center from each edge of the tub and mark it with a marker to have a reference point for installation.
- Attach each counter to the tiled wall, aligning them with the markings on the edges of the bathroom. Most racks have pre-made screw holes, of which there are usually three. Use a marker to mark the points where the screws will enter the wall.
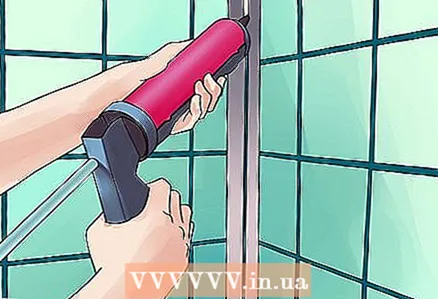 2 Apply a thin bead of silicone sealant to the threshold. Insert a tube of plumbing silicone sealant into the gun and cut off the top end. Apply a thin bead of sealant to the bottom of the sill, which should be flat.
 - The sanitary silicone sealant is water resistant and works great for attaching the bottom rail to the bathtub. The water will not pass through the sealant layer and will not fall under the threshold, and the shower will remain clean.
 3 Gently but firmly press the threshold against the tub. Align the metal threshold with the marks in the center of the bath rim and press firmly to level out the sealant. Check that the threshold is securely fixed and precisely aligned with the marks. Be careful, because if you install it incorrectly, then after drying, the side posts will not be aligned, and the door will not close properly.
 - Some adhesive tape can be used to keep the threshold firmly attached to the bathtub while it dries. This will take about five minutes, but you will be sure that the threshold will not move.
- After the threshold is dry, place the side posts against the wall and check the alignment. If mistakes are made when attaching the threshold, you may need to re-mark for drilling for the screws. Check everything again with the level.
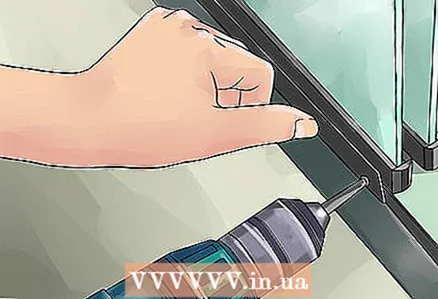 4 Drill the marked holes with a tile drill. Install a thin tile drill into the electric drill and drill the marked holes to a depth of 5 cm. This drill has a sharp end with a wide and flat chamfer that effectively passes through the tile.
 - Some people prefer to tape the tile under the hole with duct tape to prevent the drill from slipping. Since bathroom tiles are usually very smooth, there is the possibility of the drill slipping off, which can be dangerous. The adhesive tape also reduces the chance of tile cracking during the drilling process.
 5 Drive plastic dowels into the holes. Take the supplied door plugs and hammer them firmly into the drilled holes with a hammer. They will allow you to securely fix the screws in the wall, thereby securing the side posts.If you do not use a dowel, then the screws will have nothing to catch on.
 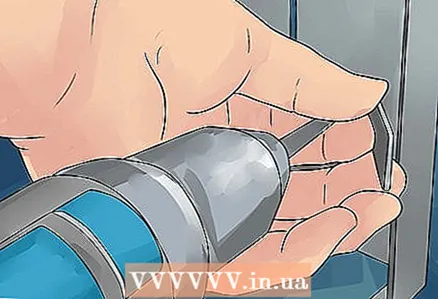 6 Attach the uprights to the wall again and secure them. Align the holes with the dowels and fix the uprights to the wall using the screws required. They should be screwed tightly into the dowels. Repeat these steps for both posts.
 - Apply a thin layer of silicone on both edges where the tile meets the rack. This will prevent water leaks.
 7 Install the cross member. In most kits, this is a regular clamping element that should fit snugly onto the tops of the posts. Since everything is correctly measured and secured, it should slide on easily and become the top edge of the shower door assembly.
  8 Install the door into the frame. Turn the door so that the handle is outside, without interfering with closing and opening the door. Some glass doors may require rollers to fit into the grooves of the top and bottom edges, which should sit easily, but the process may vary slightly depending on the manufacturer. Read the installation instructions.
 - Rotate the glass door so that the rollers are inside the rail, then carefully lower it into the threshold. You will have to try to get there, especially if you have no room for maneuver. If everything was measured and installed correctly, then there should be no problems. The door should slide easily and smoothly.
Method 3 of 3: Installing a Swing Shower Door
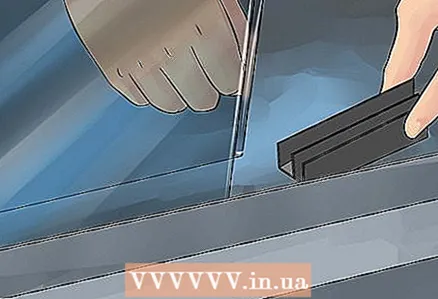
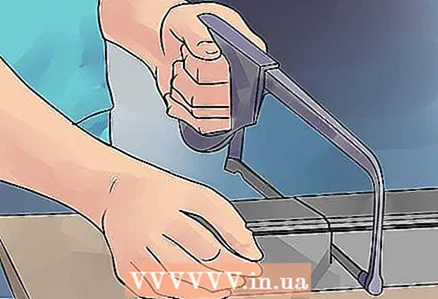
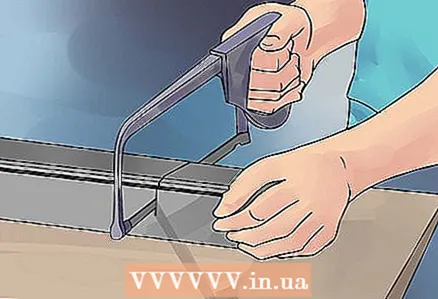 1 If necessary, trim the guides to fit. Measure the width at the bottom of the shower opening. Transfer the value to the bottom rail of the shower door and mark with a marker. If the size is suitable, proceed to installation. If the element is too long, then it must be cut off.
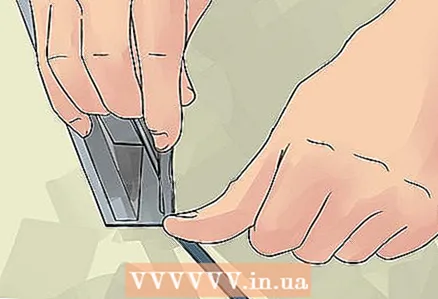
 - Using a hacksaw, carefully cut the guide along the mark. Hold the guide firmly to avoid damaging it or the saw. File away any unevenness in the cut.
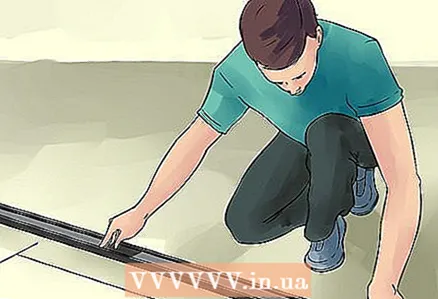 2 Measure and mark the location of the rail. Before permanently attaching the rails, temporarily attach them and mark the installation locations. Position the bottom piece along the base of the shower opening with the higher edge of the plank facing outward. The guide should fit snugly against the surface. The edge gap should not exceed 3 mm.
 - Temporarily secure the bottom piece with duct tape, then use a marker to mark the position along the inner and outer edges. Do not rush to remove the bottom element.
- The side pillars must be cut to size at the factory. Lean them against the wall relative to the bottom element. The side pillars and the sill must match exactly. Use a level to check verticality.
- Holding the rails securely in place, mark the mounting holes on each wall with a marker pen, then set the stands aside.
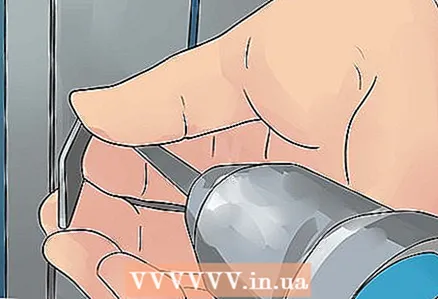 3 Drill holes at the marked points. Use a nail or center punch to punch the mounting holes shallowly at the designated points. This will prevent the drill from slipping and damaging the surface. Drill the mounting holes with a suitable drill.
 - If you are drilling into tiles, tape each place under the hole with duct tape. This will prevent damage to the tiles. Drill deep enough to install the dowel. You do not need to use dowels for fiberglass.
 4 Install the threshold guide. Apply a thin bead of sealant to the bottom mounting surface of the rail. Apply sealant centrally between the two lines marked during measurement, and apply along the entire length of the joint. Then press down firmly on the bottom element.
 - Check that the bottom of the rail is firmly in contact with the sealant. If not, apply another strip along the center of the bottom of the mounting surface.
- Hold the element motionless for about two minutes, pressing it to the floor if necessary. Wait no more than five minutes to proceed to the next step.
 5 Install the side posts. Align them with the mounting holes and check that they fit exactly around the edges of the bottom element. If the measurements and marks are accurate, they should fit easily into place.
 - If included, install the rubber bumpers over the screws and secure the uprights to the wall with a screwdriver. Do not fully tighten the screws at this stage, hand tightening will suffice.
 6 Install a swing door. The installation of a swing door will depend on the kit purchased, so it is important to read all instructions and follow the directions. The installed door should be hinges outward, but in different cases they will be on the right or left, on which the principle of the mechanism will depend. In some kits, the door will simply sit in place and click into place, while others use screws.
 - Most swing door kits have a rubber strip that fits into the side post opposite the hinged post. In some cases, it is secured with screws.
 7 Measure and cut the top plank. If you have trimmed the sill, you will almost certainly have to trim the top bar as well, as they are about the same length. The plank should fit snugly between the two side posts and be precisely aligned. She should just sit on top of the racks.
 - Many kits contain corner brackets that are screwed to hold the top bar. If necessary, read the instructions for your kit.
 8 Seal all joints with sealant. Then apply plumbing sealant along all points where the rails meet the walls. Apply sealant to both sides of the rail.
 - Let the sealant dry and wait at least 24 hours before turning on the shower water and checking the work done. The sealant will dry in a few minutes, but it is recommended to wait until all the elements are finally in place.
What do you need
- Shower door kit
- Roulette
- Hacksaw
- Level
- Pencil
- File
- Drill
- Plastic dowels
- Rubber mallet
- Screwdriver
- A hammer
- Nail


