Author:
Joan Hall
Date Of Creation:
1 July 2021
Update Date:
1 July 2024

Content
- Steps
- Part 1 of 3: Improving Soil Composition
- Part 2 of 3: Improving soil texture
- Part 3 of 3: Normalize Your pH
- Tips
- Caveats
All gardeners are periodically faced with the need to improve the quality of the soil on a plot of land. Not all soils are good for growing crops, and land improvement is a common problem for all agricultural workers, whether they work in a small business or a large company. Effective soil improvement will require some skill and prior planning. Here are some standard and often recommended ways to improve the quality of your land and ultimately make your site more profitable.
Steps
Part 1 of 3: Improving Soil Composition
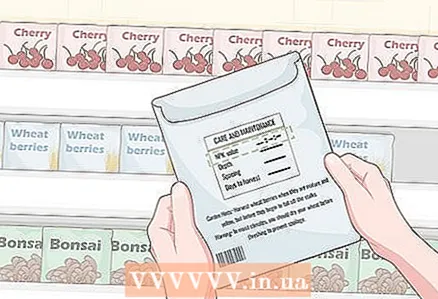 1 Check what nutrients your plants need. There are three key nutrients that are important for plants: nitrogen (N) is needed for the growth of leaves and herbs, phosphorus (P) is needed for roots, fruits and seeds, potassium (K) increases plant resistance to disease and strengthens them. Young plants may require more phosphorus to keep the leaves growing actively, and vegetable crops generally need less phosphorus when they are not producing fruit. For best results, check which nutrients are required by the plants you are planting. The data is usually given as three numbers, corresponding to nitrogen, phosphorus and potassium, and shows the ratio or total amount of the substance that the plant needs.
 - If you would like a detailed report on what nutrients are already in the soil in your area, send soil samples to the laboratory. For amateur gardening, this procedure is usually not required, unless the plants clearly feel bad - they grow slowly or change color.
 2 Choose organic fertilizers. Fertilizers of plant or animal origin (such as fish emulsion or fish hydrolyzate) are best suited for the long-term development of microorganisms in the soil, so that the soil remains nitrogen-rich and loose. Chemical fertilizers synthesized in laboratories usually provide plant nutrition, but they do not improve the soil, and in some cases can have a negative effect.
 - Always protect your hands and face when handling soil additives, as they may contain bacteria and other elements that can be harmful to health.
 3 Consider using manure and other organic matter. Instead of industrially produced fertilizers, you can find cheaper, natural alternatives at a gardening store or on a farm. Here are some typical options:
 - The manure should be left to decompose for at least a month before being applied on the site, so as not to harm the plants. Chicken or turkey droppings are quite cheap, but can cause drainage problems in large areas. Cow dung, sheep, goat and rabbit manure are of higher quality and less pungent odor.
- Add bone meal to the soil to enrich it with phosphorus, or blood meal to increase nitrogen.
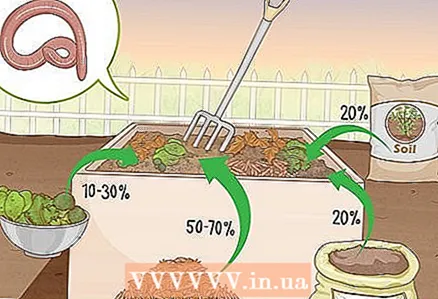 4 Compost yourself. Compost matures in 4-8 months, if you do not increase the speed of the process with the help of special bacterial additives. This is a time-consuming task, but as a result, the composition and texture of the soil can be significantly improved. Place a large container in your yard. It must be tightly closed so that animals cannot climb into it), but there must be holes in it to ensure the flow of air. Take care of it according to the instructions:
 - Start with 20% soil, manure, or mature compost; from 10 to 30% should be raw vegetable or food waste; from 50 to 70% are dry leaves, grass and branch cuttings. Mix all ingredients thoroughly.
- Keep the compost moist and warm, and add raw waste (no animal ingredients) from the kitchen.
- Stir the compost with a pitchfork or shovel at least once every 1 to 2 weeks to allow airflow to help the growth of beneficial bacteria.
- Look for worms in damp areas under rocks and add them to your compost bin.
- The compost will mature (ready to use) when it crumples easily when squeezed, but just as easily crumbles. The plant fibers should still be visible, but the overall compost will be smooth.
 5 Apply fertilizer. When using fertilizer, manure, or compost, most gardeners mix the substance into the soil. Most crops thrive on 30% compost and 70% mixed soil, but vegetable and fruit crops often require less compost. The required amount of fertilizer varies greatly depending on the concentration of the beneficial substance in it; follow the recommendations for each specific plant species.
 - Advocates of gardening without plowing and digging up the soil recommend adding fertilizer to the surface, allowing it to gradually penetrate into the soil. Practitioners of this approach consider it the most natural and less aggressive way to improve the soil, however, it can take years to get the full result, and a large amount of organic raw materials may be required to ensure the desired effect.
- For the best effect, fertilize in the fall. Many plants require feeding every 1-2 months during the growing season, but this depends on the type and variety of the plant.
- If you think the compost has not rotted enough, add a layer of clean soil around the plant to avoid burning it.
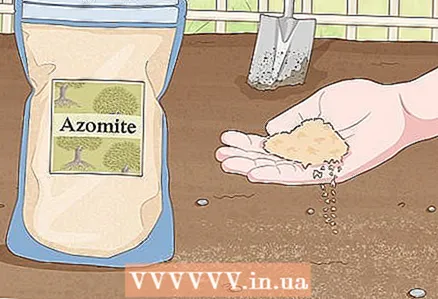 6 Add micronutrients. Many trace elements have less or less noticeable effects on plants, but deficiencies can lead to plant disease or soil depletion. If you want to make sure you have enough micronutrients, add green sand, algae flour, or azomite to the soil before planting the plants. For a small private garden, this is not necessary if the plants are not sick.
 - The most important trace elements are iron, boron, copper, manganese, molybdenum and zinc.
- The additives described are natural and suitable for organic farming.
 7 Consider planning your crop rotation. If you plant the same plants in the same area year after year, nutrients are drawn out of the soil faster. Some plants use less nutrients or even enrich the soil with nutrients, so a species change schedule will help keep the soil quality at a higher level.
 - Start using your crop rotation according to this simple home gardening guide. If you are a farmer, consult an experienced local farmer or agribusiness representative as the plan for changing plants depends on the crops available.
- Farmers should also consider using winter “cover crops” that are grown to provide enough nutrients for real crops. Plant frost-resistant crops at least 30 days before frost, or 60 days if the crop is not too frost-resistant. Mow or cut the shoots at least 3-4 weeks before planting the main crops and leave the cover crop to decompose on the ground.
 8 Consider adding beneficial fungi or bacteria. If the soil is sufficiently aerated and rich in nitrogen, populations of microorganisms will grow naturally, converting dead plants into nutrients that other plants can use. You can purchase fungi or bacteria from your gardening store to improve soil health, if this soil improvement method is appropriate for the plant species you have planted. Soil, which decomposes quickly enough, does not require such additives, although there is no consensus on how many additives to add and when to stop.
 - One of the most common additives is a type of fungus called mycorrhiza. It develops on the roots of plants and helps them get more nutrients and water. All plants other than those of the Cabbage genus (including mustard and cruciferous plants such as broccoli and Chinese cabbage) benefit from fungus, unless the soil is already nutritious enough.
- A bacteria called rhizobium (nitrogenification agents) is often already present in the soil, but you can add bacteria for safety. They enter into a symbiotic relationship with vegetables, such as potatoes and legumes, and enrich the soil with nitrogen.
Part 2 of 3: Improving soil texture
 1 Understand the "soil triangle". Soil scientists divide the particles that make up the soil into three categories. Sand particles are the largest, peat particles are smaller, and clay particles are the smallest. The ratio of these three substances determines the type of soil in your area and can be described using a diagram called the "soil triangle". For most plants, "loam" is best suited, a mixture of substances in a ratio of 40-40-20 (sand, peat and clay, respectively).
 - Succulents and cacti often prefer sandy loam with a sand content of 60-70%.
 2 Try a quick soil texture test. Take a small lump of soil from underneath the top layer of the earth. Moisten the soil, then try rolling it into a ball and kneading it into a strip. This is a quick and dirty method to identify key issues based on the following metrics:
 - If the strip of earth breaks before it reaches 2.5 cm (1 inch), you have loam or peat. (If the soil cannot form a ball or strip, your soil is sandy.)
- If the streak is 2.5 to 5 cm (1-2 inches), the soil is clayey. It can be improved by adding sand and peat.
- If the strip is more than 5 cm (2 inches), you have clay. The soil will require a large number of additives, described at the end of this section.
 3 Prepare a soil sample for testing. If you are still not sure about the composition of the soil, you can get more accurate information with 20 minutes of work and a few days of waiting. First, remove the topsoil, then dig a soil sample from a depth of about 15 cm (6 inches). Sprinkle it on a newspaper to dry the soil and pick out debris, rocks, and other large impurities. Break up large lumps, separating them as carefully as possible.
  4 Mix the ingredients for the dough. When the soil is dry, pour it into a tall, large jar, ¼ full. Add water to ¾, then add 5 ml (1 teaspoon) of dish soap that does not foam too much. Close the jar and shake for at least 5 minutes to further grind the particles.
  5 Mark on the jar how the soil settles. Let the jar sit for at least a couple of days, marking the following points with a marker or duct tape:
 - After a minute, mark the upper limit of the settled particles. It is the sand that settles first due to the coarse particle size.
- After 2 hours, label the jar again. Most of the peat has now settled on top of the sand layer.
- When the water is clear, label the jar again. If there is a lot of clay in the soil, the water can be cleared only after 1-2 weeks, soils with a high peat content will settle in a couple of days.
- Measure the distance between the marks to determine the relationship between the different soil components. Divide each metric by the total soil depth and you get the component percentage. For example, if you have 5 cm (2 inches) of sand and a total soil depth of 10 cm (4 inches), in the soil 5 ÷ 10 = 0.5 = 50% sand.
 6 Improve the soil with compost or natural additives. If you have determined that there is loam on your site, there is no need to change the composition of the soil. Clay soils can be significantly improved by adding mature compost as described in the section on improving soil composition. Other natural supplements like dried leaves or herbs serve the same purpose.
 - Old pieces of wood, twigs or bark will help retain more water and nutrients in the soil, while simultaneously loosen the soil and retain nutrients that the plants can use later. Avoid adding fresh wood to the soil as it can reduce nitrogen levels.
 7 Consider manual soil adjustment. If your soil is high in clay (over 20%) or very high in sand or peat (over 60% of one or the other), you can add a different soil type to end up with a soil with roughly equal sand and peat content, where clay will be no more than 20%. This can be labor intensive, but this method is faster than making your own compost. The challenge is to create a loose soil that will retain enough water, air and nutrients.
 - Please note that you need to use very fine, salt-free sand.
- Perlite, which is available in all gardening stores, is good for all types of soil, but especially for clay soils - it works as a larger particle in them.
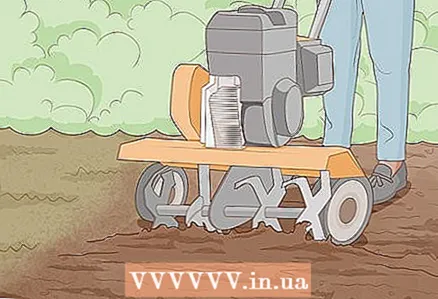 8 Fight soil compaction. Minimize walking and driving around the area to keep the soil aerated. If the soil feels tight or crusty, use a pitchfork to turn the soil over and break up large clods. For caked soil, use a power cultivator or lawn aerator. Even if there are no problems with water retention, beneficial bacteria and fungi can die in dense soil, they can be replaced by harmful bacteria that can develop without air access.
 - Adding organic matter is also helpful, as described in the section on improving soil composition.
- Dandelions and other plants with long roots will help prevent soil caking.
- You can use pro-gardening methods without loosening and plowing, letting the soil naturally form, but it will take several years. In this case, it is also recommended to restrict movement on the site.
Part 3 of 3: Normalize Your pH
 1 Take a soil sample. For accurate results, remove the topsoil until you reach a layer that is uniform in texture and color, usually about 5 cm (2 inches) deep. Dig a hole 15 cm (6 inches) deep. Repeat several times over the parcel or field to obtain a representative sample.
  2 Check the acidity (pH) of the soil. You can send samples to the laboratory and pay for the soil acidity test. However, pH kits are inexpensive and readily available at gardening stores and can be easily tested at home.
 - Sending samples to a professional laboratory is recommended for farmers as it provides additional advice on how much and what additives to use.Hobby gardeners may prefer the faster, cheaper method, and the choice of supplements may be trial and error.
 3 Check what your plants are missing. Many plants prefer slightly acidic soil, so a pH of 6.5 should be considered normal unless you have other information. It is best to check the soil requirements of your plants - online or in conversation with experienced gardeners.
 - If you can't find definitions for pH levels, assume that "acidic soils" have a pH of 6.0 to 6.5, and "alkaline soils" have a pH of 7.5 to 8.
 4 Make the soil more alkaline. If the pH is too low for the plants, raise it with alkaline additives. Shop for lime, crushed snail shells, or other calcium supplements, or grind eggshells into a powder at home. Mix the additives with plenty of soil, taking a handful at a time and checking the soil's pH each time.
  5 Make the soil more acidic. If you need to lower the pH of the soil, you will need an acidic additive. Mix the aluminum or sulfur sulfate from your gardening store with the soil, rechecking the pH after each handful.
 - There are no stable and reliable “home” methods for raising soil pH. Scientific tests have shown pine needles and coffee grounds do not significantly affect soil acidity, although these remedies are often advised.
 6 Check the soil every three years. Over time, the pH of the soil will return to its normal level, which is determined mainly by the minerals typical of the area. If you have no problem regulating the acidity of the soil and the plants are doing well, checking the soil pH level every three years is sufficient.
Tips
- The presence of toxic chemicals in soil is not a common problem, but it is worth checking the site if you live near an industrial area, landfill, or near a toxic waste storage site, or if you grow edible plants near a road. Send soil samples to a laboratory for verification and recommendations. Hazardous chemicals may require professional intervention, while others can be neutralized by mixing topsoil.
- If cats are using your garden as a litter box, ward them off by scattering a thin layer of straw over the area, leaving a clean area around the plants. Straw will also help retain more water, which can be harmful or beneficial depending on the characteristics of the soil and climate.
Caveats
- Always protect your face, hands and other body parts from contact with various substances to improve soil quality. Read product warnings and stay up to date on how to safely use chemicals to improve soil quality.
- When using organic matter to improve your soil, try to limit the amount of weed seeds in your supplements. If there are too many seeds, they can germinate and cause problems in the garden.
- Never use feces from cats and dogs instead of manure, as it can spread diseases that are dangerous to humans.
- Citrus waste is not very suitable for compost, as it takes a long time to disintegrate.


