Author:
Helen Garcia
Date Of Creation:
19 April 2021
Update Date:
1 July 2024
Content
Are you going to glue a new wallpaper? In many old houses, the walls are covered with one or more layers of obsolete wallpaper. Removing old wallpaper can be a real headache for the uninitiated person, but when using the right approach, the task becomes much easier. Skip to Step 1 to properly prepare for work.
Steps
Part 1 of 2: Preparation
 1 Determine the type of wallpaper. Depending on the manufacturing method, the wallpaper can be easily removed dry or you have to tinker with it. The way to remove wallpaper will depend on their type, among which the following are distinguished:
 - Wallpaper to be removed dry. These wallpapers are easy to remove without using water. Try to pry off the corner of the strip; if the material comes off easily, then your wallpaper is probably of this type. If the material begins to tear, then to another.
- Porous wallpaper. This type of wallpaper is unlikely to be easily removed to dry, but it quickly absorbs water and falls behind the wall, after which it is not difficult to separate them. To determine if your wallpaper is porous, sponge a small area with a wet sponge. If the wallpaper absorbs water, then it is porous, but if the water just flows down the wall, then it is not.
- Non-porous wallpaper. Many wallpapers have a decorative, non-porous layer. It is especially noticeable on metal or embossed elements. You will have to work a little to remove such wallpaper; before moistening, they will have to be processed so that the water can absorb and separate them from the wall.
 2 Determine the number of layers. It only takes a few hours to remove a single layer of easily removable wallpaper, but adding more layers makes your task more difficult. Pry up a corner of the wallpaper strip and look underneath. Is there already plaster or another layer of wallpaper? Pry the material until you reach the plaster, counting the number of layers glued in parallel.
 - If there are more than two layers, then a lot of work awaits you. Consider getting yourself an assistant or renting wallpaper remover equipment to help you handle it yourself.
- A layer of paint on one of the wallpaper layers also complicates the task. Again, it's best to use a dedicated tool.
 3 Collect the necessary fixtures. The most basic tools are suitable for removing any type of wallpaper. If you have a particularly insidious combination of non-porous wallpaper in 4 layers and paint in between, then you cannot do without additional tools. You will need:
 - For wallpaper to be removed dry:
- Wallpaper scraper
- Putty knife
- For porous wallpapers:
- Wallpaper scraper
- Putty knife
- Wallpaper remover
- Water bucket and sponge
- Spray
- For non-porous wallpapers:
- Wallpaper scraper
- Putty knife
- Wallpaper remover
- Water bucket and sponge
- Spray
- Wallpaper punching tool (or sandpaper)
- For wallpaper to be removed dry:
 4 A steam plant can be rented. Steam wallpapering machines will prove to be very useful when working in particularly difficult areas. Instead of soaking the walls with water, you can use this installation to treat the wallpaper with hot steam so that it immediately peels off and can be easily removed from the wall. The cost of renting a steam plant for half or all day will cost you about $ 15 - $ 30. If you can't do it in one day, then it would be better to buy such a device for $ 50.
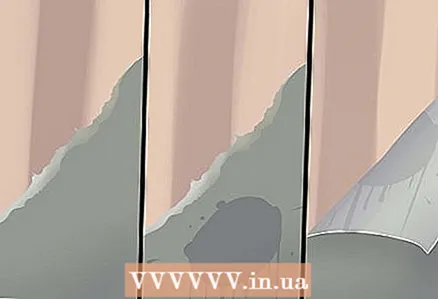
  5 Get ready for surprises under the wallpaper. There is nothing surprising in finding crumbled plaster under the wallpaper. To save money on wall repairs, many simply glue wallpaper on it, thereby hiding the defect and not allowing the plaster to crumble.When layers of wallpaper are removed, pieces of plaster may come off along with them. Also, under the wallpaper, cracks in the plaster or other problems can be hidden. Prepare to fix these imperfections before painting the walls.
Part 2 of 2: Remove Wallpaper
 1 Preparing for removal. Before getting down to business, you need to properly prepare the room, so that you can quickly get the job done and not dirty the whole house.
 - Cover the floor with old newspaper or tarpaulin to protect it from dirt, drips, and pieces of wallpaper.
- Have a trash can ready so you can immediately collect pieces of wallpaper in one place.
- If you have tall walls, use a small stepladder.
- Wear old or work clothes, as dust from old wallpaper and plaster will most likely get on you.
- If you are sensitive to dust, you can wear a respirator while working.
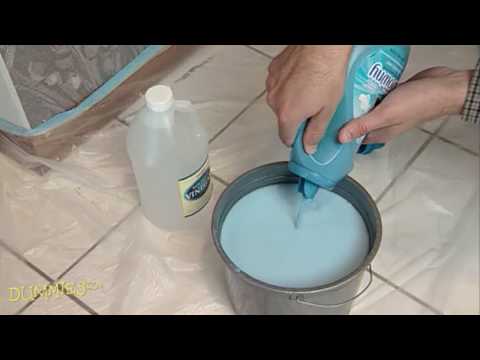
 2 Mix the wallpaper remover solution. Fill a bucket and spray bottle with water and wallpaper remover. The recommended concentration is 300 g of solvent per 8 liters of water. If you use water not only in a bucket, but also in a sprayer, then you can treat all parts of the wall.
  3 If necessary, process the wall with a perforator. If you have non-porous wallpaper, start with a puncher or sandpaper. Instead of working on small areas, it is better to work the entire wall right away and not come back to this question again. In order for the wallpaper to absorb water or steam well, perforation should be performed evenly from top to bottom and from edge to edge.
 - Do not attempt to perforate the wallpaper with a knife or other pointed tool. This will damage the plaster underneath the wallpaper.
- A special punch for wallpaper works in this way: pumping along the wall, it pierces the smallest holes in the wallpaper, without penetrating too deep so as not to damage the plaster.
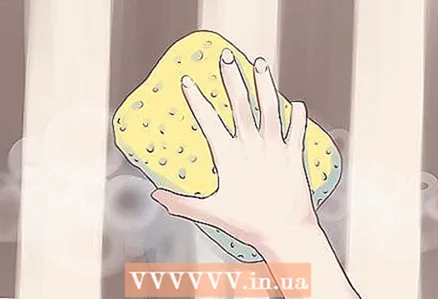
 4 Wet the walls. If your wallpaper is easy to dry, then you can skip this step. If you have porous or non-porous wallpaper (not removed to dry), then you need to wet it. Use a sponge and a bucket of mortar or a spray bottle (depending on the area of the wall) to thoroughly wet the wallpaper. Leave them on for 10 minutes so that the water is absorbed and the wallpaper peels off the wall.
 - Do not wet all the walls at once. It is best to water an area large enough to remove the wallpaper in 15 minutes. If wet wallpaper stays on the wall longer, moisture can damage the plaster. Try working in 1 x 3 meter sections.
- To treat wallpaper under the ceiling, you can use a paint roller or mop soaked in the solution.
- When treating wallpaper with steam, try to remove the wallpaper immediately after passing through the area. After finishing work, place the hot head of the steam system on a baking sheet.
 5 Proceed to uninstall. It is convenient to pry and remove wallpaper with a spatula and a special scraper. It is better to go with an acute angle backward rather than forward; this reduces the likelihood of prying the plaster along with the wallpaper. Continue removing the wallpaper until you have cleaned the entire wet area.
 - Removing wallpaper in one area, you can wet the other and leave to soak. So the work will go faster.
- Sometimes, after one wet, the wallpaper is still not removed. In this case, spray the area with water again and wait again for 10 minutes.
 6 Continue to work. Continue to wet or steam the walls, letting them soak and removing the wallpaper in patches until all layers of wallpaper on the wall have been removed. Now you can walk along the walls and remove small residues.
 - When you are already removing soaked and pliable wallpaper, keep a wet sponge handy anyway, as it will come in handy in some places.
 7 Clean the walls. After removing the wallpaper, wash the walls with clean, warm fresh water. This will prepare the walls for further processing, be it renovation or painting. Or maybe you want to paste the wallpaper again!
Tips
- Instead of solvent for wallpaper, you can use warm or hot 50% vinegar solution. There will be a vinegar smell in the room, but it perfectly dissolves dried old glue.
- Remove furniture, curtains and rugs from the room so as not to stain them while working.
Warnings
- Many old wallpapers contain arsenic, and other questionable substances may be present in the glue - DO NOT allow children or pets to be in the room with you!
What do you need
- Wallpaper scraper
- Putty knife
- Wallpaper remover
- Water bucket and sponge
- Spray
- Wallpaper punching tool (or sandpaper)


