Author:
Gregory Harris
Date Of Creation:
11 August 2021
Update Date:
1 July 2024

Content
- Steps
- Method 1 of 5: Prepare the leaves for drying
- Method 2 of 5: Hang the leaves
- Method 3 of 5: Dry the sage in a fruit and vegetable dryer
- Method 4 of 5: Dry the sage in the oven
- Method 5 of 5: Respect Dried Sage Storage Conditions
Unlike many other herbs, sage is very easy to dry.The reason is that sage leaves contain relatively little moisture. This makes sage ideal for drying. Before drying the sage, the leaves must be separated from the stem and washed. If you're looking for a quick way to dry, use an electric dryer or oven. Dried sage should be kept in an airtight container.
Steps
Method 1 of 5: Prepare the leaves for drying
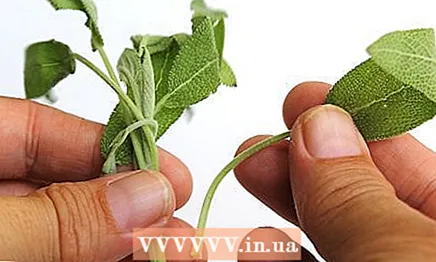 1 Separate the leaves from the stem. Sage leaves are quite dense, so they will dry faster if you first separate them from the stem. Peel off each sheet carefully and place on a clean towel.
 - You can also use sharp scissors to cut the leaves off the stem, but this will take a little longer.
 2 Get rid of damaged, blackened and loose leaves. Check each sheet and if you find any damaged ones, throw them away. If this is not done, the seasoning will only spoil the taste of your dishes.
 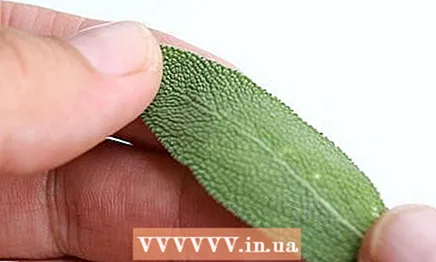 3 Check the leaves for insects. Herbaceous plants, including sage, are one of the favorite places for insects. Examine each sheet carefully. They may have crawling bugs, remains of cobwebs, and tiny larvae.
 - Leaves can be cleaned of insect marks and then used, but it is better to get rid of them and use clean, healthy leaves.
 4 Rinse the leaves with cold water, then shake off excess water. Take the leaves in your hand or place them in a colander and rinse under running water for a few seconds. The sage leaves are quite large, so it will be more convenient to put them in a colander. After washing the leaves, gently shake them over the sink to shake off excess water and spread them out on a clean, dry towel.
 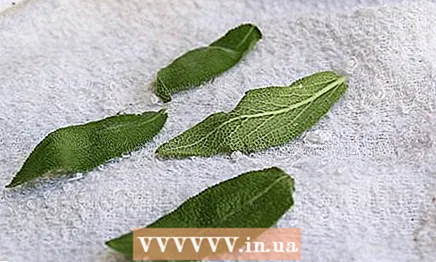 5 Dry the leaves with a clean towel. Take another clean towel, place it on the leaves and press lightly to absorb any remaining moisture. Then transfer the leaves to a dry towel.
Method 2 of 5: Hang the leaves
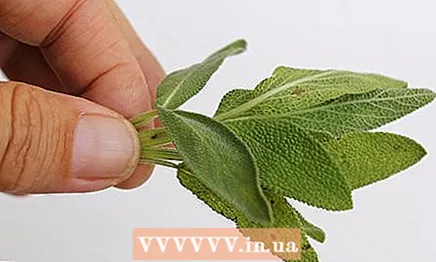 1 Collect the leaves into bunches. Fold the leaves into bunches one at a time, holding them by the cuttings. There should be no more than eight leaves in one bunch. This is necessary so that there is enough space between them for air.
 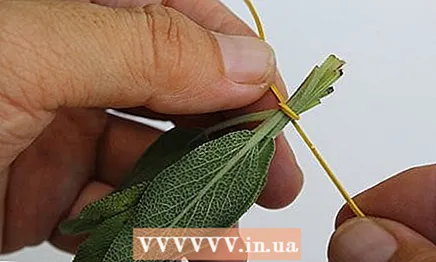 2 Tie the bundles with thread, twine, or elastic. Secure the bundles by tying the cuttings at the base. Leave a small piece of thread or tie an extra piece of thread to a bunch to hang the bun.
 - If you use an elastic band, the knot will tighten as the sage dries. Thanks to this, the leaves will definitely not fall out of the bunch.
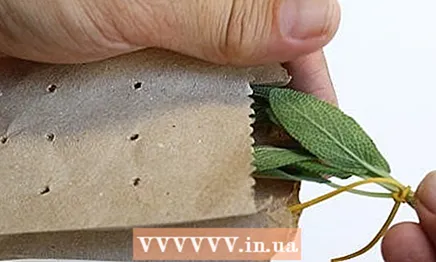
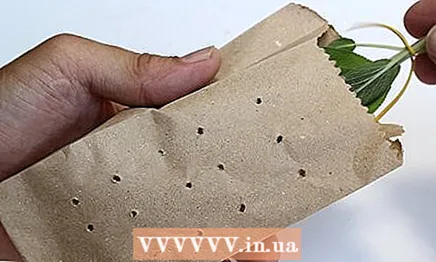 3 Place the bunches of sage in a perforated paper bag. The bag will keep dust out of the leaves, and the holes will allow air to circulate. Place the bundles in the pouch and leave it open.
 - If you don't have paper bags, you can wrap the bundles in cheesecloth. The main thing is that in no case put the leaves in plastic wrap, otherwise mold will form on them.
- Some people like the look of dried herbs, so they prefer not to cover the leaves with anything, but in this case, you will have to dust them from time to time.
 4 Hang sage in a well-ventilated area away from direct sunlight. Take the bundles and hang them by the strings. Make sure that the air is actively circulating in the location you choose. It is best to dry the leaves in the kitchen in an area that is usually dry and out of direct sunlight.
 - It is recommended to dry sage at home and not outdoors. This way it will better preserve its taste and color.
- You can also dry the sage on a paper towel. Arrange the leaves so that they do not touch each other, and change the towel daily.
- Do not dry sage in damp areas, such as near a sink, stove, or dishwasher.
 5 Turn the leaves every 1-2 days to dry evenly. Untie the thread that ties the bundle and turn the leaves over. Even with good air circulation, the bundles may dry unevenly. There may be more air or light on one side than on the other, which will dry that side faster.
  6 If you live in a high humidity environment, be careful not to grow mold on the leaves. Drying in such conditions is possible, but the likelihood of mold growth increases dramatically. If you notice dark spots or white fuzz, remove the tufts immediately.
 - If you live in a humid environment, it is best to choose a different drying method, such as a fruit and vegetable dryer.
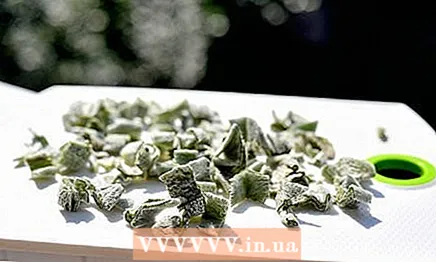 7 Dry the bundles for 7-10 days. Check the drying progress daily. Dry the leaves until they are fine. If you remove the leaves too early, they can grow moldy and deteriorate over time.
 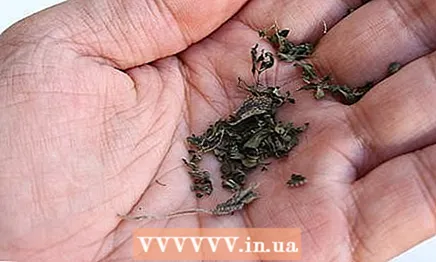 8 Check the dryness of the leaves. Determine how dry and crunchy the leaves are. Take a sheet and try to crumple it in the palm of your hand. If it crumbles easily, the sage is dry.
  9 Remove insects and larvae from dried leaves. When inspecting the leaves, you may not have noticed some traces of insects, so after drying, they also need to be cleaned. You can get rid of insects and larvae using an oven or freezer.
 - To destroy insects and their larvae using the oven, heat it to 70 ° C and put the leaves in it for 30 minutes. Do not heat the leaves for more than 30 minutes, otherwise the sage will lose its flavor.
- To kill insects and their larvae using the freezer, place the leaves in the freezer for 48 hours.
- If you dry your herbs at a high temperature, you do not need to remove insects after drying.
Method 3 of 5: Dry the sage in a fruit and vegetable dryer
 1 Set the dryer to a low temperature. The best temperature for drying sage is 35 to 45 ° C. At a low temperature, sage will dry for a long time, but with such drying, the taste and aroma of the seasoning will be preserved.
 - If you live in a high humidity area, you may need to raise the temperature to 50 ° C.
 2 Arrange the leaves in a single layer on the tray. To keep the leaves dry evenly, arrange them so that they do not touch or overlap. If you have a lot of leaves, you may need to dry them in several batches.
 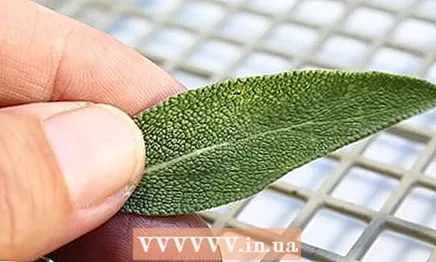 3 Dry sage separately from other foods to keep the flavors from mixing. Do not dry sage with other herbs or fruits. Of course, it is much faster and more convenient to dry several foods together than separately, but the result is a mix of tastes and smells.
  4 Check the leaves every 30 minutes. Sage can take from 1 to 4 hours to dry, depending on which appliance you use. See if the dryer manual has any recommendations for drying times.
 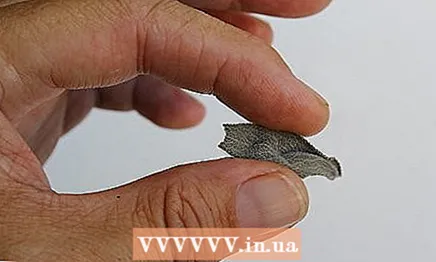 5 Determine if the sage is dry enough. The edges of the leaves should be dry. Take one sheet and fold it in the palm of your hand. If it crumbles easily, it is dry enough.
Method 4 of 5: Dry the sage in the oven
 1 Spread the sage on a baking sheet. Place baking paper on the baking sheet before placing the sage. Arrange the leaves so that they do not touch or overlap, or they will dry unevenly. If one part of the sheet dries out more than the other, the sheet may subsequently break.
  2 Set the oven to the lowest temperature. If sage is dried in the oven even at medium temperatures, it will quickly lose its flavor and color, and the oils it contains will evaporate completely. It is necessary to dry the leaves as slowly as possible to avoid their destruction.
 - The maximum permissible drying temperature is 80 ° C.
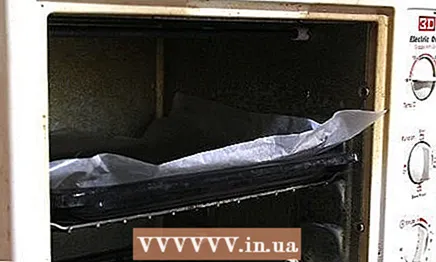 3 If you are using an electric oven, leave the door open. This will promote better air circulation, which is important when drying herbs. It also prevents the oven temperature from rising too high.
 - If you have a gas oven, do not open the door, otherwise gas will seep into the kitchen, which can be dangerous. Instead, open the door every 5 minutes to let some air into the oven.
 4 Turn the leaves over after 30 minutes. Remove the baking sheet from the oven and place on a heat-resistant surface.Only touch the baking sheet through the potholders, and turn the leaves with kitchen tongs. Then put the baking sheet back in the oven.
 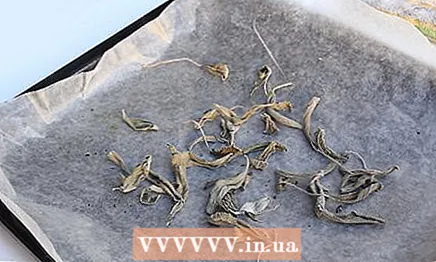 5 Dry the sage for 1 hour. Set a timer and check the sage every 15 minutes just in case.
 - If you think the sage will dry out earlier, remove the baking sheet from the oven. Herbs are very easy to dry out.
 6 Determine the dryness of the leaves. Leaves should be dry and crunchy. Crumple the leaf in the palm of your hand to determine how easily it crumbles.
Method 5 of 5: Respect Dried Sage Storage Conditions
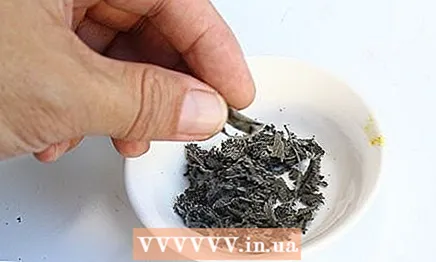 1 Grind the sage leaves with your fingers. Chop the leaves if you are going to use sage as a seasoning. Rub each leaf separately in your hand. The resulting mass can be stored and used as a seasoning.
 - If you want to store sage in bunches, do not chop the leaves.
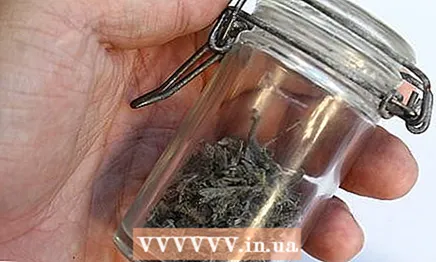 2 Transfer the dried sage to an airtight container. You can use a jar, plastic container, or zip-lock bag. The storage container must be completely airtight. Otherwise, the seasoning will deteriorate due to moisture in the air.
 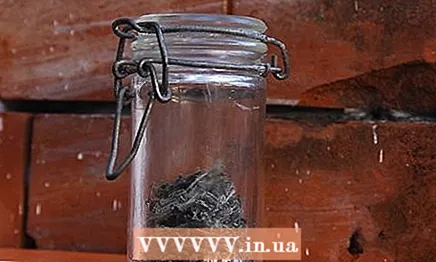 3 Store the container in a cool, dry place. You can store sage in a closet, closet, or refrigerator.
 - If you store sage in a clear jar, place the jar in a dark place to prevent the sage from losing its color.


