Author:
Janice Evans
Date Of Creation:
24 July 2021
Update Date:
1 July 2024

Content
- Steps
- Part 1 of 4: Preparing the rods
- Part 2 of 4: Weaving the bottom
- Part 3 of 4: Weaving the walls
- Part 4 of 4: Making a pen
- What do you need
- Tips
For thousands of years, people have woven baskets from natural materials such as willow and reed. Nowadays, basket weaving is a rewarding practical skill as well as a serious art form. If you follow the step-by-step instructions below for weaving a willow basket, the result is a functional basket that can be used at home on the farm, while also beautiful enough to display. To get started, go to step 1.
Steps
Part 1 of 4: Preparing the rods
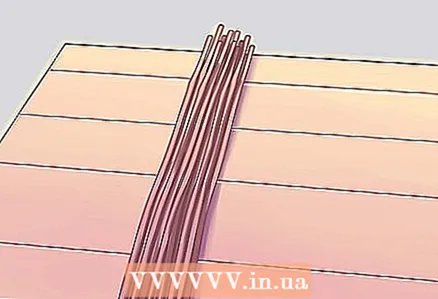 1 Take a bunch of willow twigs. Baskets can be woven from any flexible reed, grass, vine, or twig, but willow is the most popular choice because it creates sturdy baskets when dry. You can make your own willow rods, or you can buy them at a handicraft store.
 - You will need large bundles of thick, medium, and thin twigs to weave the various parts of the basket. Make sure you have enough long, thin rods, the longer the better, so that you don't have to fly out new rods very often.
- If you will be harvesting willow twigs yourself, you will need to dry them before using. The willow twigs shrink when dry for the first time. Spread them out to dry for several weeks before using.
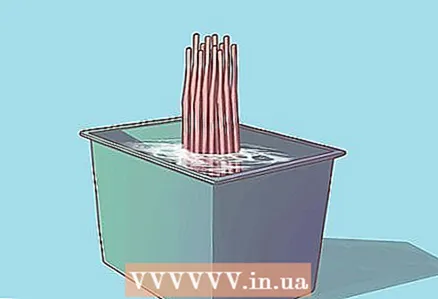 2 Soak the willow twigs. To use the twigs in basket weaving, you will need to soak them to make them flexible. Soak the rods in water for a few days until they bend easily and stop breaking.
  3 Cut the rods for the base. Choose a few thick twigs to serve as the base for the basket. Use the pruning shears to cut 8 willow twigs into the same length. The size of the willow rods for the base will determine the diameter of the bottom of the basket.
 - For a small basket, cut the rods into 30 centimeters each.
- For a medium-sized basket, cut the rods into 60 centimeters.
- For a larger basket, cut 90 centimeters of rods.
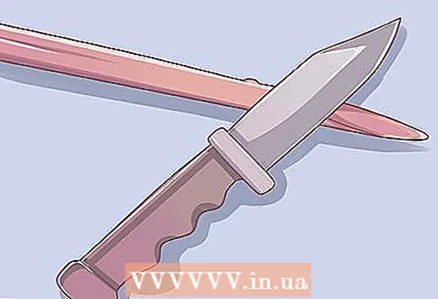
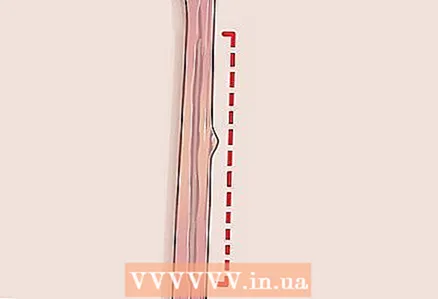 4 Make a notch in the center of the four rods. Place 1 rod in front of you on a work surface. Use a very sharp knife to make a 5 cm vertical slit in the middle of the rod. Repeat the process with the three remaining rods to make 4 rods with a slot in the middle.
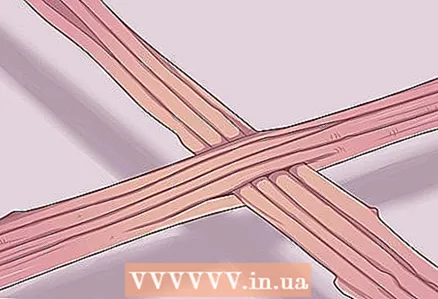
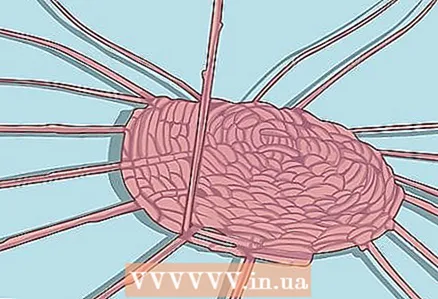
 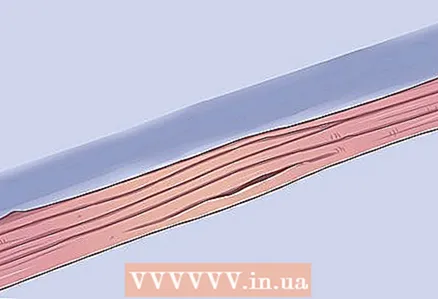 5 Assemble the base. It will be used to weave the bottom of the basket. Place 4 slotted rods side by side. Pass the 4 remaining rods through the slots of the four rods so that they are flat and perpendicular to the slotted rods. You should have the shape of a cross, made up of four slotted rods and four simple rods passed through them. This is the base of the bottom. Each of the 4 groups of bottom rods is called a ray.
Part 2 of 4: Weaving the bottom
 1 Insert 2 working rods. It's time to start weaving the basket. Find two long, thin rods of roughly the same length. Insert their ends on the left into the slot in the base so that the twigs stick out next to the base beams. These two thin rods will be called workers, they will braid around the base beams and create a basket shape.
 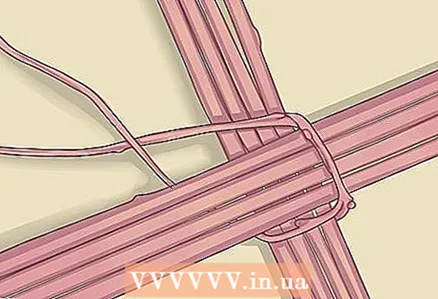 2 Double weave to reinforce the base. Pair weaving is a type of weaving that uses two working rods to create a secure base for your basket. Divide the working rods and bend them to the right towards the nearest beam. Place 1 rod above the beam and the other below it. Then reattach the working rods together to the right of the beam. Now bring the lower rod up to the next ray, and the upper one down. Turn the bottom and continue weaving, alternating the arrangement of the two working rods. Continue paired around the four beams until 2 rows have been braided.
 - Make sure you twist the rods in one direction when braiding.
- The weave should be tight so that the rows fit snugly together.
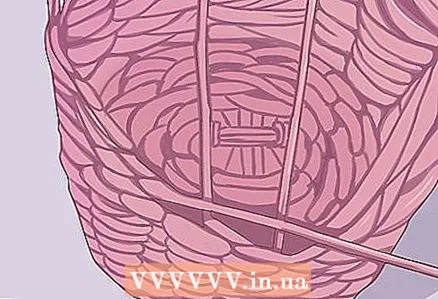
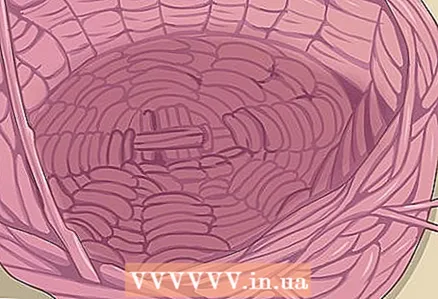
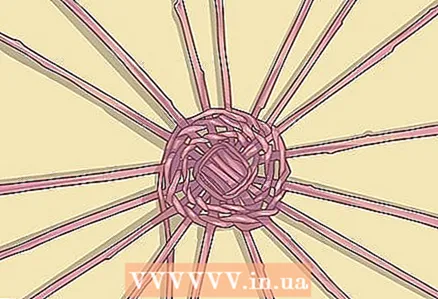 3 Divide the base beams. On the third row of weaving, it is time to separate the beams to form a round shape for the bottom of the basket. Now, instead of braiding the groups of twigs, separate them and pair them around each individual base rod using the same method.
 - For a start, it can help if you bend each rod of the base to form a fan (similar to the placement of bicycle spokes). make sure all the base rods are fanned evenly relative to each other before you start braiding.
- Continue pairing around the individual basket base rods until you reach the desired basket bottom diameter.
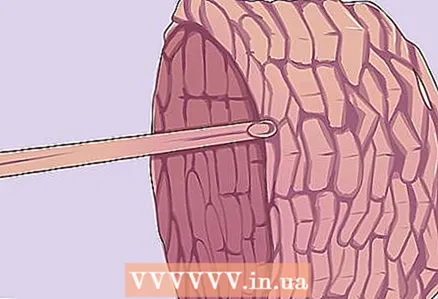
 4 Add new working rods as needed. When you run out of an old working rod, choose a new rod that closely resembles it. Use a knife to sharpen the tip of the new cane. Stick it between the weaves of the last two rows and bend it towards the continuation of the weaving. Make sure to hold the pruner securely in place before trimming the old pruning shears. Continue to weave the basket with a new working rod.
 - Do not replace more than one rod at a time. Replacing two or more rods in one place can create a weak point in the basket.
Part 3 of 4: Weaving the walls
 1 Install the side racks of the basket. Choose 8 long, medium-thick rods for the rack posts. These will be vertical rods that will form the structure of the basket walls. Sharpen the ends of the uprights with a knife. Insert each of the uprights into the bottom of the basket, pushing them as deep as possible towards the middle. Bend the struts up. Cut the base bars with pruning shears so that they end at the edge of the bottom of the basket, and then tie the ends of the bars together to prevent them from falling apart.
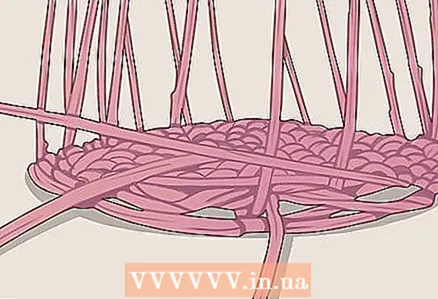
 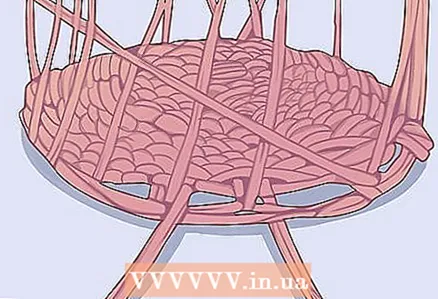 2 Weave two rows of string with three rods. For this weaving, 3 working rods are required, with which the racks are braided for fixation. Pick up three long, thin rods. Sharpen the tips. Stick them into the bottom on the left side of three successive racks. Now weave in the following order:
 - Bend the far left bar in front of the two uprights. Start it behind the third rack and bring it forward again.
- Take the next leftmost rod and bend it to the right in front of the two uprights. Start it behind the third rack and bring it forward again.
- Continue braiding in this manner, always starting with the leftmost working rod, until you have braided 2 rows of string into three rods.
- Untie the ends of the uprights.
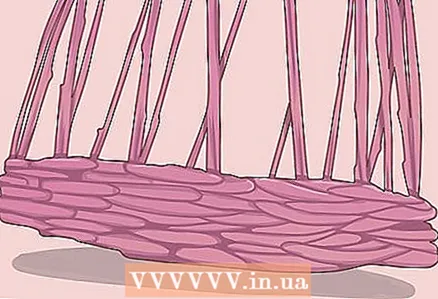
 3 Add working rods to weave the sides of the basket. Find 8 long thin twigs. Sharpen the ends with a knife. Insert 1 working rod behind the rack. Bend it to the left in front of the next post, lead it behind the next post on the left and bring it forward again. Now insert the second working rod behind the post on the right side of the starting point and do the same: bend it to the left in front of the adjacent post, lead it behind the next post on the left and bring it forward again. Continue to weave the working rods until each rack has a working rod.
 - When weaving the last two working rods, you will need to lift the first woven rods slightly to make room for the latter to slip in. To do this, use an awl and a long nail.
- This type of weaving is called French hem. This fairly common weave creates upright sides of the basket.
 4 Weave the sides of the basket. Take the working rod, pass it in front of the next post on the left, lead it behind the next post on the left and bring it forward again. Take the next working rod to the right of the first one and pass it in front of the adjacent post to the left, lead it behind the next post to the left and bring it forward again.Continue to weave the entire basket in this way, always taking the next working twig right.
 - When you get to the starting point, you will see that the two working rods are behind the last two racks. Both rods must be braided around the posts. Weave the bottom first, then the top. On the last stand, first weave the bottom and then the top.
- Continue braiding until you have braided the sides of sufficient height, then cut off the ends of the working twigs.
 5 Secure the weave with a row of 3-strand string. Pick up three long, thin rods. Sharpen the tips. Stick them on the left side of three consecutive racks. Now weave one row of rope as follows:
 - Bend the far left bar in front of the two uprights. Start it behind the third rack and bring it forward again.
- Take the next leftmost rod and bend it to the right in front of the two uprights. Start it behind the third rack and bring it forward again.
- Continue braiding in this manner, always starting with the leftmost working rod, until you have braided a row of three rods of string.
 6 Finish the edge. Fold one of the uprights to the right and slide over the next two uprights. Swipe in front of the third and fourth racks. Swipe past the fifth and then forward again. Repeat with the next stance to the right of the first.
 - For the last two uprights, there will no longer be any other uprights to braid, as they will all already be braided into the edge. Instead of braiding them around the racks, simply weave them into the edge of the basket (passing the tip of the rod through the rest of the rods), following the pattern formed.
- Cut the ends of the woven uprights flush with the sides of the basket.
Part 4 of 4: Making a pen
 1 Make a base. Fold it over the basket, holding the tips in place to determine the height of the handle. Trim to size, leaving a few centimeters on each side. Sharpen the ends and stick them into the basket at the racks on opposite sides.
 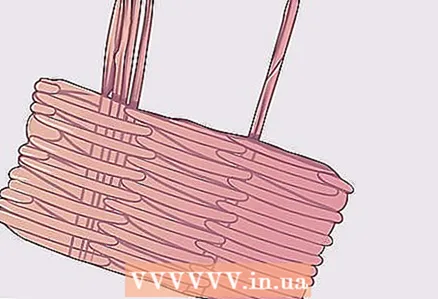 2 Stick 5 thin twigs into the weave near the handle. Sharpen the ends of the twigs and stick them deep into the weave so that they lie close together.
 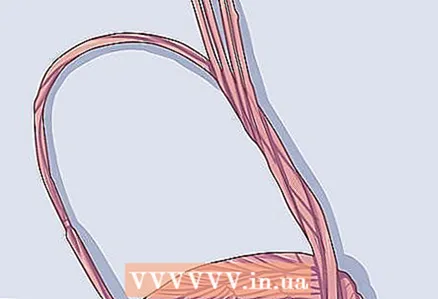 3 Wrap the twigs around the handle. Take the rods and wrap them around the handle like tape until you reach the opposite end of the handle. The rods should lie flat side by side with each other. Slip the ends into the hem of the woven basket.
 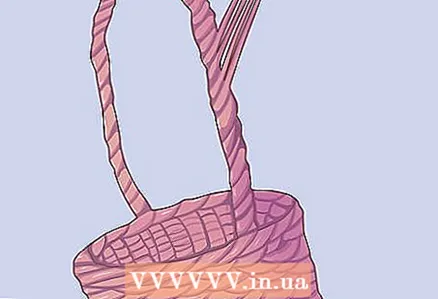 4 Stick the other 5 thin sticks on the opposite side of the handle. Moving in the other direction, wrap the rods around the handle, filling in the space not covered by the first set of rods. Continue wrapping around the handle until you reach the opposite side, and then tuck the ends of the twigs into the top of the braided edge of the basket.
  5 Lock the bases of the handle. Insert a thin rod into the braid at the base of the handle. Bend it towards the handle and wrap it tightly at the base several times to secure the rods in the handle. Wrap the rod tightly until the handle is securely locked, then pass the tip under the last loop and tighten, and then cut. Lock the opposite end of the handle in the same way.
What do you need
- Large bunch of willow twigs
- Secateurs
- Knife
- Long nail or awl
Tips
- To keep the rods flexible as you work, spray them with water from a small bottle.

")

