Author:
Janice Evans
Date Of Creation:
2 July 2021
Update Date:
1 July 2024

Content
If you like to drink soda, coffee, wine, or any other drink without distracting from your laptop, remember that this is not safe - an unstable cup can tip over and liquid can spill from an accidental shock. If this happens, don't panic. Follow these simple instructions immediately to save your computer.
Steps
 1 Turn off your laptop! Remove the battery, power adapter and unplug the laptop immediately. The greatest danger to electronics from spilled liquid is a short circuit. Damage occurs almost immediately when the liquid interacts with live parts of the laptop, so the sooner you disconnect the device from the mains and remove the battery, the more likely it is to save the laptop.
 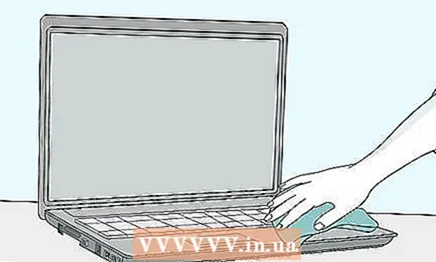 2 Disconnect and remove all external devices.
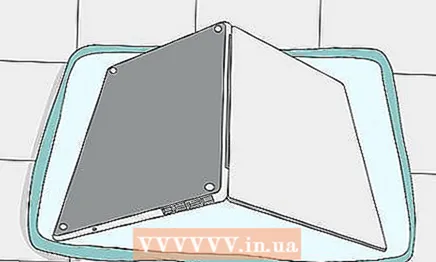
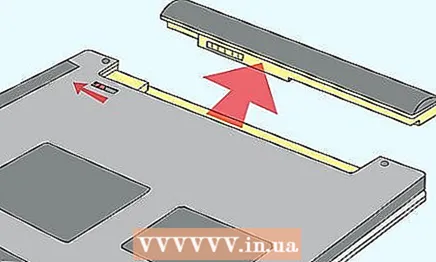 3 Turn the laptop over to prevent further liquid spreading inside the case.
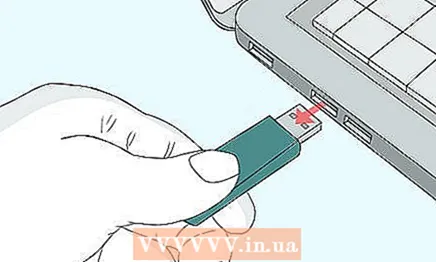 4 Wipe dry any parts you can reach. Use paper towels or any other absorbent, lint-free material.
  5 Examine the keyboard. Some keyboards are designed to prevent liquids from entering the laptop case:
 - Pour out any liquid that gets into the keyboard compartment.
- Remove and clean the detachable keyboard (depending on model).
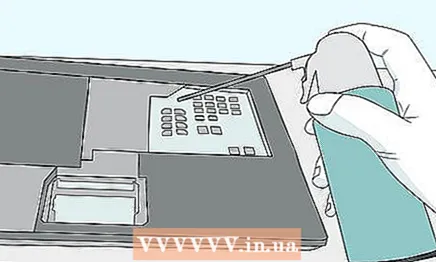
 6 Wipe down all areas requiring special attention. These surfaces include the monitor screen, keyboard keys, and other buttons. Use a clean, slightly damp, lint-free cloth.
 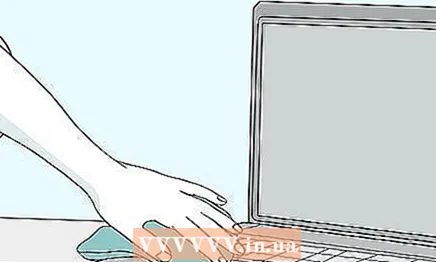 7 Isolate yourself to prevent static discharge. Static discharge can be very high voltage. Static electricity from your hands or body can damage your computer even if it has not been exposed to moisture. Learn how you can insulate yourself to prevent ESD damage to electronics.
  8 Disassemble the laptop case. If you are unable to reach all of the spilled liquid, you may need to disassemble the laptop case. Some liquids contain chemicals that can corrode laptop circuit boards:
 - If you are not sure that you can disassemble the device yourself, it is recommended that you find a wizard who can do this as soon as possible.
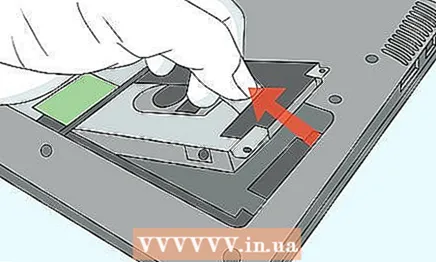
- Detach the hard drive to keep your data safe.
- Disconnect all removable devices and drives.
 9 Remove dry residue. Liquid stains such as cola or coffee can be removed with a toothbrush or lint-free cloth. Solids can be removed with compressed air or a vacuum cleaner with a power setting to ensure that the solids are gently removed when dry to a powder.
 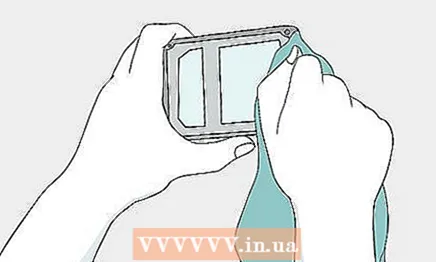 10 Wash off the contamination. If you spill any liquid other than water on your laptop, the hardest part of the “rescue” process will be rinsing the dirt off the parts. There are several ways to flush your device, depending on the type of liquid spilled and the risk you are willing to take:
 - Consider what kind of liquid was spilled on the laptop and determine if this liquid can be dissolved with water or if this liquid is a petrochemical product. In the first case, distilled water can be used to remove contamination. If the liquid was oily, you can rinse the surface with denatured alcohol and then with distilled water.
- Rinsing with water.Take contaminated parts of your laptop (such as those with spilled cola or old stains) and rinse them under the tap. Most printed circuit boards will tolerate water well as long as they are not connected to a power source. Other internal parts such as fans (coolers) and CD / DVD drives may not withstand rinsing with water.
- Rinsing with deionized or distilled water. Many people prefer to use deionized water instead of tap water. When using tap water, a sludge may form on the surface to be washed, which may subsequently cause a short circuit. Deionized water leaves no residue.
- Don't overdo it with flushing. Water and a laptop are things that can hardly be called compatible. Rinse the surface to remove dirt, but no more. Remove excess water carefully.
 11 Wait for the laptop to dry. Make sure all parts of the laptop are completely dry before proceeding. As with rinsing, there are different opinions on drying:
 - Leave to dry naturally. Position the laptop so that it does not come into contact with the surface, allowing free air circulation. Leave the device to dry for 24-48 hours. In the meantime, put the laptop battery in the dry rice container.
- Dry by a heat source. Leave the device on a warm battery or shelf in a warm place away from direct sunlight and near a heat source. However, it is worth remembering that the heat source should not be too strong, a moderately warm temperature is enough. Leave the device to dry for about 12 hours. Using desiccants can speed up the process. At a high drying temperature, condensation may occur, subsequently moisture will serve as a source of permanent problems with the computer, namely, oxidation of contacts and rusting.
- Never use a hair dryer, as this can cause static electricity, and your device will become more dirty and filled with dust. If the dryer is hot, some of the plastic parts may melt. In the worst case, using a hair dryer will penetrate deeper into circuits and components, subsequently causing oxidation and increased capacitive loading on integrated circuits and connections, ultimately causing device failure. The best way to remove any remaining moisture is to use a vacuum cleaner over each accessible area for up to 20 minutes. In this case, most of the liquid must already be removed by hand and all surfaces have been dried to prevent moisture from entering the vacuum cleaner. This method is preferable to natural drying, as it prevents the possibility of oxidation of small surfaces of compounds and components, which would otherwise lead to problems in the future.
 12 Solvent cleaning. Re-flushing with a solvent-based cleaner has its supporters and opponents. This method is recommended if a lot of time has passed from the moment the liquid was spilled until the attempts to clean the laptop and, possibly, rust has formed on the contacts. Always use gloves and keep the area well ventilated when handling any solvent or alcohol-based cleaning agent, as some cleaning agents may be carcinogenic.
 - If you suspect that the first flush did not remove all contaminants, flushing with a solvent may be effective. The advantages of such washing are that only one substance is used, the removal of this substance does not require much effort, since the solvents evaporate quickly, therefore, it does not take much time to dry.The disadvantages of this method include the fact that if you use the wrong type of solvent, you can literally "dissolve" your computer.
- Use 99% (not 90%) isopropyl alcohol. Never use gasoline or acetone to clean computer parts.
- Using cotton swabs and / or a soft toothbrush, gently scrub the area.
- Try using a flux remover that you can buy from an electrical supply store and replace isopropyl alcohol.
- Equipment damage does not occur from liquid spilling into the laptop, but when the current from the batteries causes a short circuit. In this case, you will have to spend a couple hundred dollars on repairs. Make sure your laptop is completely dry before turning it on.
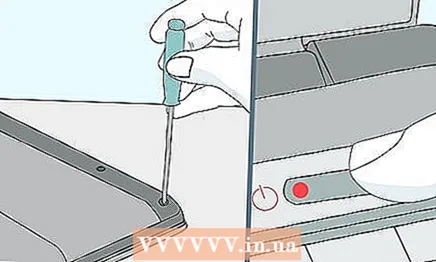 13 Assemble your laptop and test it to work.
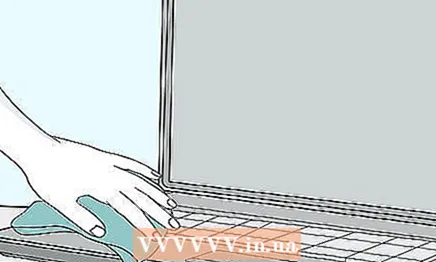 14 If the laptop does not turn on, take it to a service center.
Tips
- Some companies include a clause on the spillage of liquid on the device in the text of the warranty; check this item before disassembling the case. Some manufacturers will immediately revoke the warranty if traces of damage to the integrity of the device are found by unauthorized persons or personnel of the service company. Manufacturers carefully maintain a database of calls and repairs of equipment in authorized service centers. If a third party tampering is found and no records of previous repairs are available, the manufacturer may refuse to cover the costs of the repair.
- When drying the computer, allow air to circulate around the device. This can be achieved by positioning the laptop so that it does not touch a solid surface. To be sure, leave the laptop to dry for a few days.
- Deionized water is often used in the semiconductor industry because tap water contains many ions or chemical impurities that can leave deposits on sensitive electronics components.
- Do not try to remove the case by force, otherwise you may break plastic parts and bend metal parts. If you cannot disassemble the case, check: you may not have removed all the screws.
- Some tablet computers do not have a keyboard that can be broken or spilled on. These computers usually come with covers to protect connectors and ports. However, if you really "try", the liquid can get into the interior of such computers.
- Make sure to purchase an accidental spillage warranty if you intend to work in an environment where such spills are likely. This can add an extra hundred dollars to the cost of the computer, but it is much cheaper than buying a new computer.
- On some laptop models, disassembling the case is not so easy. In particular, you need to remove all screws. The screws are often very small and are found all over the surface in the most unexpected places. First, locate all the screws on the back cover and be sure to check all interior compartments, under the battery and under the stickers.
- The screws in the laptop case may be star-shaped. Accordingly, you need a set of Torx screwdrivers of the correct size.
- Please be aware that laptops are often manufactured with built-in components and connectors that may differ from manufacturer to manufacturer. Components that require all screws to be removed on one model may require you to remove the cover and disconnect all mounting brackets on another model.
- Several manufacturing companies sell laptop keyboard covers. It will take a little time to get used to the changed sensitivity of the keys, but at the same time, no liquid will get between the keys.
- If several types of screws are used to secure the case, you can sketch your laptop on paper and identify all the screws.Thus, you will know exactly the location of this or that screw when assembling the laptop.
- You can order a ruggedized laptop that is shock- and spill-resistant if you are unsure of its safety.
- You can purchase a warranty for a one-year replacement cost for the device at a reasonable cost (and use that warranty at least until the laptop drops in value). Do not purchase an extended warranty or a replacement warranty except for online purchases. You should also be careful in the case of third party warranties, which often cover only the cost of on-site repairs, but not the types of repairs available only from the manufacturer. In some cases, on-site repairs may use parts not approved by the manufacturer and will void the manufacturer's warranty.
- Expose Power supply functions your laptop when you close the lid on No action required... While you are drinking your coffee, you can close the laptop lid, thus protecting the keyboard from spilling liquids. In this case, after opening the lid, you do not have to re-enter the password. Also, if you download something, the system will not turn off when you close the lid. When you close the lid, the screen always turns off, regardless of software settings, this prevents overheating and conserves battery power.
- Check the instruction manual and the manual for the maintenance and repair of your laptop on the manufacturer's website. This will help you disassemble the laptop consistently.
- Some companies make laptop cases and sleeves. Cases cover the top and bottom of the laptop, protecting it from scratches (models with a handle), while cases allow you to completely cover the laptop (models with a zipper for the rear ports of the laptop). There are also more expensive models of covers that are designed for use in extreme conditions: for example, such covers are equipped with upholstery that prevents damage from falling from a low height.
- If possible, try to capture a video of the disassembly process. This will help in the subsequent installation of cables and mounting elements. It is enough to pierce the cable or ribbon cable with a screw in order to "fry" all the motherboards of the laptop.
- You can buy special tablets to deionize the water from the tropical fish section of your pet store.
- Manufacturers will typically disassemble and assess liquid damage for a nominal fee depending on the contractor doing the work and your computer model. You can find out all the details by calling the technical support of your manufacturer.
- Try turning off and on the device several times.
- Many liquid spills can be avoided... Try to keep your computer away from food and liquids.
Warnings
- Water and electricity are incompatible things! Make sure the power supply is completely disconnected.
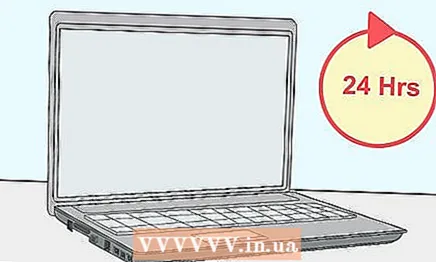
- Whatever you do, do not include your laptop to check if everything is in order. Leave the laptop for at least 24 hours to allow all liquid to evaporate and dry before turning on the computer.
- Even "clean" tap water can ruin electronics, as it contains minerals and chemical additives such as chlorine, a strong oxidizing agent.
- Organic solvents can be hazardous and even poisonous. Solvents should only be used in well-ventilated areas with personal protective equipment such as gloves and a respirator for organic solvents.
- If you choose to dry the device without cleaning the dirt, be prepared for the fact that any remaining acid over time can corrode the computer chips and cause damage.
- If the power adapter gets wet, you should replace it with a new one.
- Opening the laptop case will void your warranty.However, if acidic liquid is spilled on the device, the warranty will also be void. Acid damage is rarely covered under warranty.
- Many, if not all laptops have a CMOS battery, which is a permanent battery. Despite the low power, this is enough to cause a short circuit. It will likely be helpful to remove this battery (looks like a watch battery) as soon as possible after spilling liquid. It should be noted that this will delete all changes in the system BIOS settings.
What do you need
- Deionized / desalinated water or isopropyl alcohol
- Small screwdriver set
- Plastic bags for storing small parts and screws
- Paper towels, dry soft toothbrush, or cotton swabs
Additional articles
 How to format a laptop
  How to turn on the keyboard backlight on HP Pavilion How to remove a sticker from a laptop
  How to change the language on your computer
  How to transfer files from laptop to laptop
  How to adjust the bass on your computer
  How to save photos on Macbook
  How to download a folder from Google Drive to your computer
  How to connect your Chromecast to your computer
  How to boot your computer from an external hard drive
  How to use the keyboard for clicks instead of the mouse
  How to right click on a Macbook
  How to increase the size of an Outlook mailbox on a computer
 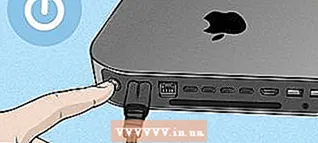 How to turn on your Mac


