Author:
Clyde Lopez
Date Of Creation:
24 June 2021
Update Date:
1 July 2024
![How to keep Inventory using an Excel Spreadsheet - [create your own Template]](https://i.ytimg.com/vi/msQoTuCsKJ4/hqdefault.jpg)
Content
- Steps
- Method 1 of 2: Using a template
- Method 2 of 2: How to Create a Stock Inventory from Scratch
- Tips
In this article, you will learn how to manage inventory using an Excel spreadsheet on a Windows or Mac OS X computer. You can use a ready-made template or create an inventory from scratch.
Steps
Method 1 of 2: Using a template
 1 Start Microsoft Excel. Click on the icon in the form of a white letter "X" on a green background.
  2 Click on the search bar. It's at the top of the Excel window.
 - On a Mac, first click File in the upper left corner and then click New From Template from the menu.
 3 Find a stock inventory template. Enter stocks in the search bar at the top of the page, and then click ↵ Enter... A list of templates for inventory management will open.
  4 Select a template. Click on the template that suits your needs. The template preview page will open.
 - Each inventory control template has different functions. If you don't like the selected template, click Escto return to the templates page.
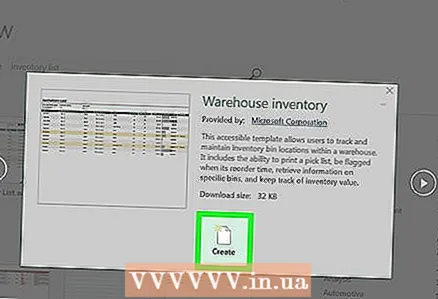 5 Click on Create. It's on the right side of the template preview window.
  6 Wait for the template to load and open. This may take a few seconds.
  7 Enter inventory information. To change the data in a cell, double-click it, delete the number or word, and enter the new data. Although the selected template may have different options, each inventory should include the following items:
 - Stock number of item.
- Name of product.
- Unit price.
- Quantity of goods.
- Total cost of goods.
 8 Save your changes. For this:
 - Windows - Click File> Save As> This PC, click on the folder to save in the left pane, enter a file name (for example, Inventory Inventory) in the File Name text box and click Save.
- Mac - Click "File"> "Save As", enter a file name (for example, "Inventory Inventory"), in the "Where" menu, select the folder to save and click "Save".
Method 2 of 2: How to Create a Stock Inventory from Scratch
 1 Start Microsoft Excel. Click on the icon in the form of a white letter "X" on a green background.
  2 Click on Blank book. It's an option in the upper-left side of the window.
 - Skip this step on Mac.
 3 Enter the column headings. Enter in the following cells:
 - A1 - Stock number of item
- B1 - Name of product
- C1 - Unit price
- D1 - Quantity of goods
- E1 - Total cost of goods
 4 Change the width of the columns. Click and hold the divider between the two columns, and then drag it to the right to expand the column.
  5 Enter the stock number of the item. Click on a cell A2, enter the stock number of the item (for example, 123456) and press ↵ Enter.
  6 Enter the name of the product. Click on a cell B2, and then enter the name of the product (for example, Cable ties).
 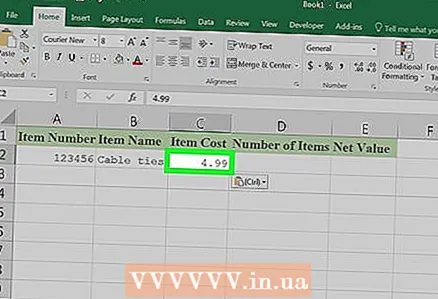 7 Enter the unit price of the item. Click on a cell C2 and enter the unit cost of the item (for example, 300).
 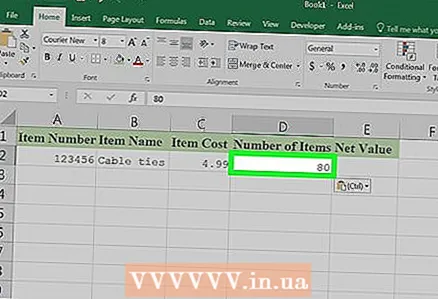 8 Enter the quantity of the item that is in stock. Click on a cell D2 and enter the quantity of goods in stock (for example, 80).
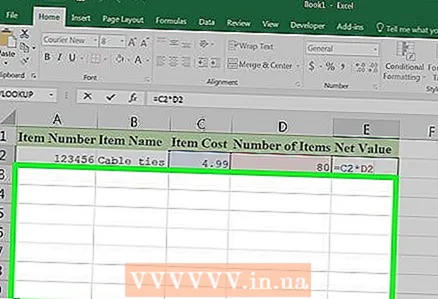
  9 Enter a formula to calculate the total cost of an item. Click on a cell E2, enter = C2 * D2 and press ↵ Enter... The cell will display the total cost of the item.
 - Enter the same formula in each cell in the "Total Cost of Goods" column - just instead of C2 and D2 enter the appropriate cell addresses (for example, if the values in the cells are multiplied C10 and D10, enter these addresses instead of C2 and D2).
 10 Add other items to inventory. Repeat the above process for every item in stock. Enter information about each new product on the next line.
  11 Save the table. For this:
 - Windows - Click File> Save As> This PC, click on the folder to save in the left pane, enter a file name (eg, Inventory Inventory) in the File Name text box and click Save.
- Mac - Click "File"> "Save As", enter a file name (for example, "Inventory Inventory"), in the "Where" menu, select the folder to save and click "Save".
Tips
- To add a new sheet to the table, click the "+" in the lower left corner.


