Content
- Steps
- Method 1 of 2: Create an Elementary Electromagnetic Emitter
- Method 2 of 2: Create a Portable EM Radiation Device
- Tips
- Warnings
- What do you need
Electromagnetic pulse (EMP) is a natural phenomenon caused by the sharp acceleration of particles (mainly electrons), which leads to an intense burst of electromagnetic energy. Common examples of EMP include lightning, combustion engine ignition systems, and solar flares. Despite the fact that an electromagnetic pulse can damage electronic devices, this technology can be used to purposefully and safely disable electronic devices or to ensure the safety of personal and confidential data.
Steps
Method 1 of 2: Create an Elementary Electromagnetic Emitter
 1 Stock up on the materials you need. To create the simplest electromagnetic emitter, you will need a disposable camera, copper wire, rubber gloves, solder, a soldering iron, and an iron bar. All of these items can be purchased at your local hardware store.
 - The thicker the wire you take for the experiment, the more powerful the final emitter will be.
- If you can't find an iron bar, you can replace it with a non-metallic bar. Note, however, that such a substitution will negatively affect the power of the pulse produced.
- When working with electrical parts that can hold a charge, or when passing an electric current through an object, we strongly recommend that you wear rubber gloves to avoid possible electric shock.
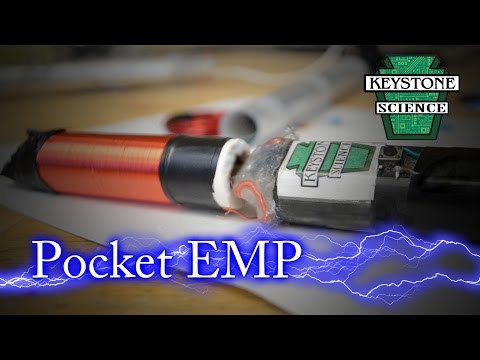
 2 Assemble the solenoid coil. An electromagnetic coil is a device that consists of two separate, but at the same time interconnected parts: a conductor and a core. In this case, an iron rod will act as a core, and a copper wire will act as a conductor.
 Wrap the wire tightly around the core, leaving no gaps between turns... Do not wrap the entire wire, leave a small amount at the ends of the winding so you can connect your coil to the capacitor.
 3 Solder the ends of the solenoid coil to the capacitor. The capacitor is usually in the form of a cylinder with two contacts, and you can find it on any circuit board. In a disposable camera, such a capacitor is responsible for the flash. Before unsoldering the capacitor, be sure to remove the battery from the camera, otherwise you may get an electric shock.
 - While you work with the circuit board and capacitor, rubber gloves will keep you safe from electrical discharges.
- Click the camera a couple of times after removing the battery to use up the accumulated charge in the capacitor. Due to the accumulated charge, you can get an electric shock at any time.
 4 Find a safe place to test your electromagnetic emitter. Depending on the materials involved, the effective range of your EMP will be approximately one meter in any direction. Be that as it may, any electronics that fall under the EMP will be destroyed.
 - Do not forget that EMP affects all devices within the radius of destruction, without exception, from life support devices, such as pacemakers, to mobile phones. Any damage caused by this device through EMP may have legal consequences.
- A grounded area, such as a tree stump or a plastic table, is an ideal surface for testing an electromagnetic emitter.
 5 Find a suitable test object. Since the electromagnetic field only affects electronics, consider purchasing an inexpensive device from your local electronics store. The experiment can be considered successful if, after activating the EMP, the electronic device stops working.
 - Many office supply stores sell fairly inexpensive electronic calculators that you can use to check the effectiveness of the emitter you create.
 6 Insert the battery back into the camera. To restore the charge, it is necessary to pass electricity through the capacitor, which will subsequently provide your electromagnetic coil with current and create an electromagnetic pulse. Place the test object as close to the EM emitter as possible.
 Note: the presence of an electromagnetic field is generally impossible to determine by eye.Without a test object, you will not be able to confirm the successful creation of an EMP.
 7 Let the capacitor charge. Disconnect the capacitor from the solenoid coil so that the battery recharges it, then use rubber gloves or plastic tongs to connect them again. Working with bare hands risks electric shock.
  8 Switch on the capacitor. Firing the flash on the camera will release the accumulated electricity in the capacitor, which, as it passes through the coil, will create an electromagnetic pulse.
 - The generated electromagnetic field will affect any electronics, including switched off ones. If you have selected a calculator as the test object, then after turning on the capacitor and in case of a successful creation of an EM pulse, the calculator will no longer turn on.
- Depending on the capacitor involved, the required voltage for charging it will also be different. The capacitance of a capacitor in a disposable camera is somewhere between 80-160 μF, and the voltage should be in the range of 180-330 volts.
Method 2 of 2: Create a Portable EM Radiation Device
 1 Get everything you need ready. Building a portable EMP device will go smoother if you have all the necessary tools and components with you. You will need the following items:
 - finger battery;
- corresponding battery compartment;
- copper wire;
- cardboard box;
- disposable camera (with flash);
- insulating tape;
- iron core (preferably cylindrical);
- rubber gloves (recommended);
- simple switch;
- solder and soldering iron;
- Radio antenna.
 2 Remove the circuit board from the camera. Inside the disposable camera there is a circuit board, which is responsible for its functionality. First, remove the batteries, and then the board itself, while not forgetting to note the position of the capacitor.
 - Working with the camera and the condenser with rubber gloves, thereby protect yourself from possible electric shock.
- Capacitors are usually in the form of a cylinder with two pins attached to the board. This is one of the most important details of the future EMP device.
- After you remove the battery, click the camera a couple of times to use up the accumulated charge in the capacitor. Due to the accumulated charge, you can get an electric shock at any time.
 3 Wrap copper wire around the iron core. Take enough copper wire to completely cover the iron core with evenly spaced turns. Also make sure that the turns are tight against each other, otherwise this will negatively affect the power of the EMP.
 Leave a small amount of wire at the ends of the winding. They are needed to connect the rest of the device to the coil.
 4 Apply insulation to the radio antenna. The radio antenna will serve as a handle on which the coil and camera board will be attached. Wrap the base of the antenna with electrical tape to protect it from electric shock.
  5 Secure the board to a thick piece of cardboard. The cardboard will act as another layer of insulation to keep you from getting a nasty electrical shock. Take the board and tape it to the cardboard, but so that it does not cover the paths of the electrically conductive circuit.
 - Secure the board face up so that the capacitor and its conductive paths do not come into contact with the cardboard.
- There should also be enough room for the battery compartment on the cardboard backing for the PCB.
 6 Attach the solenoid coil to the end of the radio antenna. Since electric current must pass through the coil to create the EMP, it is a good idea to add a second layer of insulation by placing a small piece of cardboard between the coil and the antenna. Take electrical tape and secure the coil to a piece of cardboard.
  7 Solder the power supply. Locate the battery connectors on the board and connect them to the corresponding contacts on the battery compartment. After that, you can fix the whole thing with electrical tape in a free area of the cardboard.
  8 Connect the coil to the condenser. It is necessary to solder the edges of the copper wire to the capacitor electrodes. A switch should also be installed between the capacitor and the solenoid coil to control the flow of electricity between the two components.
 During this assembly phase of the EMP device, you must remain wearing rubber gloves. The remaining charge in the capacitor could shock you.
 9 Attach the cardboard backing to the antenna. Take electrical tape and firmly attach the cardboard backing along with all the parts to the radio antenna. Attach it over the base of the antenna, which you should have already wrapped with electrical tape.
  10 Find a suitable test object. A simple and inexpensive calculator ideal for testing a portable EMP device. Depending on the materials and equipment used in the construction of your device, the EM field will either work in the immediate vicinity of the coil or cover a distance of up to one meter around it.
 Any electronic device within the range of the EM field will be disabled. Make sure that there are no electronic devices near the selected test site that you would not want to harm. All responsibility for damaged property will remain with you.
 11 Test your portable EMP device. Make sure the device switch is in the OFF position, then insert the batteries into the cardboard-backed battery compartment. Hold the device by the insulated antenna base (like the proton accelerator from Ghostbusters), point the coil towards the test object, and flip the switch to the ON position.
 - If you are in doubt about your knowledge and skills in connecting electronic components, wear rubber gloves as an extra precaution when working with the device.
- If the experiment is successful, the tested object, together with other electronics that are in the effective range of the EM field, will stop working.
- Depending on the capacitor involved, the required voltage for charging it will also be different. The capacitance of a capacitor in a disposable camera is somewhere between 80-160 μF, and the voltage should be in the range of 180-330 volts.
Tips
- The size of the copper wire and the length of the coil will determine the strength and radius of the electromagnetic pulse. For safety reasons, before you start building a larger, more powerful emitter, start with a small device to test the effectiveness of your design.
Warnings
- All responsibility for property damaged by the electromagnetic field will rest with you.
- It is extremely dangerous to work with electromagnetic pulses. There is a high risk of electric shock, and in rare cases, explosion, fire, or damage to electronics. Remove all electronic devices from the room or work area before creating a copper coil. Any electronic devices within a few meters of the pulse will be damaged.
What do you need
- Copper wire (EM emitter)
- Disposable camera (EM emitter)
- Iron rod (EM emitter)
- Solder and soldering iron (EM emitter)
- Finger-type battery (portable EMP device)
- Battery compartment (handheld EMP)
- Copper wire (handheld EMI device)
- Cardboard box (portable EMI device)
- Disposable camera (with flash; portable EMP device)
- Electrical tape (portable EMI device)
- Iron core (preferably cylindrical; portable EMP)
- Rubber gloves (recommended for both devices)
- Simple electrical switch (portable EMP device)
- Solder and soldering iron (handheld EMI device)
- Radio antenna (portable EMP device)


