Author:
William Ramirez
Date Of Creation:
22 September 2021
Update Date:
1 July 2024

Content
Many people would like to design a robot as a machine that would work autonomously. However, if we expand the concept of the word “robot” a little, then remotely controlled objects may well be considered a robot. You may think that it will be difficult to assemble a robot on a remote control, but everything is actually easier than it seems. This article will tell you how to assemble a remotely controlled robot.
Steps
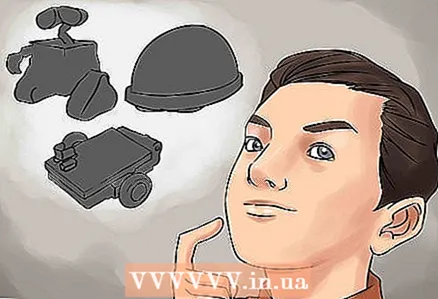 1 Decide what you will build. You are unlikely to be able to assemble a full-scale, bipedal humanoid that can fulfill all your whims. In addition, it will not be a robot with various claws capable of grabbing and dragging 5 kg objects. You will start by building a robot that can move forward and backward, left and right wirelessly from the control panel. However, after you master the basic aspects, you can improve your design and add various innovations, just follow the instruction: "There is no complete robot in the world." You can always add and improve something.
  2 Seven times measure cut once. Before starting the actual assembly of the robot, even before ordering the necessary parts. Your first robot will look like two servo motors on a flat piece of plastic. The design is very simple and leaves you room for improvement. The size of such a model will be about 15 by 20 centimeters. To create such a simple robot, you can simply sketch it using a ruler, paper and pencil in real size. For larger and more complex projects, you will need to learn the rules of scaling and automated programming.
  3 Select the parts you need. While it is not time to order parts, you should already select them and know where to buy. If you order online, it is best to find all the parts on one site, which will help you save on shipping. You will need frame or chassis material, 2 servomotors, battery, radio transmitter, transmitter and receiver.
 - Select the servos you need to drive the robot. One motor will drive the front wheels and the other will drive the rear. This way you can use the simplest steering method, differential gear, which means that both motors rotate forward when the robot moves forward, both motors rotate backward when the robot moves backward, and to make one of the turns, one motor runs, and Do not have another one. A servo motor differs from a conventional AC motor in that the former is only able to rotate 180 degrees and transmit information back to its position. This project will use a servo motor because it will be easier and you do not need to buy an expensive speed controller or a separate gearbox. Once you figure out how to assemble a robot on a remote control, you can construct another one or modify what you have using AC motors instead of servos. There are 4 important aspects to seriously consider before purchasing a servo motor, more specifically: speed, torque, size / weight, and if they can be modified to rotate 360 degrees. Since the servos can only rotate 180 degrees, your robot will only be able to move forward slightly. With a 360-degree retrofit option, you can tune the motor so that it rotates continuously to one side and allows the robot to go constantly one way or the other. Size and weight are very important for this project because you will most likely have a lot of free space anyway. Try to find something of a medium size. Torque is the power of the engine. This is what the gearbox is used for. If the motor does not have a gearbox and the torque is low, then your robot, most likely, will not budge because it does not have enough power. You can always buy and attach a stronger or faster motor after completing the assembly. Remember, the higher the speed, the less power will be. It is recommended to purchase the “HS-311” servo for the first prototype of the robot. This motor has a good balance of speed and power, is inexpensive and is the right size for the robot.
- Since this servo can only rotate 180 degrees, you will have to readjust it 360 degrees, but this procedure will violate the purchase warranty, but you will need to go for it to give the robot more freedom to move around. Instructions on this can be found on the Internet.
- Pick up the battery. You will need something to supply power to the robot. Do not try to use an AC power source (i.e. a regular outlet). Use an uninterruptible source (penlight batteries).
- Choose batteries. There are 4 types of batteries, among which we will choose: lithium polymer, nickel metal hydride, nickel cadmium and alkaline battery.
- Lithium polymer batteries are the newest and incredibly lightweight. However, they are dangerous, expensive and you will need to use a dedicated charger. Use this type of battery if you have experience in robotics and are ready to fork out for your project.
- Nickel cadmium is a common rechargeable battery. This type is used in many robots. The problem is that if you recharge them before they are fully discharged, they will not be able to last as long as when fully charged.
- A nickel metal hydride battery is very similar to a nickel cadmium battery in size, weight and price, but it has the best performance and is the type of battery recommended for beginner technicians.
- An alkaline battery is a common type of non-rechargeable battery. These batteries are very popular, cheap and readily available. However, they drain quickly and you will have to buy them all the time. Don't use them.
- Select battery specifications. You will need to find the correct voltage for your set of batteries. Mostly 4.8 (V) and 6.0 (V) are used. Most servos will run on one of these. It is recommended to use 6.0 (V) more often (if your servo can handle it, although most can) because it will allow your motor to be faster and more powerful. Now you should think about the battery capacity, which is measured in (mAh) (milliamps per hour). The higher this figure, the better, but the more expensive and the most difficult. For a robot of this size, 1,800 (mAh) is best. If you have to choose between 1450 (mAh) and 2000 (mAh) with the same voltage and weight, then choose 2000 (mAh), as this battery is better in all respects and will only be slightly more expensive. Don't forget to purchase a charger for your battery.
- Choose batteries. There are 4 types of batteries, among which we will choose: lithium polymer, nickel metal hydride, nickel cadmium and alkaline battery.
- Choose a material for your robot. The robot will need to attach a frame to attach all the electronics. Most robots of this size are made of plastic or aluminum. For beginners, the use of a plastic board is recommended. This type of plastic is cheap and easy to use. The thickness will be about half a centimeter. What size sheet of plastic should you buy? Take a sheet large enough to have a second chance if you fail, but buy enough for 4 or 5 tries.
- Select a transmitter / receiver. This part will be the most expensive part of your robot. Besides, this will be the most important part, because without it, your robot will not be able to do anything. It is recommended that you start with a very good transmitter / receiver, because it is this detail that can serve as an obstacle to improving your robot in the future. A cheap transmitter / receiver will set the robot in motion very well, but most likely, all the possibilities of your mechanical creation will end there. So instead of buying a cheap device now, and an expensive one in the future, it is better to save money and buy an expensive and powerful transmitter / receiver today. Although there are only a few frequencies you can use, the most common are 27 (MHz), 72 (MHz), 75 (MHz) and 2.4 (MHz).The frequency 27 (MHz) is used for airplanes and toy cars. Frequency 27 (MHz) is most often used in children's toy cars. This frequency is recommended for very small projects. The 72 (MHz) frequency can only be used for large model airplanes, so it would be illegal to use that frequency, as you could disrupt the signal of a large model airplane, which could crash on the head of a passer-by and cripple or even kill him. The 75 (MHz) frequency is only used for terrestrial purposes, so feel free to use it. However, there is nothing better than the 2.4 (GHz) frequency, which is subject to the least amount of interference, and we highly recommend that you spend a little more money and choose a transmitter / receiver with this frequency. Once you have decided on the frequency, you should decide how many channels you will be using. The number of channels determines how many functions your robot will support. One channel will be assigned to driving forward and backward, the second will be responsible for turning left and right. However, it is recommended that you acquire at least three channels, because you may want to add something else to the robot's arsenal of movements. With four channels, you also get two joysticks. As we noted earlier, you should get one of the very best transmitters / receivers so you don't buy another one later. Plus, you can use the same device in other robots or science and technology projects. We advise you to take a closer look at the 5-channel radio system “Spektrum DX5e MD2” and “AR500”.
- Select wheels. When choosing wheels, pay attention to three main aspects: diameter, grip and how well they fit your engine. Diameter is the length of the wheel from one side, passing through the center point, to the other side. The larger the diameter of the wheel, the faster it will rotate and, the greater the height it will be able to drive in, and the less grip it will have with the ground. If you bought small wheels, then they are unlikely to pass in difficult areas or accelerate to crazy speed, but in return you will get more power from them. Traction force refers to how well the wheels grip the ground with a rubber or foam rubber coating so that the wheels do not slide on the surface. Most wheels designed to connect to a servo motor will not be too difficult. It is recommended to use a wheel with a diameter of 7 or 12 centimeters with a rubber coating around them. You will need 2 wheels.
- Select the servos you need to drive the robot. One motor will drive the front wheels and the other will drive the rear. This way you can use the simplest steering method, differential gear, which means that both motors rotate forward when the robot moves forward, both motors rotate backward when the robot moves backward, and to make one of the turns, one motor runs, and Do not have another one. A servo motor differs from a conventional AC motor in that the former is only able to rotate 180 degrees and transmit information back to its position. This project will use a servo motor because it will be easier and you do not need to buy an expensive speed controller or a separate gearbox. Once you figure out how to assemble a robot on a remote control, you can construct another one or modify what you have using AC motors instead of servos. There are 4 important aspects to seriously consider before purchasing a servo motor, more specifically: speed, torque, size / weight, and if they can be modified to rotate 360 degrees. Since the servos can only rotate 180 degrees, your robot will only be able to move forward slightly. With a 360-degree retrofit option, you can tune the motor so that it rotates continuously to one side and allows the robot to go constantly one way or the other. Size and weight are very important for this project because you will most likely have a lot of free space anyway. Try to find something of a medium size. Torque is the power of the engine. This is what the gearbox is used for. If the motor does not have a gearbox and the torque is low, then your robot, most likely, will not budge because it does not have enough power. You can always buy and attach a stronger or faster motor after completing the assembly. Remember, the higher the speed, the less power will be. It is recommended to purchase the “HS-311” servo for the first prototype of the robot. This motor has a good balance of speed and power, is inexpensive and is the right size for the robot.
 4 Now that you have selected the parts you need, order them online. Try to order them from as few sites as possible, which will allow you to save on shipping costs and get all the parts at the same time.
  5 Measure and cut out the frame. Take a ruler and a cutting object, and measure the length and width of the walking frame, approximately 15 (cm) by 20 (cm). Now, check how straight your lines are. Remember, measure seven times, cut once. If you use a plastic board, you will be able to cut it in the same way as its wooden namesake.
 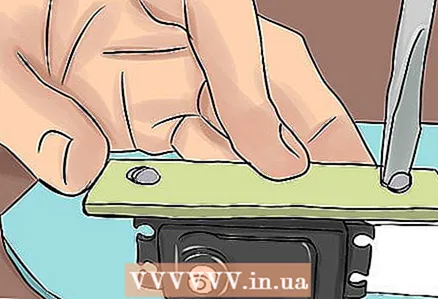 6 Assemble the robot. At the moment, you have all the necessary materials and a cut out undercarriage.
 - Place the servomotors on the bottom side of the plastic board near the edge. The side of the servomotor that has the rod should point outward. Make sure you have enough space to engage the wheels.
- Attach the wheels to the motors using the screws supplied with the motors.
- Stick one piece of Velcro to the receiver and the other to the battery pack.
- Stick two pieces of the opposite type of Velcro on the robot and attach the receiver and battery pack to it.
- Before you appeared a robot with two wheels on one side, and the other side of which is simply dragging along the floor, but we will not add a third wheel for now.
 7 Connect the wires. Now that all the parts are in place, everything needs to be connected to the receiver. Connect the battery to the receiver where it says "power" or "battery", try to connect everything correctly. Next, connect the servos to the receiver where it says “channel 1” and “channel 2”.
 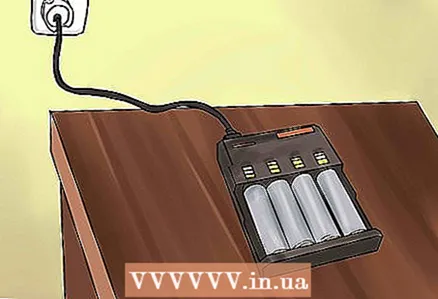 8 Get on the charge. Disconnect the battery from the receiver and connect it to the charger. Charging can take about 24 hours, so please be patient.
  9 Now play with your new toy. Forward! Press the forward button on the transmitter. Organize an obstacle course, play with your cat. And when you play enough, add some bells and whistles to it!
Tips
- Try putting your old “smartphone” with a camera on the robot and use it as a moving recording device. You can use video chat to see where the robot is heading, allowing you to take it outside of your room without your escort.
- Add some bells and whistles. If your transmitter / receiver has an additional channel, then you can make a claw that can close, and if you have multiple channels, then your claw will be able to both open and close. Use your imagination.
- If you push to the right and the robot is driving to the left, then try to connect the wires on the receiver in a different way, for example, if you plugged the right servomotor into channel 2 and the left servomotor into channel 1, then swap them.
- You may want to purchase an adapter that allows you to connect the battery to a charger.
- You may prefer to use a 12 volt DC battery, which will improve the speed and power of the robot.
- Make sure you buy the transmitter and receiver on the same frequency. Also, make sure the receiver has the same or more channels as the transmitter. If the receiver has more channels than the transmitter, then only fewer channels will be usable.
Warnings
- Beginners should not use an AC power source (home outlet) for home projects. Alternating current is very dangerous.
- Do not tune to 72 (MHz), unless you are building an airplane, as you are breaking the law, use this frequency on ground toys, and you also risk maiming or killing someone.
- Do not use a 12V AC battery with a 110-240V AC battery, as this may soon render the engine unusable.
- Using 12 (V) AC power may blow up the engine if it does not support such a battery.
What do you need
- Undercarriage material: a piece of plastic.
- Two servomotors.
- Receiver: transmitter receiver.
- Battery: 60 (V) 2000 (mAh) Ni-MH battery.
- Charger.
- 2 wheels.


