Author:
Gregory Harris
Date Of Creation:
7 August 2021
Update Date:
1 July 2024

Content
The waterwheel is an environmentally friendly way of converting water energy. The history of the use of such mechanisms came to us from ancient times, when people tried to find ways to use natural sources of energy.
Steps
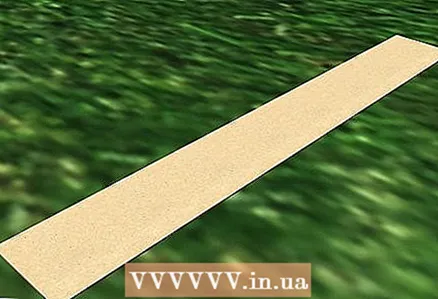 1 Cut a long strip from the side of a sheet of heavy cardboard, foam board, or plywood. The strip should be 5 centimeters wide and 38 centimeters long on the long side. Cut the material with a utility knife.
 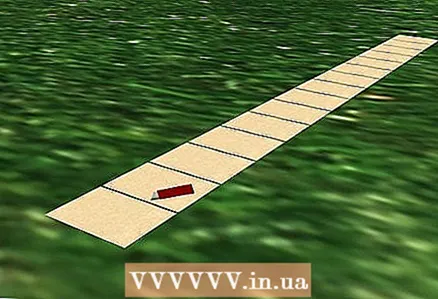 2 Using a utility knife, divide this strip into ten 3.8 cm pieces. From these parts you will make blades by gluing them to both sides of the water wheel.
 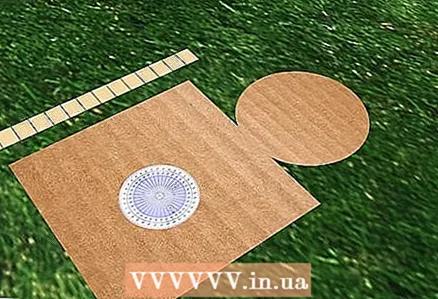 3 Using a protractor, mark a 15.2 centimeter circle on a piece of cardboard or foam board. With the help of a protractor, you can not only draw an even circle, but also determine its center. At this center, you will later attach an axle to hold the two sides of the wheel around which it will rotate.
 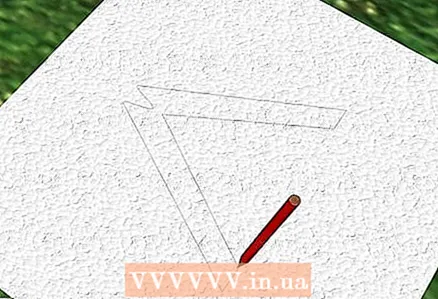 4 Using a pen or pencil, sketch out the wheel struts by tracing the "A" -shaped shapes on a piece of cardboard or foam board. These posts should be 10.2 cm high and 10.2 cm wide. In the middle of the top crossbar of the letter "A", make a small mark in the shape of a lowercase "v". In this groove you will place the axle of your wheel. Draw an additional 2 x 6.4 cm long and 2 cm wide for the wheel stands.
 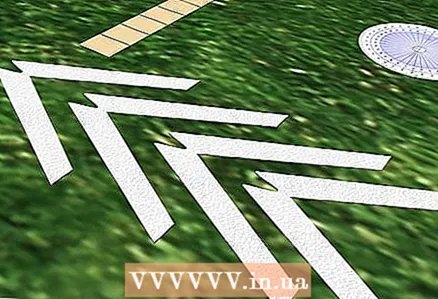 5 According to the sketch, cut out the outlined wheel disks, as well as the stands and stands for it.
 6 Place one of the wheel discs on a flat surface.
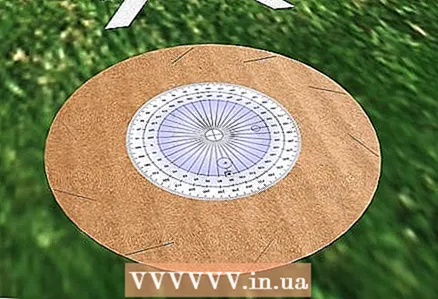 7 Using a protractor, measure and mark the attachment points of the blades to the discs. Each next blade should be 40 degrees apart from the previous one. Make sure each blade is diagonal to the center of the disc. To make it easier for you to correctly position the blades, take the position of the spokes in the bicycle wheel as a basis.
 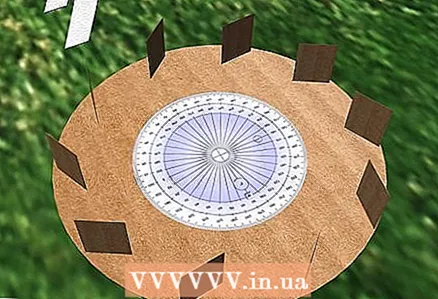 8 Attach or glue the blades on the 3.8 cm side to the wheel rim along the marks you made.
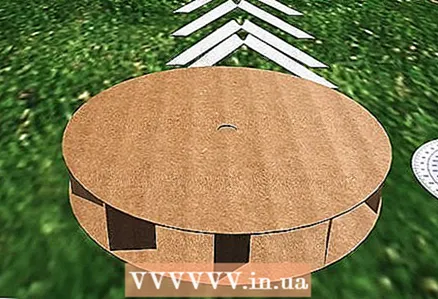 9 Attach another disc of the waterwheel to the paddles that you just attached to the first side of the disc.
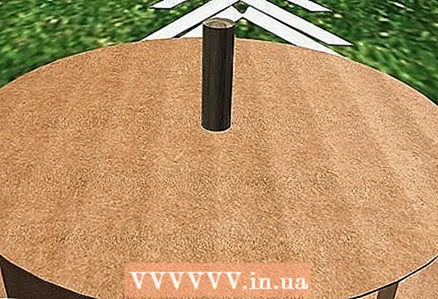 10 Thread the axle through the centers marked on both sides of the discs. Make sure the rod goes through the centers on both sides, and the right and left portions of the axle are of equal length. Set aside the finished wheel for a while.
 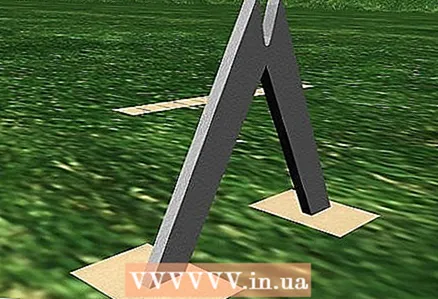 11 Fasten with buttons or glue "A" -shaped stands and wheel stands. To do this, attach the rectangular stands to the left side of one of the posts, just below the horizontal bar that crosses the middle of the post. Repeat with the second stand on the right side.To complete the support system, attach the rectangular stands to the "A" -shaped posts on the other side.
 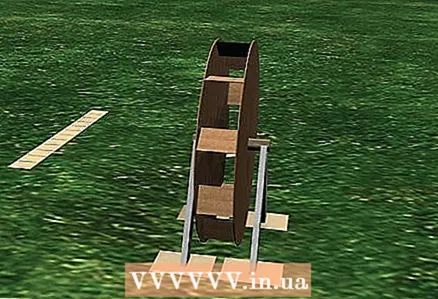 12 Place the waterwheel on its supports using a wooden rod as an axle. Place this axis in the "v" -shaped notches located on the top rungs of the "A" -shaped posts. This will allow the waterwheel to spin.
 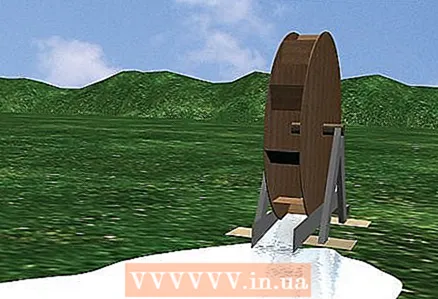 13 Test the wheel by placing it in a slow stream of running water. Check if the wheel is turning correctly.
 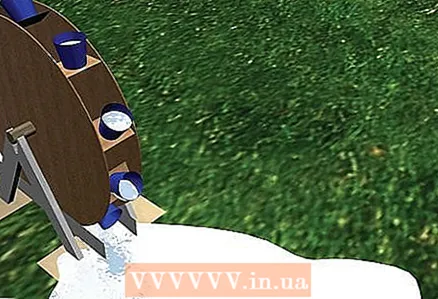 14 Check how much weight your wheel can lift by attaching one end of the string to a small bucket and the other end to the axle of the water wheel. Pour some water into the bucket and see, see how much water your wheel can turn and lift the bucket of water.
Tips
- To make a small bucket, cut one compartment from the egg carton into which the egg is placed. Make two holes at the top and insert a piece of thread into it to make the handle of a makeshift bucket.
- If you are using glue, make sure it is completely dry before trying to run the wheel in water.
- If you want your wheel to last long, use foam board and a hot glue gun to make it. This will keep your wheel wet.
Warnings
- Some of these materials (utility knife, wood rods, and hot glue gun) can be dangerous. Take special care when using them and do not leave children unattended when working with these materials if you are making a wheel with children.
What do you need
- A sheet of pension board or plywood measuring 38.1 x 50.8 centimeters
- Stationery knife
- Protractor
- Pen or pencil
- Roulette
- Buttons or hot glue gun
- Wooden knitting needle
- Small bucket
- Threads


