Author:
Marcus Baldwin
Date Of Creation:
16 June 2021
Update Date:
1 July 2024
Content
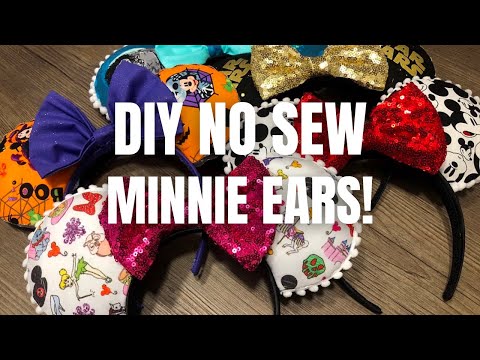
1 Gather everything you need to make ears. For the ears, you will need black felt and cardboard. If you do not have cardboard, then instead of it you can take construction paper, which is also quite dense and resilient.- You can buy everything you need to make Mickey Mouse ears at a craft store or fabric store.
- If you do not have felt, then you can paint over with paint or pencils the cardboard circles of the ears in black, you can also paste over the cardboard with a black sheet of colored paper.
- If you do not have cardboard for your ears, you can glue several sheets of heavy construction paper together instead.
- The material used for the ears should be tight enough so that the ears do not fall off after being attached to the headband.
 2 Buy a matching headband. The headband should be black and at least 1.5 cm wide. It will serve as a base to secure your ears and allow you to wear them over your head. The wider the bezel is, the better support it will be for mouse ears. 3 Cut out two identical ear templates from the paper. You need to draw two circles (one for each ear). The circles should have a diameter of about 7.5-12.5 cm. At the base of the circles, an allowance should be made for fastening with a width of about 1.5 cm. The resulting ear template will outwardly resemble the contours of an incandescent light bulb. The allowances at the base of the ears will subsequently be used to secure them to the headband. 4 Transfer the outline of the patterns to the felt. Place the ear template on black felt, support it with your hand, and trace the paths to create four identical details. You can trace the contours of the templates with chalk. Subsequently, traces of chalk can be wiped off with a damp cloth. 5 Transfer the outline of the templates to the cardboard. The cardboard will provide support for the felt ears to stand upright. You will need two cardboard pieces, one for the left and one for the right ear.
 - You can also use the outline of the edge of a small round bowl or plate to create round ears.
6 Cut out the felt pieces. You will need some very sharp fabric scissors or you may not be able to cut the felt evenly.Cut the parts strictly along the contour with a firm hand. After cutting out the parts, you may need to trim the edges. 7 Cut out the cardboard pieces. As with the felt ear pieces, you need to cut out two cardboard pieces along the previously drawn outline. They will be used as a base for the felt to keep the ears in shape and not fall off. 8 Stick the felt pieces evenly onto the cardboard ear pieces. In most cases, regular office glue will be sufficient to glue the front and back sides of cardboard parts with felt. This will give the ears the elasticity of cardboard, and their outer texture will be more reminiscent of the texture of mouse ears. Part 2 of 2: Attaching the ears to the headband
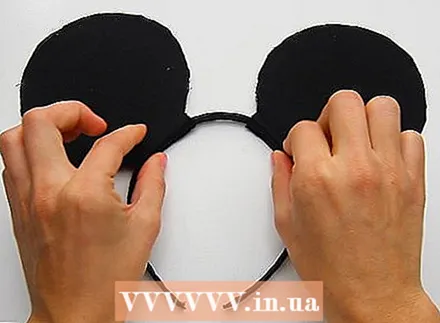
- 1 Use a glue gun to glue the ears to the plastic headband. The higher quality hot glue your glue gun uses, the more securely it will glue the mouse ear mounting allowances to the rim. If the headband is made of thin and flexible enough plastic, then the ears can be attached to it using a stapler.
- 2 Fold over the ear hooks to adhere them to the underside of the headband. The ears should be placed symmetrically on the rim, about 7.5 cm apart. Use a glue gun to secure your ears to the headband. The most accurate gluing of the ears can be achieved by preliminary marking on the rim of their correct position.
- To help your ears stand up, you may need to bend them forward a little harder.
 3 Give the hot glue enough time to cure if you've attached your ears with it. You don't have to wait when using the stapler to secure your ears, but when using hot glue, you should give it 30-60 minutes to cure. The ears will stick to the rim better if you hold the parts to be glued for the first 5-10 minutes.
 - 4 Dress up as a Mickey Mouse costume and put on your ears. As a costume, all you have to do is dress up in Mickey's classic yellow boots and red shorts. You may also want to dress up as one of the incarnations of Mickey Mouse, such as the robed assistant wizard from Disney "Fantasy".
Tips
- Consider using thick foamiran instead of cardboard. Cut out parts from foamiran with allowances for fastening, glue them in pairs together, and then attach to the rim.
- At Disney theme parks, Mickey Mouse ears are sold as a head-worn beanie. You can also use a cap instead of a headband to make them look more like those sold in parks.
- If you don't have a glue gun, you can use a powerful stapler instead to secure your ears.
Warnings
- Avoid using regular stationery glue to secure your ears to the headband. It won't be strong enough to keep your ears in place for long periods of time or during active play.
What do you need
- Black felt
- Felt pen, wax pencil, or black paint (optional)
- Cardboard
- a piece of chalk
- Foamiran (optional)
- Glue gun (and hot glue sticks)
- Bezel
- Powerful stapler (optional)
- Plain paper
- Scissors
- Heavy construction paper (optional)
Additional articles
How to draw Mickey Mouse How to draw Minnie Mouse How to make a lightsaber using household items
  How to act like Hatake Kakashi
  How to make vampire fangs How to tie a toga How to make an eye patch
  How to act and look like an attractive anime girl
  How to act like an anime or manga character
  How to be like Light from Death Note How to make artificial blood
  How to make a fake pregnant belly How to make a Harry Potter wand How to make a mask


