Author:
Marcus Baldwin
Date Of Creation:
16 June 2021
Update Date:
24 June 2024
Content
1 Measure the mat. Passepartout is made of plain paper or cardboard and frames the image inside the frame. Photo frame with mat looks more professional and finished. It also focuses on photography. Before you start measuring the material from which you will make a mat, you should decide how wide you want to make it.- A good option is to use about ¼ - ⅓ the size of the short side of the photo.
 2 Measure the picture. After deciding on the width of the mat, measure the image itself. Double the estimated width of the mat and add it to the length and width of the photo. The result will be the final size of the outer borders of the mat, which will need to be prepared.
 - The inner border should be the same size as the photo, or slightly smaller.
3 Cut out the outer borders of the mat. Once you transfer your measurements to the mat material, you can cut it out. Passepartout made from thinner materials (paper or thin cardboard) can be cut with a paper knife or scissors. Thicker materials can also be cut in the same way, but they will look neater with a special cutter. - Cut out the outer borders. Cut out the outer borders of the mat to fit.
- You will need to mark these boundaries with a ruler and pencil in order to know where to cut.
- When drawing borders, you should use a corner so that the corners are strictly straight.
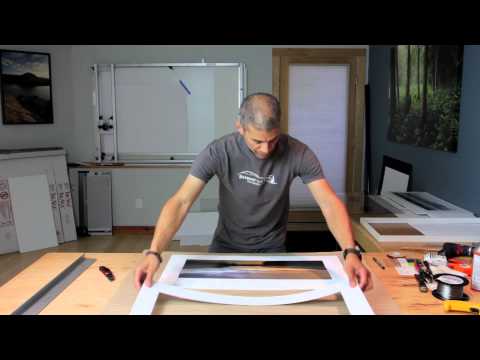
4 Cut out the inner borders of the mat. They must match the size of the photo or be slightly smaller. On the seamy side of the mat, outline the contours of the image. Subtract a few mm from them that you want the mat to overlap the photograph. Cut out the inner borders. 5 Place the image on a mat. Place the mat face down. Superimpose the photo in the center (also face down). Glue the two top corners of the photo to the mount with vertical pieces of tape, and then cover the vertical pieces of tape with horizontal ones (one of their edges should be on the mount, and the other in the photo). - The photograph will now be fixed to the mat and at the same time will have enough flexibility not to bend or wrinkle.
Method 2 of 3: Making a frame
 1 Select materials. You will choose materials that not only satisfy your needs and correspond to the conceived design, but also have high quality and suit the image itself. There are different types of wood, glue, metal, nails; and you need to carefully choose them so that in the end you get everything perfect. Here is some information about the materials:
 - The shape of the tree for the frame. The shape of the tree used in the frame depends largely on your preference and the purpose of the frame. It can be molded and carved, or simple. Shaped frames add a lot of intricacy to the finished image and are good for large images. Simple frames, on the other hand, give the image a neat and simple look; they are best suited for small pictures or art nouveau designs.
- Type of tree. You need to decide what kind of wood you will use. Many types of trees are suitable for this purpose, especially hard ones, so the decision can only be based on your preferences for appearance. It is best to use the same type of wood from which the other objects in the interior of the room are made. Thanks to this, the frame will perfectly fit into the existing environment.
- Metal. If you want to make a metal frame instead of wood, you will need to follow the same process as for a wooden frame, but use a diamond saw to cut the metal. The frame will have to be connected with corners and self-tapping screws for metal, having previously marked holes for the bottom with a drill.
- Glue. It is best to use wood glue. Other types of glue can be used if wood glue is simply impossible to get. Usually, wood glue is inexpensive and can be easily found at hardware stores.
- Nails. The use of nails in making the frame depends on its size. Large massive frames require thicker and longer nails. Use nails of the appropriate size to keep your frame firmly in place and not fall apart.
- 2 Determine the dimensions of the frame. Measure the outer borders of the mat. They are also the internal dimensions of the frame. To calculate the outer dimensions of the frame, you should use the formula: L = E + (2 x C) + (2 x W).
- L is the length of the cut piece of wood. E is the length or width of the mat. C - the size of the gap between the mat and the frame (if necessary), usually about 1-1.5 mm. W is the width of the material itself for making the frame.
- 3 Cut out the details of the frame. Cut out the details of the frame according to the formula below. You will need two pieces for longitudinal and cross sections. Remember the rule: "Measure seven times, cut once." It is very important to be precise. Since any mistake will lead to the fact that the frame will turn out to be crooked or the tree will not converge at all.
- After the initial cutting, you need to cut the ends of the bars obliquely so that they can be folded into a frame (the outer edges will be long and the inner edges will be short).
- You can use a 45-degree saw or manually mark the corners and saw them off with a regular saw (although the latter method is not very accurate and is not recommended).
 4 Make a chamfer on the inside from the wrong side of the frame. This is a recess for fixing the glass in it. The indentation can be done neatly with a chisel, or by overlaying your frame with another thin frame with slightly larger inner edges.
 - The second frame should be longer and wider to support the glass, which should not fall out through the main frame.
- The chamfer must be deep enough for the glass to fit into it and it was possible to nail in it all the materials that will be inserted into the frame.
- 5 Color the frame (optional). You may wish to make the frame more appropriate to the setting of the room where it will be hung, or to add an accentuating aspect to the photo that will be placed in this frame. Before you insert glass and other materials into the frame, you can tint the wood. The choice of color is entirely up to you. Here's how you can paint or tint the frame to give it that special twist:
- Painting. If you decide to paint the frame, then you need to use paint on wood. Latex based paints give smoother and shinier results. You can paint the frame in one color, or you can apply a pattern to it. For a smooth finish, apply paint in long strokes and paint over the frame with several coats of paint.
- Toning. For toning wood, there are special stains that come in different colors. Try to choose a stain that will give you a color close to the rest of the wood in the room. Try it first on scraps of wood to see how many layers you need to apply and how the stain will apply to the wood you are using. It is better to tint the tree even before assembling the frame. This will allow the stain to spread more evenly on the wood. Apply the stain with a specially designed brush for a more professional look. Once the stain has dried, the wood can be varnished to give it a shine.
- 6 Assemble the frame. Assemble the frame like a puzzle to make a rectangle. Make small adjustments as needed, but remember that changing the angles too much can result in an uneven frame. Here's how to do it:
- First, glue the frame parts together using well-holding fasteners and corners. You need to ensure that the frame is glued correctly.
- After the glue dries, carefully hammer a nail into each corner of the frame, fastening two parts for reliability. The nails should go into one part of the frame and reach the second. At the same time, they should, as far as possible, pass along the center of each part. Also, when driving them in, the perpendicular to the line of alignment of the two parts must be observed.
- Use wood putty to mask any holes that appear.
 7 Insert glass. The glass should be cut in accordance with the dimensions of the recess made for it. You can do this yourself or use the services of a glass cutting company, as certain skills and tools are required to safely cut glass.
 - You don't have to use real glass. Plexiglass or clear plastic are also great for this. These materials may not look as impressive as glass, but they are more difficult to break if the frame falls.
- 8 Insert a photo. Putting the frame face down, insert the mat and photo into it, center. Fix everything with the help of special glass holders, or with nails driven into the frame from the inside out parallel to the mat directly next to it. This is the final step in creating the frame itself. Now you can think about how to decorate it, as well as choose a place where it will hang.
Method 3 of 3: Final strokes
- 1 Decorate the frame. You can decorate the frame with something. You can add gold plating to the frame elements to give it a more traditional look. Another option is to glue small objects to the frame, such as shells or buttons. This is a great way to make your frame themed. Here are some other ways to decorate the frame:
- Use the remains of old jewelry and glue them to the frame. For example, you have an old broken brooch in the shape of a flower, a pendant from a pendant, a cute earring, you can decorate certain parts of the frame with them or even lay out some design on the frame with them.
- Make a mat for a photograph from a significant page in a book or newspaper article.To do this, draw the contours of the mat on the back and cut it out. Then circle the contours of the photo on it in the center. Reduce them by about 3 mm on each side so that the edges do not stick out later, and cut out. Flip the mat face up, place the photo down, and frame everything. For greater durability, you can first laminate an article or page.
- Stamp the frame. Find the stamp that matches the person in the photo. For example, if in the photo your little daughter who loves stars very much, find a stamp with a star. It is good if the frame is painted white or light so that the stamp is clearly visible on it. Due to the color contrast.
- 2 Hang up the frame. There are two easy ways to hang the frame when you're done decorating it. Just remember to let it dry completely after all the procedures before hanging it. Do not forget that regardless of the method of suspension used, everything must be carefully measured and centered so that the framed photo will hang on the wall evenly. Here are two options:
- You can attach a string to the back of the frame. To do this, you need to drive in from both sides of the seamy side of the frame along the carnation and fasten the string to them.
- Another option is to attach a special hook for hanging the frame on the wall.


