Author:
Eric Farmer
Date Of Creation:
12 March 2021
Update Date:
1 July 2024

Content
- Ingredients
- Steps
- Part 1 of 3: Making the jam
- Part 2 of 3: Sterilizing the cans
- Part 3 of 3: Preserving Jam
- Tips
- What do you need
How incredibly pleasant it is to open a jar of strawberry jam in the middle of winter and enjoy the taste of summer sweets. This feeling will be even better if you make the jam yourself. Head down to Step 1 to learn how to make some delicious strawberry jam to enjoy and cheer you up any time of the year.
Ingredients
- 10 cups strawberries or 6 cups mashed strawberries
- 4 cups sugar
- One bag of pectin
Steps
Part 1 of 3: Making the jam
 1 Wash the berries. After you have selected the berries you want to use - either you picked them yourself or bought them from the store - put them in a colander and rinse with cold water, stirring the berries and making sure each is clean. You don't want any bacteria to get into the berry jam.
 - You can also use frozen strawberries if you cannot afford to buy fresh ones.
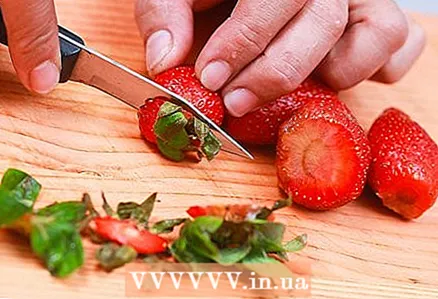 2 Remove the petioles and remember the strawberries. Use a knife or spoon to cut or tear off the stems and leaves from the berries. Your goal is to remove all green petioles. After you've peeled all the berries, pour them into a large bowl. Use a large wooden spoon to knead the strawberries until they become lumpy. The crushed berries release the natural pectin they contain.
 - You should have about six cups of chopped berries after kneading.
- You can also cut the strawberries into quarters instead of crushing them.
 3 Mix 1/4 cup sugar with 1/2 bag dry pectin. Pectin is the substance that helps the jam become thick - it is produced naturally in fruits, and most stores sell apple pectin. Mix sugar and pectin. Transfer the mashed strawberries to a large saucepan and add the pectin and sugar mixture.
 - If you don't want to use pectin, you will need to add about seven glasses of sugar to your recipe. Your jam may turn out to be slightly thinner than regular jam.
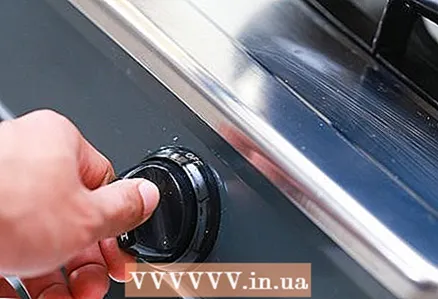 4 Turn on a medium-high heat on the stove. Combine the berries with the pectin mixture. Continue stirring the jam so often that it doesn't burn until the jam boils. When the mixture boils, add the rest of the sugar (about four cups) and stir.
 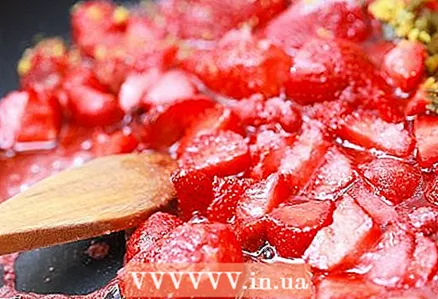 5 Boil the mixture over high heat for one minute. After the mixture has boiled over high heat for a minute, remove from heat. Remove the foam that has formed on the surface of the boiled mixture. The foam is just an oxygen-filled jam, so you can leave it in the mixture if you like - it's harmless.
 - Collect the foam and put it in a bowl if you don't want to make jam with it.You can drain this foam into the jam, which you will eat right now.
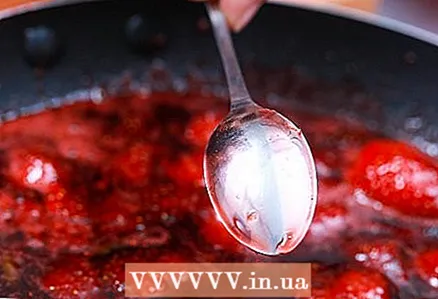 6 Check if your jam is getting thick or not. Dip the spoon in ice water for a few minutes. After the spoon has cooled, scoop up the "juice" - the liquid portion of the jam - and let it cool to room temperature on the spoon. When it reaches room temperature, check the consistency. If it thickens well, keep up the good work.
 - If it's still a little thin, add a quarter bag of pectin and bring the mixture back to the boil for another minute.
Part 2 of 3: Sterilizing the cans
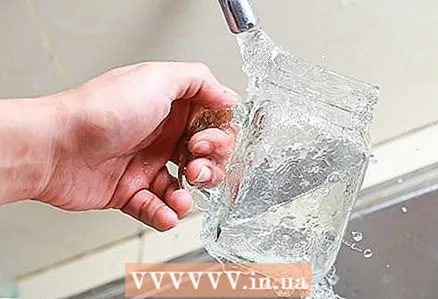 1 Sterilize the jars. It is very important to check that the jars are crystal clear, if any bacteria remain on them, this can ruin your jam during storage in the pantry. You can of course put your jars in the dishwasher for sterilization. If your dishwasher is running in “sanitize” mode, that's even better. Place the cans in the “hot dry” mode before use. Hot jars will not crack if you pour hot jam into them.
 - If you don't have a dishwasher, use hot soapy water to clean the cans. After you clean them, rinse with hot water and place in a pot of boiling water for 10 minutes. Leave them in hot (but not boiling) water until you need them.
 2 Place a pot of water over high heat. The water should be very hot, but not boiling yet. When this warm-up level is reached, dip the jar lids in boiling water. This procedure will sterile the lids, which is just as important as cleaning the cans. Imagine opening your jar of jam in the middle of winter as a special medicine and finding that the jam has gone bad. It would be very upsetting for you.
  3 Remove the covers when you're ready to use them. Take special care when removing the lids from the water, they will be very hot. Use pliers or a "magnetic grip" to safely remove the covers. You can buy a magnetic grab from any kitchen supply store or online.
Part 3 of 3: Preserving Jam
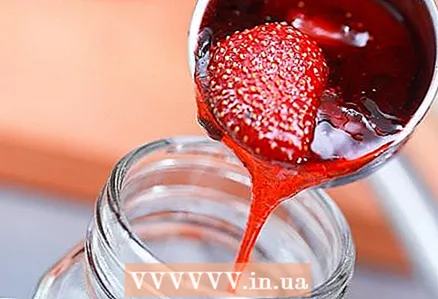 1 Pour or put the jam into jars. Fill the jars approximately 30 cm from the edge of each jar. Wipe away any jam streaks from the sides or around the rim of the jar. Place a lid on top of each can, place a ring around the lid and tighten until it stops.
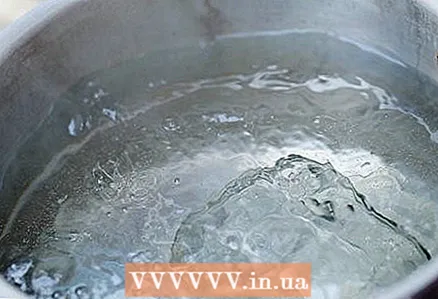
  2 Prepare a large pot of boiling water. There must be enough water in the pot so that when the cans are placed in the pot, the water level is 2.5 cm above the edges of the cans. Place a rag on the bottom of the pot so that the jars you put there don't clink against the bottom of the pot.
 - If you have an autoclave, use it. Bring the water to a boil in the autoclave. Make sure the water level is 1 to 2 cm below the cans when you put them there.
 3 Place the jars in the pot. Regardless of whether you plan to use a saucepan or an autoclave, you need to let the jars simmer for at least 10 minutes. Typically, the height of the jam jar will determine the time to process your jars. Follow these basic timing:
 - Up to 1 liter: Boil your jars for five minutes.
- 1 to 6 liters: Boil the jars for 10 minutes.
- More than 6 liters: Boil the jars for 15 minutes.
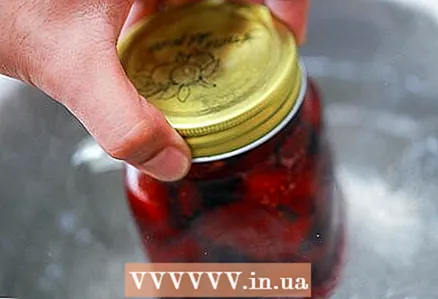
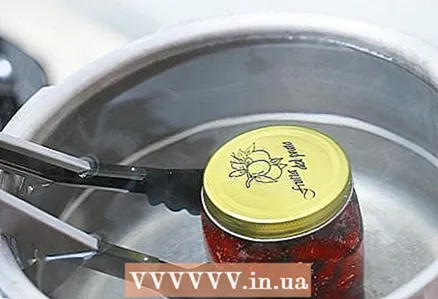 4 Remove the boiling water cans. Use tongs to remove the jars from the water so you don't burn yourself. Place the jars in a cool, draft-free place to cool overnight. The next day, either remove the rings or loosen them so they don't stick to the rust (otherwise you'll have to break the glass jar to get your yummy jam).
  5 Make sure your lids are well sealed. Before you put your jam deeper in the pantry, you should make sure that the jars are well rolled up so that when you open the jar later you will not be upset that your jam has gone bad. Press down on the center of the lid.If the center does not move, then everything is fine. If it makes a click and bends up and down, the lid is not sealed. You will need to refrigerate this jam and eat it soon.
 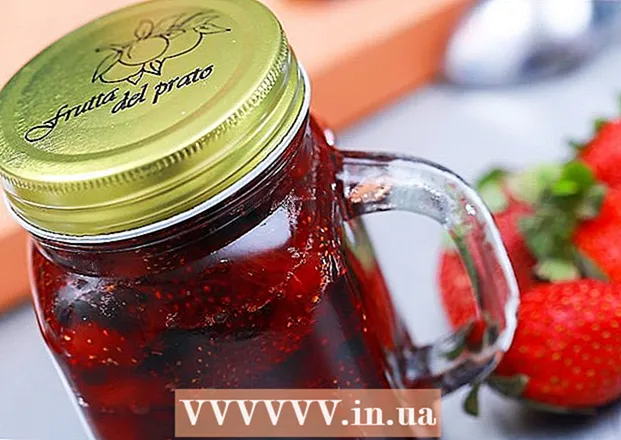 6finished>
Tips
- If you plan on eating your jam straight away, you don't need to roll up the jars, instead, just put it in the refrigerator and enjoy.
- You can add four tablespoons of lemon juice to add sourness to your jam, which in turn will make the jam thicken faster.
What do you need
- Knife
- Wooden spoon
- Forceps or magnetic gripper
- 8 jars with lids and rings
- One autoclave or large pot for boiling water
- Washcloth
- Large or medium saucepan


