Author:
Clyde Lopez
Date Of Creation:
23 June 2021
Update Date:
1 July 2024

Content
The practice of yoga originated in India thousands of years ago. Yoga is becoming more and more popular today as it has proven its health benefits. While the goal of yoga is to build "strength, awareness, and harmony between mind and body," the Osteopathic Association notes that the practice also improves body flexibility, increases muscle strength, reduces weight, reduces the risk of injury, and improves heart and circulatory health. Various postures (asanas) are practiced in yoga. The frog pose, or adho mukha mandukasana, improves flexibility in the buttocks, groin and thighs.
Steps
Part 1 of 2: Preparation
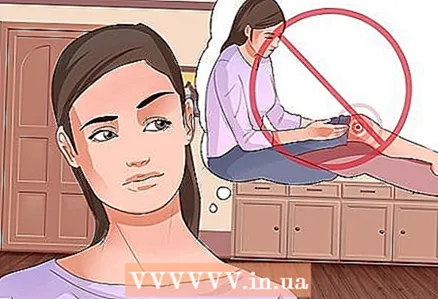 1 Pay attention to contraindications. While yoga may seem like a fairly straightforward exercise, you must exercise extreme caution if you have had any kind of injury. Keep in mind that you should not do table pose if you have wrist and / or knee problems. Also note that Frog Pose is not recommended for recent illnesses or chronic conditions involving the knees, hips, or legs.
 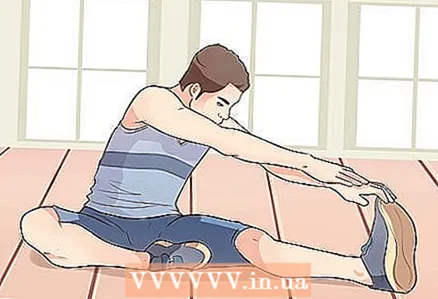 2 Warm up. Before starting a yoga session, it is always recommended to do some stretching exercises to warm up the body. Preparatory exercises relax your muscles and prepare your body for the basic exercises you are about to do. There are many postures and exercises that warm up the body well. Considering that you are going to be doing frog pose, it is best to stretch the muscles in your hips, glutes, and groin. The prone butterfly pose is ideal for stretching these areas.
 - Starting from a seated position, as you exhale, lower your lower torso to the floor. Lean on your hands while doing this.
- Sinking to the floor, lean on your forearms. Use your hands to place the basin on the floor. Use a blanket to support your head if needed.
- With your hands on top of your hips, turn your hips outward and try to "pull" your buttocks out from under your torso. Move your hands up over your hips and spread your knees to the sides, with your feet together. Finally, lie down completely and lower your palms to the floor at a 45-degree angle to your body.
- At first, this pose must be performed for one minute. Gradually, you can increase the duration of this pose to 5-10 minutes.
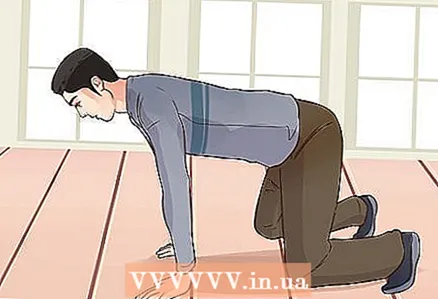
 3 Take the starting position. To do the frog pose, you will need to first assume the table pose. This is the basic yoga posture from which many floor poses begin. It itself is very beneficial for the body as it allows you to stretch and align your spine.
 - Stand on the floor using your knees and palms. The knees should be at some distance from each other, and the feet should be located directly behind the knees. The palms should be exactly under the shoulders, and the fingers should be directed forward.
- Lower your head and concentrate on the point between your palms. The back should be straight. Place your palms on the floor and lower your shoulders away from your ears. Bend your tailbone inward and stretch forward with the top of your head. With this movement, you will stretch and stretch your spine.
- Breathe deeply and try to stay in this position for 1-3 inhalations and exhalations.
Part 2 of 2: Doing Frog Pose
 1 Start doing frog pose from table pose. While in a table pose, gradually move your knees outward. When you spread your knees wide enough to the sides, align your ankles and feet so that they are in a straight line.
 - When spreading your knees to the sides, make sure that you are comfortable. Do not under any circumstances perform the movement through force or through pain!
 2 Place your elbows and forearms on the floor. As you slide down, keep your palms flat on the floor. Then exhale slowly and push your hips back. Continue pushing your thighs back until you feel a stretch in the lateral and inner thigh muscles. As soon as you feel enough stretch, stop. While continuing to breathe, hold the pose for 3–6 breaths and exhalations.
  3 Return to table pose. In a swinging motion, move your hips forward. Leaning on your palms and forearms, return to the starting position - the table position.
 - You can also leave your hips in place and push with your palms so that your entire torso is on the floor.
What do you need
- Yoga mat
- Blanket or pillow (optional)


