Author:
Carl Weaver
Date Of Creation:
23 February 2021
Update Date:
1 July 2024
Content
- Part 2 of 4: Making the basket
- Part 3 of 4: Making the support frame
- Part 4 of 4: Build and Launch the Balloon
- Tips
- Warnings
- What do you need
- Additional articles
- Do not use heavy duty plastic bags. They are too small and too heavy.
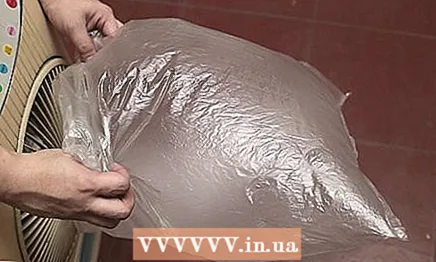 2 Hold the bag over to a small fan and check that there are no holes in it. Open the bag inlet in front of the fan. Make sure there are no holes in the bag, then turn on the fan. The bag should fill with air similar to a balloon. If it does not fill, then there are still holes in it. Find the holes and cover them with tape.
 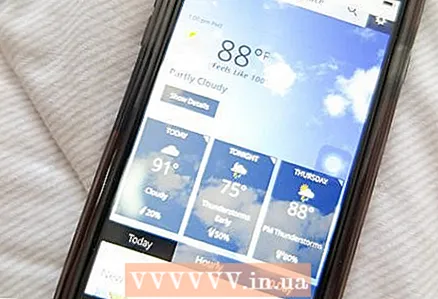 3 Check the weather if you plan to fly a hot air balloon outside. The air temperature should be cool enough as the balloon will not fly well on a hot day. Make sure there is no wind outside, as even the lightest breeze can prevent the balloon from flying properly. It is best to launch the balloon at dawn or at dusk, when the weather is quietest.
 - Cold winter days with high atmospheric pressure are ideal for balloon launch.
 4 If you plan to launch an indoor balloon, choose a spacious, empty room. The balloon can also be launched indoors, only for this you need a spacious enough room without any carpets or curtains. If the balloon comes close to such flammable objects, a fire could start. A good place to launch a hot air balloon can be a garage or gym.
 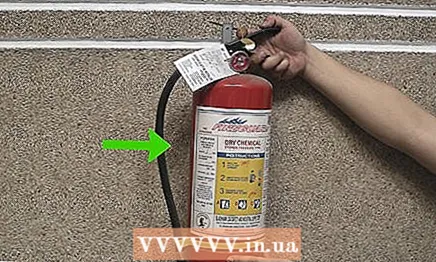 5 Prepare a bucket of water or a fire extinguisher in advance so that fire extinguishing equipment is on hand. You will be working with fire, so you need to take care of safety equipment. If you are still a child, you should be supervised by an adult at all times throughout the project.
 Part 2 of 4: Making the basket
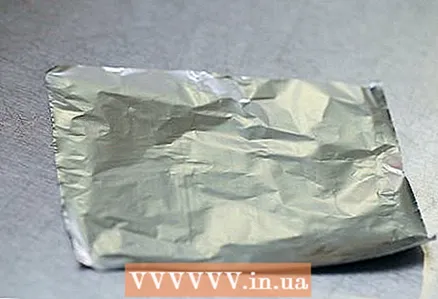 1 Cut a 10 cm square out of aluminum foil. You will make a balloon basket out of it. The edges of the foil are sharp enough, so be careful.
  2 Mark the four dots inside the square with a marker. Each of the four points should be 2.5 cm from the corresponding corner. It is at these points that the candles will be installed.
 - 3 Take two cake candles and cut them in half. Shorter candles will be lighter, making the balloon easier to fly.
- 4 Scrape off some of the wax from the bottom two candle halves to expose the wick. You may have noticed by now that you have two candle halves with a wick and two halves without a wick. Use your fingernail to pick some of the wax from these two halves to loosen the wick a little. This will end up with four miniature cake candles.
- 5 Float all the candles from below and glue them to the corresponding points. Use a lighter to melt the candle. Allow a few drops of molten wax to drip onto the candle attachment point. Then place the candle directly into the pool of molten wax. Hold the candle in a level position until the wax hardens. Do the same with the other three candles.
- If you are still a child, ask an adult for help with this step.
- 6 Bend the 6-13 mm high sides on the aluminum square to form a basket. Be careful not to accidentally knock out the candles during this operation. They can come off easily. The sides of the basket will prevent the melting wax of burning candles from spreading.
Part 3 of 4: Making the support frame
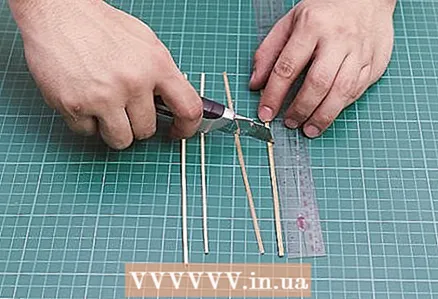
 1 Measure the width of the bag inlet. Place a ruler over the inlet of the bag and write down the reading. It is this length that the sticks of the frame should be.
 - 2 Make two skeleton sticks of the desired length from the cocktail straws. To connect too short straws together, you will need to make an incision at the end of one of the straws. Stick the notched end of the straw into a whole straw. Secure the connection point with tape. Continue lengthening the straws until you have two frame sticks equal in length to the width of the bag.
- If you use bendable accordion cocktail tubes in your work, cut off the accordion first.
- 3 Make a cross from two sticks. Find the middle of one of the sticks. Apply the second stick perpendicularly in this place.
- 4 Secure the cross with tape. Do not use too much tape or the frame will be overly heavy. It is best to use regular transparent tape for work. The masking tape will be too heavy.
 5 Consider using balsa sticks instead of straws for the frame. Balsa sticks can be purchased at a craft store. If you look at such a stick from the end, then its cross-section will be square or rectangular. Cut the sticks to the desired length. Place a drop of wood glue on the center of one of the sticks. Place the second stick on top, forming a cross. Wait for the glue to dry.
 - Try to get the thinnest sticks possible. They will be the lightest, which will make it easier to launch the ball.
- Don't buy wood dowels, they are not made from balsa wood and will be too heavy.
Part 4 of 4: Build and Launch the Balloon
- 1 Place the basket on the crosspiece. If you look at the resulting structure from above, the candles should be located in the gaps between the sticks of the frame. It is very important. If the candles are right on the straws, they will heat them up and melt them. It will also lead to incorrect weight distribution of the structure.
- 2 Attach the basket to the frame with tape. Take a piece of scotch tape and stick it to the bottom of the basket, grabbing one of the cross beams from below. Do the same with the other three beams of the cross.
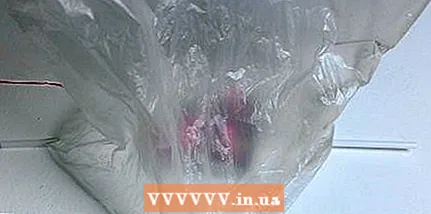
- 3 Tape the plastic bag inlet to the balloon frame. First, glue one corner of the bag to one of the beams of the frame. Then glue the opposite corner of the bag to the opposite beam of the frame. Fasten the side points of the bag in the same way. In this case, the inlet of the bag should acquire a square shape.
- 4 Tie a long thread to the frame and hold it. It can also be tied to a table, chair or fence. This step is very important. If you do not complete it, then the balloon will easily fly away to an unattainable place where you will no longer be able to catch it. Use a thin, lightweight thread for the balloon, such as a regular sewing thread.
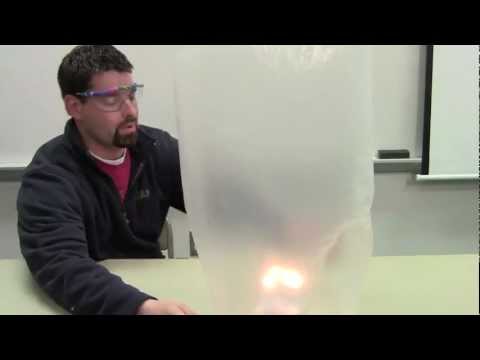
 5 Place the balloon on a flat surface and lift the bubble of the bag above the candles. Try to expand the package as much as possible. This step and the next step will be easier with a friend.
 - 6 Light the candles. Be careful not to accidentally knock over a candle or set fire to the bag. A long gas lighter will work best for this step. If you are a child, ask an adult to light candles for you.
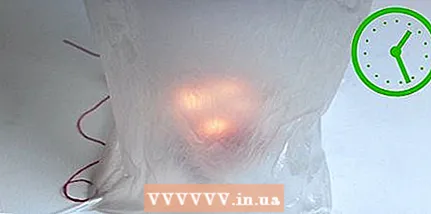 7 Continue to hold the balloon dome until it starts to stand on its own. This should take about a minute.
 - 8 Release the balloon. The balloon will not fly right away, but after a while it will begin to rise on its own. Be sure to hold it by a string or tie it to something. The balloon will fly as long as the candles are lit.
Tips
- Depending on the final balloon size and weight, you may need to install additional candles in the basket.
- Consider using a biodegradable bag for your balloon in case it flies off and gets lost.
- The larger the bag, the more hot air it can hold and the better it will fly.
Warnings
- Be careful not to accidentally set fire to the balloon's dome while filling it with hot air.
- Do not fly the balloon near trees, curtains, and dry grass.
- Be sure to properly ensure fire safety by preparing a bucket of water or a fire extinguisher.
- Be aware that your balloon can catch fire and fall down.
What do you need
- Thin plastic bag
- Aluminium foil
- Cake candles
- Cocktail straws or similar
- Scotch
- Threads
- Lighter or matches
- Scissors
- Ruler
Additional articles
How to make a slingshot How to make a Harry Potter wand How to make hair for a doll
  How to make a wooden sword How to make a toy parachute
  How to make a toy bow and arrow
  How to make chess pieces with your own hands How to make a kite from a plastic bag
  How to make a rustling Taggie kids toy How to make a flying airplane model from scratch
  How to make a periscope How to make a beyblade
  How to make a glow stick How to make a shampoo slime


