Author:
Clyde Lopez
Date Of Creation:
18 June 2021
Update Date:
1 July 2024
Content
- Steps
- Method 1 of 4: Assemble the Doll with Parts
- Method 2 of 4: Make a corn leaf doll
- Method 3 of 4: Sew a rag doll
- Method 4 of 4: Make a clothespin doll
Homemade toys require little investment from you, they are fun to invent, and most importantly, you can end up with wonderful souvenirs. They are also great gifts. Read the instructions below to find out several ways to make one of the most iconic children's toys, dolls, from the comfort of your own home.
Steps
Method 1 of 4: Assemble the Doll with Parts
 1 Buy the parts you need. At a craft store, purchase a toy head, body, arms and legs. Make sure everything fits. Some stores make this easier by selling ready-made kits. You will also need paints, thinner, small brushes, and clothes for the doll.
 - Doll heads range from pre-dyed vinyl bases with synthetic hair to basic building blocks that you can combine as you see fit. Keep in mind that if you buy the head, eyes and wig separately, you will need a little more effort to assemble the doll.
- Hair can be made from any material you like. Fine hairstyles come from special yarns like alpaca, mohair and bouclé, but simple colored threads will work too.
 2 Assemble the doll. Soft plastic parts of the doll are usually pressed into pre-built holes in the body, making it moveable. Alternatively, use the appropriate type of glue (plastic or wood glue) to fix the doll's limbs in position, or make the doll out of simpler or harder parts.
 - If you are using glue, wipe off the excess around the seam when finished.
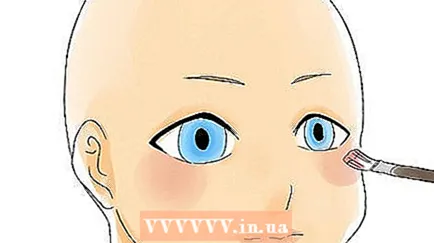 3 Paint the doll's face. If you purchased an unpainted doll, then it's time to put on makeup for her (and apply makeup for her eyes, if necessary). Acrylic paint is suitable for working with a variety of materials. Use a small brush when painting, and start with basic shades (for example, when drawing out the eyes, take first white, then color, and then black for the pupil). Let each coat dry before applying a new one over the top, and let the doll dry for a few hours after finishing work on it.
 - Try adding blush to your doll's cheeks with thinned pink paint.
- If your doll's face appears to be featureless, you can draw a nose in addition to the eyes and mouth. With a light stroke, draw the letter U or a horseshoe.
 4 Add hair. If your doll needs a wig, now is the time to attach it. You can make simple, permanent hair by gluing pieces of yarn to the top of the head with strong glue, or a removable wig by sewing threads to a piece of fabric cut to fit the doll's head. Ready-made wigs are also available commercially.
  5 Dress up the doll. Take the clothes you bought for the doll and dress it up to your liking. If you can't find any good items for your doll, put it aside temporarily and sew it yourself. As soon as your doll is assembled, painted and dressed up - it's ready!
Method 2 of 4: Make a corn leaf doll
 1 Collect the required ingredients. To make an American country style doll, you also need fresh corn leaves. To make one doll, you will need about a dozen corn fibers (no more than one or two ears). You will also need a large bowl of water, scissors to cut the husks, pins and twine to shape.
  2 Dry the leaves. Such dolls are made from dried husks. Use a food dryer or leave the leaves in the sun for several days until they are completely dry and no longer green. Drying in the sun is the preferred method because it is more traditional (corn dolls came to us from American Indians and other colonial traditions), but in principle there is no difference, the result will be approximately the same.
  3 Remove the silky, threadlike pistils of the corn cobs. Before the next step, remove the dried fibers on the husk and set them aside. You will need them soon, just keep them dry while you cure the leaves and keep them dry. Lay all fibers separately in the same direction without piling up or confusing them
  4 Moisten the husk. When you're ready to create your doll, soak the dried leaves in a bowl of water for 10 minutes. While this sounds paradoxical, the husk will not actually get wet, but rather become temporarily more flexible so that you can bend it without risking breaking it. Once the husk is completely wet, run over it with a paper towel and set it aside.
 - If the husk leaves are significantly different in size from each other, now is the time to tear off or trim the largest of them so that they all turn out to be about the same. This will avoid unevenness in the doll.
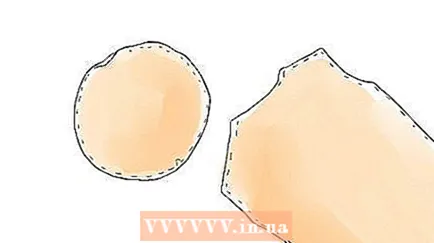
 5 Prepare the head details. Take the corn leaves and place them in front of you with the pointed ends facing away from you, then lay a bunch of filaments along their length. Next, in the same way, lay out two sheets of husk in the direction away from you on top of its 1st layer and fibers, adding a little more of the latter. Repeat this one more time (for a total of six layers of husks and strands separating them), and then tie the entire bundle together a few centimeters from the ends of the husks. Use scissors to round off the flat ends of the husk.
  6 Make a head. Take the husk and silky fibers of the corn and hold it tightly against the entwined bundle so that the pointed ends of the husk are facing up. Peel back each sheet in turn, pulling them in different directions so that the husks roll off on the other side. After you do this, you have a bunch of hairs coming from the center of the resulting ball. Fasten securely with a rope on the other side about 3 cm above the end - and you will have a head.
  7 Make your arms. You can choose from two main options: pigtails or straws. To make the arms in the shape of a tube, cut off 15 cm of the husk and roll it into a tube, then tie with twine at both ends. To make braided handles, cut 3 strips 15 cm long (longitudinally), braid them, and then tie them. Prepare just one tube or pigtail, which you then tuck into the corn leaves just below your head so that you get the arms of the same length.
  8 Tie up your waist. Using twine, tie it around the doll's body below the level of the arms to form the waist. Make sure again that your hands are in the right place before tying on the belt, while you can still change its position; the arms should usually be about 4 cm from the waist.Once you're satisfied with the result, tie the husk around the doll's waist over the twine to create something like a belt or girdle, thus hiding the twine. Tie the leaves in a bow at the back.
Method 3 of 4: Sew a rag doll
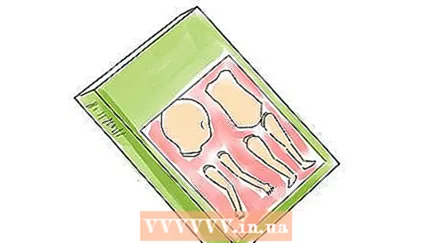
 1 Pick up the necessary material and tools at hand. The most important element when creating a fabric doll is the template. You can download it for free online, or buy it from the fabric department or craft store. Look at the drawing of the finished doll and choose one to your liking. Along with the sewing pattern, purchase fabric and / or filler, for example, batting, which will come in handy when making a doll.
 - To sew an ordinary rag doll, you will need: a rectangular piece of natural-colored fabric (plus fabric for clothes), batting, colored threads, a needle and pins to fasten the parts together while working. Read the instructions for the template to familiarize yourself with its intricacies.
 2 Cut the fabric. Following the pattern you bought, cut out each piece of fabric with a tailor's scissors and set them aside, being careful not to fold or wrinkle any parts. Remember to leave an average of 2.5 cm for seams around each sidewall.
 - Most doll patterns also include doll clothes in contrasting shades in the form of multi-colored designs or simple outfits; don't forget to cut these elements out as well.
 3 Sew the pieces together. To fill the doll with batting, you must sew stitches to create curves. Again, follow the specific instructions for your circuit.
  4 Add batting. Roll it up and insert into every piece of the doll that needs to be filled. Tie the loose ends with thread the same color as the doll's body to prevent the batting from falling out. After all the pieces are filled, sew them together according to the instructions in your diagram.
 - The batting tends to curl up into lumps or stripes, but you can roll it evenly by scattering smaller pieces in a star or triangle shape and twisting until you are the size you want.
- Stuff your head as tightly as possible to keep it firm. The body should be softer.
 5 Add hair and face elements. This will require colored thread and a little patience. Use black, brown, blue or green thread for the eyes and red or black for the mouth. Embroider the doll's face with a needle and embroidery thread to bring out the vibrant colors. Thread hair can also be easily sewn on.
 - Be sure to attach the eyes and mouth straight, then mark with pins first where you are going to sew them. Take out each pin as you start working on this part.
- If you are sewing on hair when making a doll, simply make knots to give the hair a messy, voluminous look.
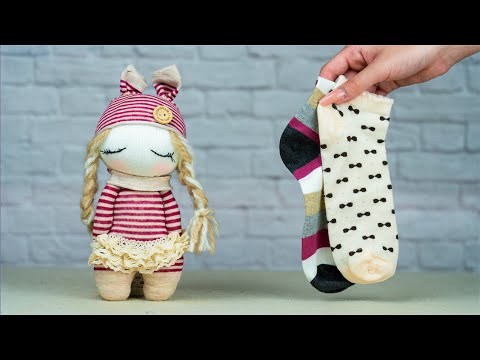
Method 4 of 4: Make a clothespin doll
 1 Pick up the items you want. To make such a simple wooden doll, you will need large craft pins (with curved ends), which can usually be found in craft stores. You can also use acrylic paints, a fine-tipped marker, and some materials for sewing clothes, such as felt, ribbons, or leftover fabric.
  2 Color in the clothespin. Its rounding at the top will serve as the head, and the bottom will become the doll's legs. Use whatever acrylics you like to paint on any of the doll's elements, including the shoes. It can easily be obtained by painting about ¼ of the ends of the clothespin on both legs with one shade, and then, after drying, drawing partially in black or brown over this layer. As a result, the black or brown elements are the shoes, and the original colors are the socks.
 - If you want, you can color the clothespin in its natural skin color, but this is not at all necessary. If painted, let the paint dry before applying other features.
- Draw the face for a nice look when the legs are apart.Otherwise, your doll will look very strange.
 3 Add details. Using a thin marker, draw any additional gadgets on the doll, such as pupils or a smiling mouth.
  4 Dress up your doll. With the help of scrap materials, scissors, and some special glue, create a fun outfit for your doll. Remember to pin the elements before cutting to be sure they are in the correct position. Consider making a hat or wig for your doll's bald head. Once you are happy with the result, glue each piece into place with glue.
 - Your clothespin doll is not suitable for play; it is best used for family reunions or on a children's board for notes.


