Author:
Marcus Baldwin
Date Of Creation:
13 June 2021
Update Date:
1 July 2024

Content
- Steps
- Method 1 of 4: Making and Dyeing Mummy Bandages
- Method 2 of 4: Sew on the sewing machine (method one)
- Method 3 of 4: Using Nodes (Method Two)
- Method 4 of 4: Finishing Touches
- Tips
- Warnings
- What do you need
- Method one: stitching with a sewing machine
- Method two: using nodes
- Finishing touches
Want to scare everyone in your Halloween mummy costume? It's very easy to make a cool mummy costume out of simple items that you have in your home or that you can buy for cheap. Follow this simple guide to learn how to make a cool mummy costume for next Halloween.
Steps
Method 1 of 4: Making and Dyeing Mummy Bandages
 1 Take out a white cloth. Old bed sheets are great, but you can also get cheap material at a fabric store. If you don’t have anything suitable, look at second-hand stores or an old-item classifieds website.
 - You will be cutting these sheets, so you may need more than one. It's not a problem if you have them!
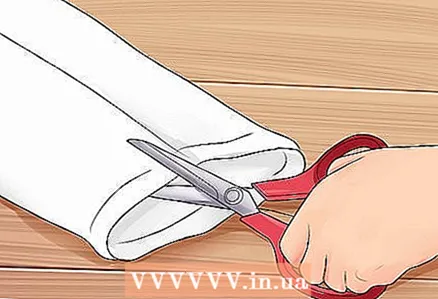
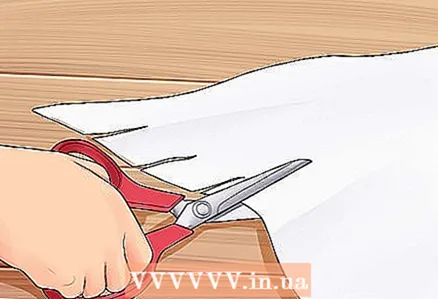 2 Spread the fabric out on the floor or a comfortable surface. Use scissors to make parallel cuts 5–8 cm apart along one edge of the sheet. The ruler is optional - if the stripes are slightly different widths, it doesn't matter. Mummies look best when they are asymmetrical and full of imperfections.
 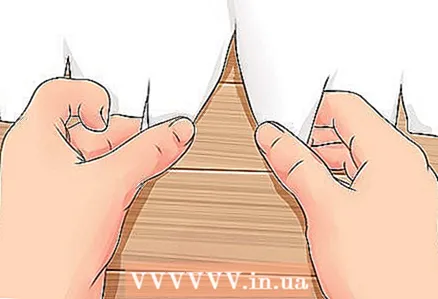 3 Tear the fabric into strips along the cut. The stripes will have perfect frayed edges. These will be your mummy's bandages.
 - Again, it's okay if you break them not very evenly. If you get too crooked, take the scissors and "redirect" the tear line, then start tearing again.
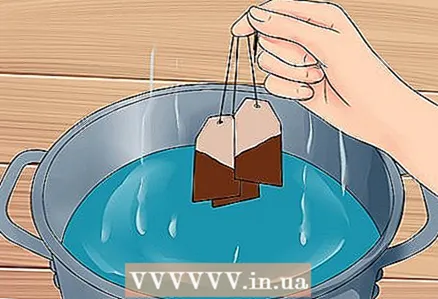 4 Paint material. The look you are striving to achieve is the dirty, no longer white, centuries-old mummy bandages. To achieve this color, you will dye the fabric with tea bags!
 - Take out a large saucepan. Fill it 2/3 full with water and bring to a boil.
- Add a handful of tea bags.The larger the person wearing the suit, the more fabric you will use and the more tea bags you will need. A few will be enough for a child. For an adult, use a whole handful.
- If you don't have tea bags, use weak coffee.
- Place the material in water and let it soak for 30 minutes to an hour.
- Take out the material and let it dry. If you want, take black face paint and randomly brush strokes in different places. To speed up the process, fold everything into a pillowcase, tie it up, and toss it into the tumble dryer.
- A pillowcase is essential to avoid staining the dryer. Don't skip this step if you decide to dry your material in a dryer!
Method 2 of 4: Sew on the sewing machine (method one)
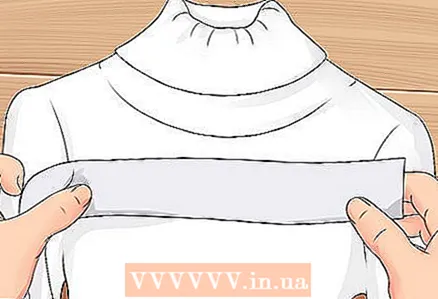 1 Spread the bandage over the front of the white turtleneck or long sleeve T-shirt. No need to wrap them around (they won't hold in place anyway), make sure they are long enough to wrap around the entire T-shirt. Lay them down casually - you don't want to be a suspiciously groomed mummy! Move from the bottom up and stop when you reach the chest area.
 - Probably thermal overalls will preferablethan a combination of t-shirt and trousers, at least in appearance. But if you don't have it, you don't want to spend money on it, or you just want to make a two-piece suit, proceed as described here.
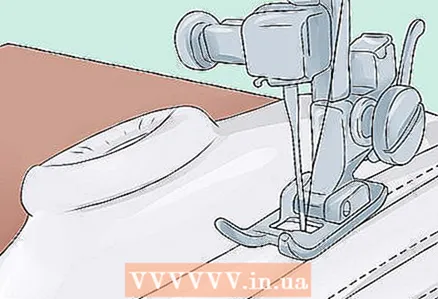 2 Sew on strips on all sides of the shirt. This is the most time consuming part of creating a costume. The good news is, the more casually and less neatly the stripes are sewn, the better. Leave some stripes partially sewn on, some longer. This is a mummy costume - almost impossible to ruin!
 - 3 Cut both sleeves along the inside seam. This way, you can unfold them completely and you can easily sew on the stripes without worrying about how to turn the fabric.
and sew them in a circle.
- 1
- Take action! Lay the shirt flat. Cut the strips to fit the sleeves and wash them layer by layer. Continue sewing on the stripes until both sleeves are finished.
 2 Turn the shirt inside out and sew the sleeves again. It is necessary to sew from the inside so that the seams are not visible. People need to think that your outfit is borrowed directly from an ancient tomb (and who said that it was not?).
  3 Part the crotch of the pants all the way to the top. Spread them out evenly and cut into strips of suitable length. Proceed as casually as when making the top of your outfit.
 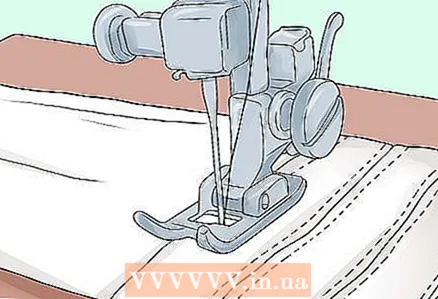 4 Start at the bottom and sew the strips to both legs. You can stop when you get to the end of the crotch, because your shirt needs to cover the rest. However, a few extra stripes would be helpful. In the end, a strong wind or years of imprisonment in a tomb could manifest themselves.
 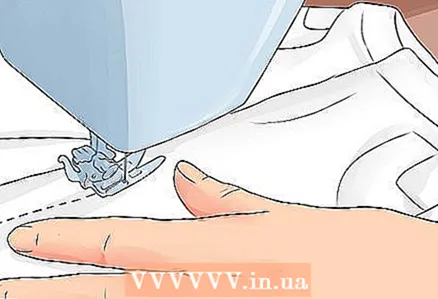 5 Turn the pants inside out and sew on the legs. If the seam isn't perfect, great! Leave it as it is. After all, who will see him?
 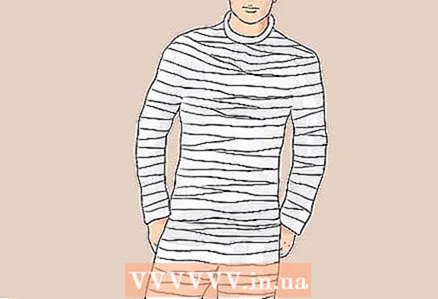 6 Put on your suit. Ay! Don't be alarmed, it's just you in the mirror. So, what to do with the hands and feet? A few more stripes here and there (around gloves and one or two pairs of socks) and you're done! Scroll down to Method 4 to find out what to do with your head.
Method 3 of 4: Using Nodes (Method Two)
 1 Tie four to five strips together. The knots can make the mummy look even more realistic and hint that it wasn't easy for you to get out! This method is suitable if you do not have a sewing machine or do not know how to use it.
 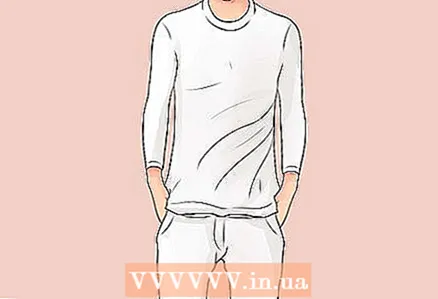 2 Wear long underwear or a white T-shirt and pants. Any combination of a white long sleeve top and white pants will work. Just keep in mind that bulky things (like cargo pants) are not the best option for a mummy silhouette.
 - Don't forget the thick wool socks!
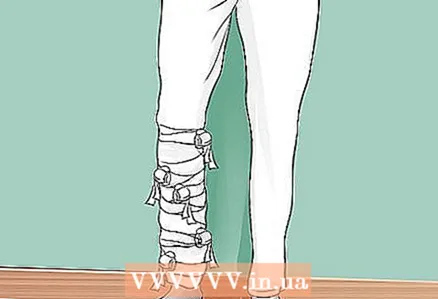 3 Start wrapping your leg. To secure the ends, you can either use an overlap, or make another knot (since you already have a lot of them, it will fit perfectly).Bandage in straight turns, criss-cross, or whatever you like, just to cover every centimeter. Repeat with the other leg and thigh. When you reach the end of the strip, tie another knot, either tie the new end to the already wrapped part, or simply tuck it in.
 - Wrap the pelvis with material from one of the legs. It doesn't matter which leg it will be. But do not wrap up to the waist or higher: even the strongest bladder will not stand the abundance of Halloween cocktails. It will be a real nightmare.
 4 Wrap your torso from waist to shoulder. The easiest way is to cross the bandages with an X across your chest and wrap them around your shoulders like straps. To close every centimeter, you need to overlap with a decent margin. Again, if the strip runs out, tie the next one to it, or fasten the one you are using and start with a new one.
 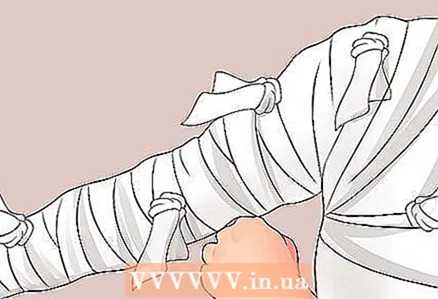 5 Wrap your arms. If you've ever wrapped your wrists for boxing or other sports, use the same tricky weaves between your toes. If you haven't done this before, wrap the strips between your fingers, around the base of your thumb, and around your wrist over and over. If the streak ends, grab the next one and continue moving from toes to shoulders.
Method 4 of 4: Finishing Touches
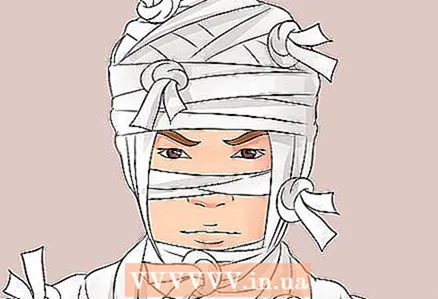 1 Apply the remaining bandage to your face. The scarier you want to look, the more closed your face should be. If you want to be a cute, harmless, smiling mummy, just wrap the chin bandage around your head and a little around your forehead. If your goal is to scare everyone you know, bandage your entire face, leaving room only to see and breathe.
 - Ask a friend to help you with this. You can use the bandages yourself, but it can be difficult to secure the bandages securely, especially if you have limited field of vision.
- If you have a ski mask and want to cover your entire face, you can use it as a base to cover your head.
- A safety pin, hairpin, or similar device can be very helpful. Just tuck them under another layer of bandages to hide.
 2 If your face is visible, add some makeup. Make sunken eyes and sunken cheeks. A little white for the base and a little black on the cheekbones and under the eyes will give you a ghostly look. Apply some baby powder to heighten the effect of the ancient mummy and you are ready to go!
 - Apply the gel to the face or around the spots to make the mummy appear slightly rotting. Pull a couple of strands of hair out from under the headbands and tousle them for an even more nightmarish look.
 3 Go to party in her new suit. Or sit on the porch when people come to your house, hold still and jump on them when they least expect it! Ha ha!
Tips
- Save old sheets that are no longer suitable for carnival costumes and similar purposes.
- If you're tying knots, keep them tight!
- If you don't have coffee or tea, there is always dirt.
- If you have pieces of headbands left over, they can be used to wrap soft toys for home decoration. Mummy bears can be displayed in the window!
- Brown, gray, and red paint are also great for dyeing fabrics. Red is kroooooooov!
Warnings
- If you've tied the bandages in knots, they can loosen and you risk spending the whole night straightening them. If you are at a party, you may need to move less. Just dance like a mummy would dance - what a great reason to stay in character!
What do you need
Method one: stitching with a sewing machine
- Lots of white cloth (or sheets)
- 3-12 tea bags
- Pot and hot water for brewing
- Pillowcase (optional)
- Scissors
- Sewing accessories (machine, ripper, etc.)
- White Long Sleeve T-shirt and White Pants looks
Method two: using nodes
- Lots of white cloth (or sheets)
- 3-12 tea bags
- Pot and hot water for brewing
- Pillowcase (optional)
- Scissors
Finishing touches
- English pins, hairpins or similar devices (optional)
- Baby powder
- Black and white face paint (black can also be used to tint fabric)
- Ski mask (optional)
- Gel (optional)


