Author:
William Ramirez
Date Of Creation:
21 September 2021
Update Date:
1 July 2024

Content
- Steps
- Part 1 of 3: Measuring future shorts
- Part 2 of 3: Cutting the Shorts
- Part 3 of 3: Hemming the trousers
- Tips
- Warnings
- What do you need
You have an old pair of jeans that you no longer wear but don't want to throw away. In the meantime, summer is coming, so why not turn them into trendy cropped shorts? Turning your unwanted jeans into shorts is a quick and easy process that can help breathe new life into old clothes.
Steps
Part 1 of 3: Measuring future shorts
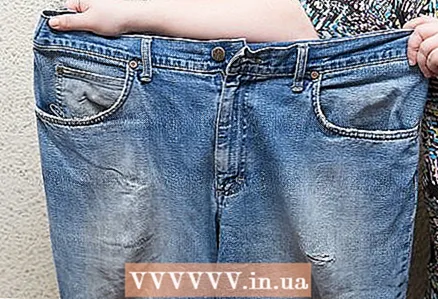 1 Put on your jeans. See how they look on you. Pay attention to how they sit on you in different areas of your hips and legs. They may be comfortable at the waist, but too loose or tight at the hips. Remember these nuances: all this will help you to trim them correctly in the future.
 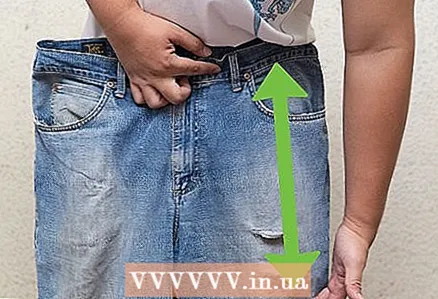 2 Decide how long you want your shorts to be. Are you going to wear knee length or will it be a very short summer version? Decide how long or short you want the shorts. Mark a preliminary cut line, which should be at least four centimeters longer than the required length if you want to roll up the edges later.
 - Take your favorite shorts as reference.
- Cut your shorts slightly longer than necessary and measure them on. The shorts can look completely different during wear, so their length may already be just enough and suitable for hemming the edges. You can always trim more, but you won't be able to add length.
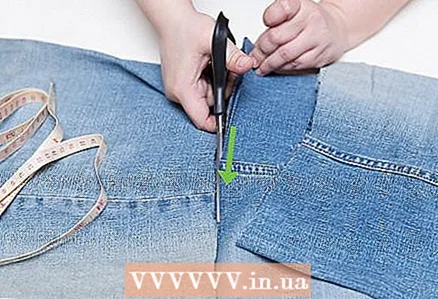
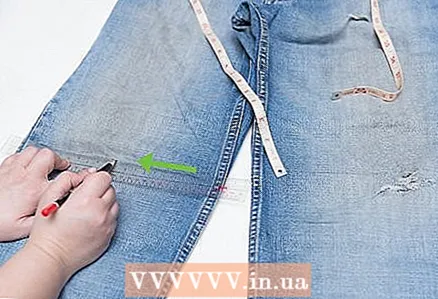 3 Note the required length. Use a pencil or erasable marker to mark the cutting line. This way you can cut the shorts as evenly as possible, and all the marks are washed off later.
 - Place a small dot while you are wearing the shorts, and draw a cut line after you remove them and spread them out on a flat surface to keep it as straight as possible.
Part 2 of 3: Cutting the Shorts
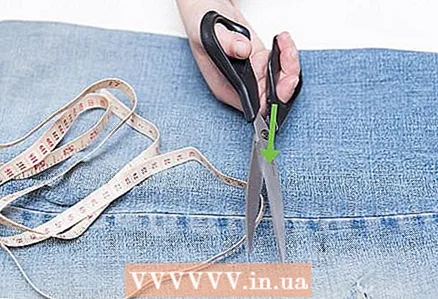 1 Select a cropping tool. Scissors are the most obvious choice, as they give you the most control over the process, but a utility knife will make a more precise and even cut, and tearing the fabric will give your shorts a rougher and more deliberately messy look.
 - Proceed with caution when using any cutting tool, in particular a clerical knife, as its blade is very sharp, which makes the process lightning fast, but at the same time it can be dangerous if used carelessly.
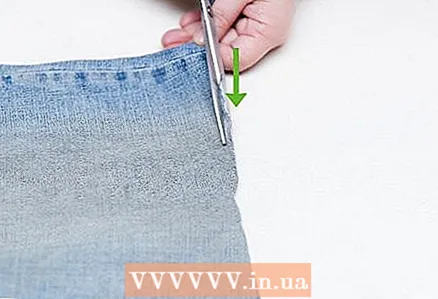
 2 Cut the leg along the marked line. Place the jeans on a flat surface and smooth out any wrinkles and creases. Use a knife or scissors to cut the leg. Follow the line carefully to get the desired length.
 - After cutting off the first leg, attach the cut section to the second, which will allow you to be sure that the length of both will be the same later.
- Try to make very long cuts with scissors if you want the edges to be as straight as possible.
- When using a utility knife, you must use a suitable cutting surface. Otherwise, the blade will scratch the surface being used after cutting through the fabric.
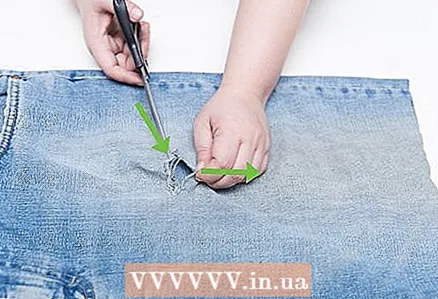 3 Tear off the legs. If you want your shorts to look rougher and messier, you can rip your legs off with your hands. Make an incision two or four centimeters long to create a small hole that will allow you to tear off the unwanted part of the leg with your hands. Place the pant leg on your knees and slowly tear towards you, while trying to keep the tear line straight; If you are wrong, it can be difficult to get back to the intended break line.
 - For a more even break, you can make several small holes and sort of "connect" these points, separating the pant leg along the line between them.
- If you make a mistake in the process, make a straight cut in the required area and try again.
- Torn and raw edges of shorts tend to look better when used with rougher materials such as denim because their threads have a coarse texture and are visually more attractive when worn. The ripped leg method is best for particularly old or worn pants, as it creates a distinctive hem.
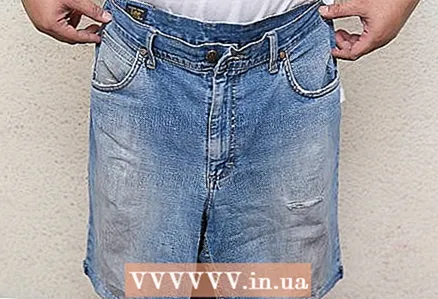
 4 Adjust your shorts. Try them on. If the length is too long, you can trim an additional one centimeter at a time until you get the desired length. Remove any dangling threads, frayed edges, or scissors until the legs are tidy and the same length.
Part 3 of 3: Hemming the trousers
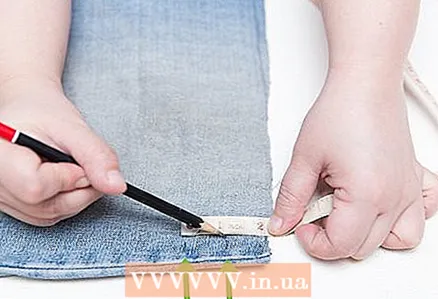 1 Select the width of the flange. Decide on the desired hem width and mark it twice on the shorts.A short collar will look more neat, while a wide one will create the appearance of folds.
 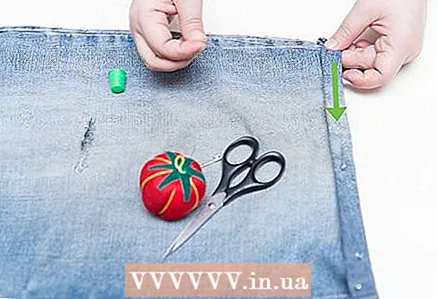 2 Sew the hem. Fold over the edge twice (or more if you like) and sew with your sewing machine. You can do it manually if you like. Be careful not to accidentally stitch the leghole.
 - If you want to sew the edges but don't have a sewing machine, take the shorts to any atelier that can do it for you for a small fee.
- Place the rounded object in the leg opening and sew around the perimeter to avoid accidentally stitching the leg opening.
 3 Try on ready-made shorts. Now you're done! Examine the shorts carefully from all angles. If the hem is too wide or, on the contrary, narrow, the stitch can be loosened and redone all over again. Experiment with different lengths, edge looks and styles to add a fresh look to your wardrobe.
Tips
- Smooth out any folds and edges before sewing.
- With fabric glue, you can decorate your shorts with sequins or rhinestones, as well as sew on patches.
- Fabric glue can also be used to fix edges if you don't have the ability to stitch them.
Warnings
- Be careful when using the sewing machine or needle and thread. Bad things happen to everyone.
- Try not to make mistakes when marking or cutting. Remember, you will not be able to replace the torn off or cut off part.
What do you need
- Old pants
- Scissors
- Stationery knife (optional)
- Sewing machine (optional)
- Needle and thread (optional)
- Pencil or erasable marker


