Author:
Mark Sanchez
Date Of Creation:
8 January 2021
Update Date:
2 July 2024

Content
- Steps
- Method 1 of 3: Using the eyelid tape
- Method 2 of 3: Using eyelid glue
- Method 3 of 3: Apply Makeup to the Double Eyelid
- Tips
Many girls (for example, almost 50% of Asian women) lack the natural fold of the eyelid. They usually use makeup to create a "double eyelid". You can use duct tape or glue to achieve this effect, and then apply makeup to create the crease of the eyelid. You can have surgery if you want permanent changes. But first, it should be easy for you to master the work with duct tape or glue.
Steps
Method 1 of 3: Using the eyelid tape
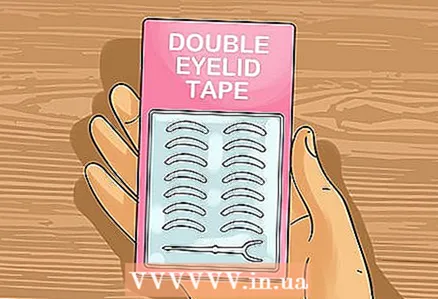 1 Purchase eyelid tape. There are several different types of eyelid tape. You can buy it in rolls (then you have to cut it yourself), and you can also use the already cut strips.
 - Eyelid tape is a specialized product and can be difficult to find in regular stores. Its presence or absence on sale depends on the country where you live. However, you can always buy it online.
- An alternative to purchasing duct tape is to purchase a sports duct tape that will need to be cut. To get your duct tape, cut your sports duct tape into small rectangles and round off the ends. You should have small ribbon ovals. Cut the ovals in half and round off any sharp ends.
 2 Wash the eye area well. Make sure the eye area is clean before applying tape. You can apply makeup after using the duct tape.
 - Some brands of eye shadow tape may hold up better if you apply a small amount of eyeshadow first. Experiment with different brands and find yours.
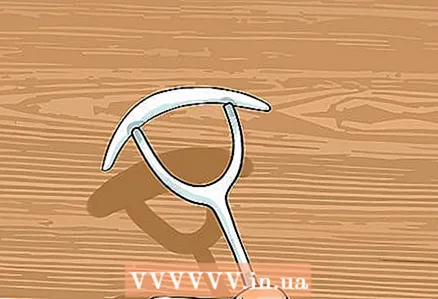
 3 Find your natural fold. Look in the mirror and find where your eyelid will naturally fold. Most brands of eyelid tape have an applicator to help you find your eyelid crease.
 - Gently bring the back end of the applicator up to your eyelid and blink to reveal the crease. This is where you will apply the tape.
 4 Attach the tape to the applicator. If you are using striped tape, use the applicator to separate the tape from the protective cover. Peel off one edge of the protective cover and place the applicator on the corner of the tape. Tear off the rest of the protective cover so that the entire tape is on the applicator.
 - You need to be able to arch the tape by squeezing the applicator.
- Depending on which brand of duct tape you use, you will be dealing with cut strips or tape that you cut yourself.Either way, you need to grab a pair of applicators to apply the tape to your eyelid.
- If you don't have an applicator, you can apply the tape with your fingers, but this can be a little tricky.
 5 Apply the tape to your eyelid. Close your eye and gently apply the tape to the area of the eyelid where you want to see the crease. Blink a few times to make sure the tape is secure.
 - You shouldn't see the tape, and a "double" crease should appear on the eyelid.
- Repeat for the second eye.
Method 2 of 3: Using eyelid glue
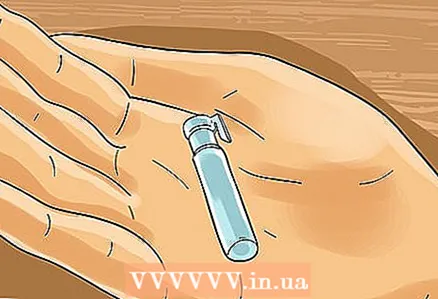 1 Buy eyelid glue. Just like eyelid tape, eyelid glue can be tricky to find in stores, but you can easily order it online. Unlike eyelid tape, you can't make it yourself.
 - There are several brands of eyelid glue, most of which are made in Japan. Find the one you need.
 2 Make sure your eyelid skin is clean. Wash your face and wash the eyelid area. Wait until your eyelids are completely dry before applying the glue.
 - Once the glue is dry, you can apply your makeup.
 3 Find your eyelid crease. Your glue should come with a pusher to help you locate the crease of your eyelid. If you don't have one, use a glue brush.
 - Close your eye and sweep the pusher across your eyelid to find the crease. This will be where you will apply the glue.
 4 Apply a small amount of glue to the brush. Remove excess glue from the brush. Use a sufficient amount of glue. If there is too much glue on the brush, it can get into the eye.
  5 Apply glue to your eyelid. Close your eye and gently brush along the intended line on the eyelid. Use a pusher to collect the eyelid and lower it to the fold. Open your eye for the glue to stick.
 - Using glue gives a more natural look, but it can wear off quickly. Reapply the adhesive if necessary.
Method 3 of 3: Apply Makeup to the Double Eyelid
 1 Start with a cosmetic product to mask blemishes. Apply a light, natural tone to the top of the browbone. Apply eyeshadow in a medium shade to the eyelids above the tape or crease. Mix colors together. Try to blend the transition between medium and light shades by applying medium tone a little on the outside and filling in 2/3 of the eyelids.
  2 Use a darker shade to add contour to your eyelid. Using a brush, paint a darker color just below the raised browbone. Add more color to the outside and work towards the center to soften the colors.
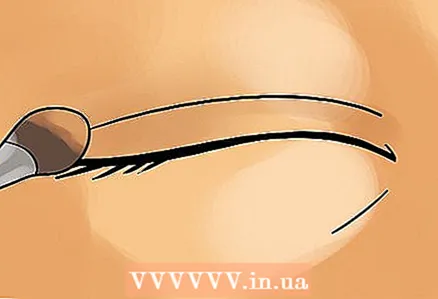
 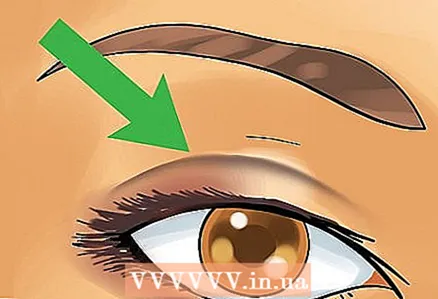 3 Use liquid eyeliner to hide the duct tape. Draw a line with matte black eyeliner just below the duct tape. Cover the bottom edge of the tape and remember to grab the edge of the tape on the inside of the eyelid, closer to the nose.
  4 Apply eye shadow over and under the eyes. When applying eyeshadow, blend from the center up and out. Do it in the shape of a wing that flares out towards the brow line.
 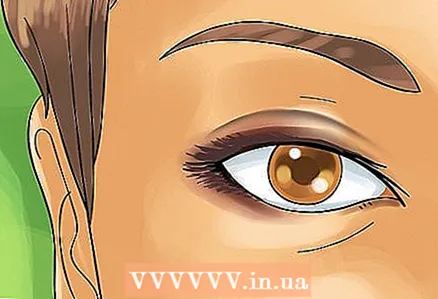 5 Blend. To create a double eyelid that looks natural, be sure to blend the colors. Choose similar colors for both the crease and the eyelid. Apply lighter tones to the inside of the eyelid, and darker tones to the area near the crease.
Tips
- Both eyelid glue and eyelid tape can be removed with water.
- There are operations to create a double eyelid, after which there are no scars, and which do not involve incisions.


