Author:
Eric Farmer
Date Of Creation:
8 March 2021
Update Date:
1 July 2024

Content
A drainage trench is a simple yet versatile structure that can be used to drain stagnant water from problem areas in your yard or basement. The process of creating a trench is simple; you only need a little planning, the availability of the necessary tools and materials, as well as knowledge of the information from this article. Start reading at Step 1 if you want to learn how to make a drainage trench yourself.
Steps
Part 1 of 2: Planning and Preparing
 1 Underground communications. Before building a drainage trench in a specific place, you need to find out where all underground cables, pipes or other communications pass on your site so as not to damage them during excavation work.
 - Contact city or government agencies to find out about the location of underground utilities. For example, in the United States, there is a 7 times, once dig 811 hotline that will connect you to your local call center.
- Plan the route of the trench so that it is no closer than one meter from any walls or fences, and try to avoid poles, bushes, and tree roots.
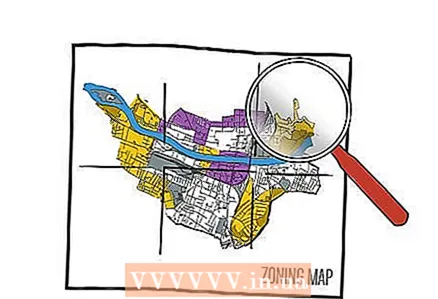 2 Find out if there are zoning or gutter regulations. Some municipalities have rules that determine the possibility of building or even excavating on your site.
 - It is possible that you need to contact your local authority or supervisory authority to begin construction of a drainage trench. It sounds strange, but even small earthworks may require many permits signed by the municipal authorities. Before you start planning, you should familiarize yourself with the rules and regulations in your area.
- It is also necessary to determine if your drainage trench will present a problem for neighbors in terms of groundwater flow. Drainage of excess water to a neighboring site can easily end in a lawsuit.
- Ideally, the drainage trench should run over a relatively unused piece of land away from buildings and go into sandy soil that allows water to pass through easily.
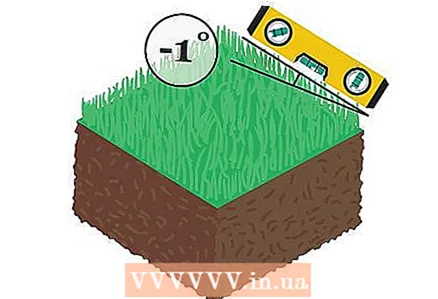 3 Find a small slope. The correct drainage trench is erected with a slight slope. Thanks to this, the water will leave the problem area by gravity.
 - In the absence of a natural slope, you can create a slope artificially by gradually deepening the trench. According to experts, an effective drainage trench requires a slope of 1 percent. In other words, the level should be reduced by 10 cm for every 10 meters of the trench.
- Use landscape paint to outline the route of the planned trench, then use a pair of rope pegs and a level to mark the desired slope of the trench.
- If you cannot calculate the correct ditch for your drainage trench yourself, you can hire a surveyor or other specialist to help determine the correct dimensions and location. You will do the further work yourself, but a work plan signed by a specialist will add confidence in the correct completion of the task.
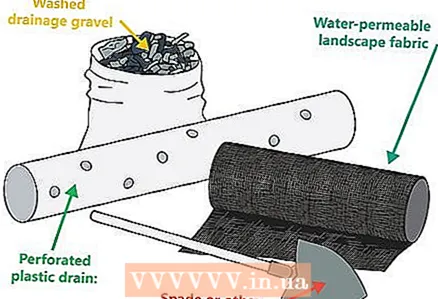 4 Gather the necessary tools and materials. To build a drainage trench, you will need to stock up on some basic tools and materials. You will need:
 - Roll of water-permeable agrotextile: Thanks to this fabric, the drainage pipe will remain clean and it will also be possible to avoid clogging by preventing the ingress of soil, silt and roots.
- Perforated plastic pipe: the diameter of the drainage pipe depends on the amount of water to be discharged and the size of the trench. You can choose from a flexible drain pipe or a rigid PVC version (this option is more expensive, but stronger and easier to clean).
- Washed drainage gravel: the number of bags depends on the size of the trench. For a rough calculation, use an online calculator that takes into account the depth and width of the planned trench.
- Tools: If you are digging a trench by hand, you will need a shovel. You can also rent special trenching tools or use an excavator.
Part 2 of 2: Building a trench
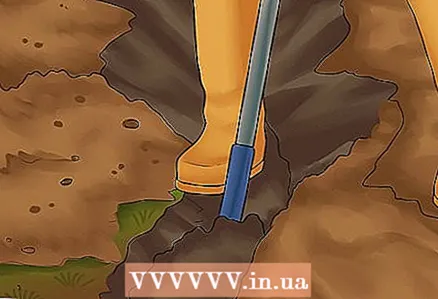 1 Digging a trench. Excavation work is the least difficult stage in the construction of a drainage trench, but the most time consuming. It is best to enlist the help of a family member, friend, or neighbor.
 - The width and depth of the trench to be dug depends on the amount of water discharged and the tools used. Standard dimensions for drainage trenches are approximately 15 cm wide and 45-60 cm deep.
- Dedicated trenching tools allow you to make trenches wider (which is very good for significant drainage problems) and cut the operating time in half. But do not forget that the use of special tools increases costs, since you will have to pay for rental services and buy more gravel.
- The same applies to using excavator services as they dig very wide and deep trenches, which also increases project cost and labor intensity.
- While digging, periodically check the depth of the trench to ensure a continuous slope is being created.
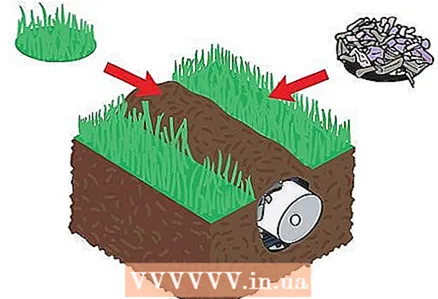
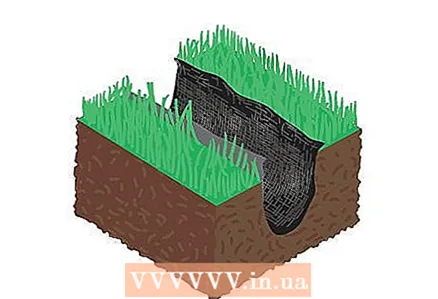 2 Cover the trench with agrotextile. When the trench is dug, it must be covered with a water-permeable agro-fabric.
 - Leave about 25 cm of fabric on each side of the trench.
- Temporarily nail the edges of the fabric to the sides of the trench.
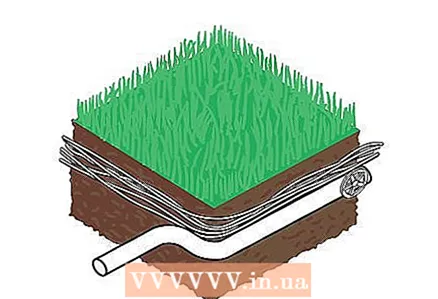
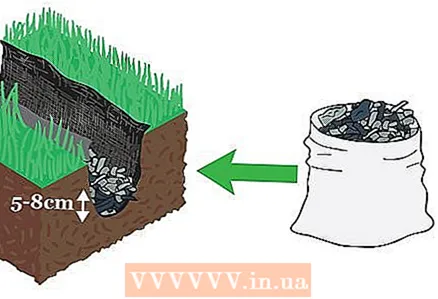 3 Fill up with gravel. Fill the bottom of the trench with a layer of gravel 5-8 cm high on top of the agrotextile.
 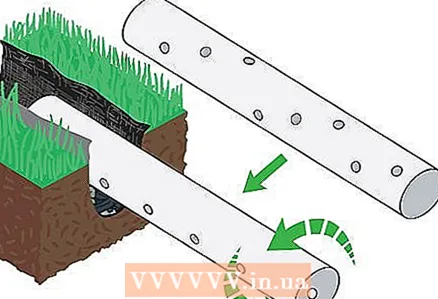 4 Lay the pipe. Lay the perforated drain pipe in the trench on top of the gravel bed. The drain holes should point downward for optimal drainage.
 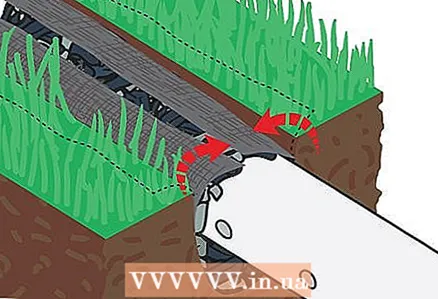 5 Fill the pipe. Fill the pipe with gravel so that 8-12 cm is left to the top of the trench.
 - Then unfasten the edges of the agrotextile and wrap it over a layer of gravel.
- Thanks to such a device, various debris will not get into the drainage trench, but water will be able to see through.
 6 Backfill with a trench. Now cover the trench with earth. Then you can finish the trench as you wish:
 - You can cover the trench with turf, sow the lawn, or cover it with large decorative stones.
- Some do the drainage trench with slight deviations from a straight line to make it look like a clever landscaping element when completed.
Tips
- To subside or compact the earth, a section of the trench can be shed with water.
Warnings
- To avoid unsafe work with an excavator or other equipment, be sure to read the operating instructions for all special attachments.


