Author:
Joan Hall
Date Of Creation:
4 July 2021
Update Date:
1 July 2024

Content
- Steps
- Part 1 of 3: Preparing to make a paper skeleton
- Part 2 of 3: Making Skeleton Parts
- Part 3 of 3: Assembling the skeleton
- What do you need
It shouldn't hurt anyone to have a paper skeleton on hand. You can start learning anatomy from the skeleton, the skeleton can serve as an excellent decoration for the room for Halloween, and you can make it just for your own pleasure. In the process of working on a paper skeleton model, you will become familiar with the main bones of the human body in a fairly visual and casual manner.
Steps
Part 1 of 3: Preparing to make a paper skeleton
 1 Prepare paper. Choose the paper you will use to make the skeleton.
 - An affordable and inexpensive option would be printer paper.
- Cardboard will hold its shape and make for a stronger skeleton, but it will cost you more.
- Disposable paper plates can be a good and thicker alternative to printer paper.
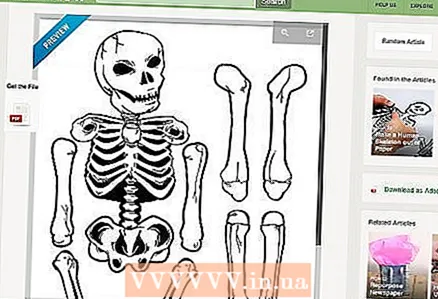 2 Find a picture of the skeleton. You will need a skeleton image to use it as a template. On the Internet, you can easily find even printable skeleton templates.
 - Note that you will find it easier to work with a simplified skeleton image than one that shows full scientific bone detail.
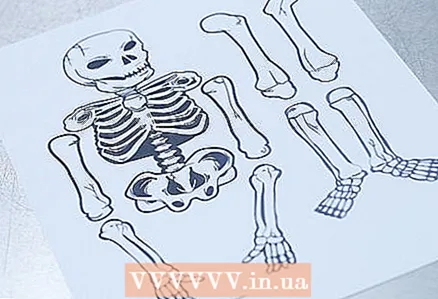 3 Divide the skeleton into parts. Select the parts of the skeleton that should represent the individual elements of your paper model. Each such part must be separately made from paper, cardboard or paper plate. In a simplified version of the skeleton, the following parts can be distinguished:
 - skull (head);
- chest (ribs);
- pelvis;
- 2 upper arms;
- 2 lower arms with hands;
- 2 upper legs;
- 2 lower legs with feet.
Part 2 of 3: Making Skeleton Parts
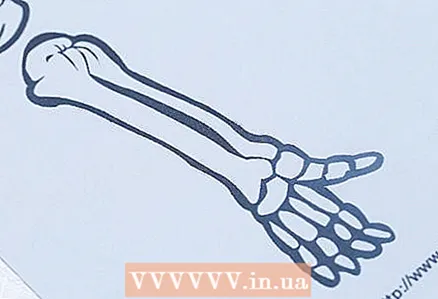 1 Print or draw hand details. The arms are made up of two main parts: upper and lower. It is advisable to use a separate sheet of paper or cardboard for each part of the hands. You can transfer the contours of the template printed on paper to cardboard or draw the bones of the skeleton yourself, focusing on any image.
 - To create a simplified skeleton model, each part of the arms can be drawn in the form of a classic template image of a bone. One such bone will fall on the upper arms, and in the lower arms, these bones should be complemented by the image of the bones of the hand.
- To make an anatomically correct skeleton, you should pay attention to the fact that the hand does not actually consist of two bones, but of a larger number of them. Follow a more detailed model of the skeleton and draw in detail the individual elements of the pattern of the structure of the arm, you can also simply draw in more detail all the bones of the arm on the selected large parts of it. The upper arm consists of one bone called the humerus. The lower arm consists of two bones: the radius and ulna. The brush also includes many separate small bones. If you want an anatomically correct skeleton, you must depict all of these bones.
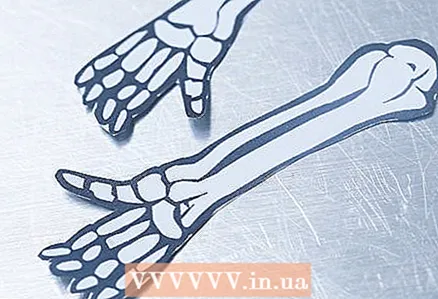 2 Cut out the details of the arms. Take scissors and cut out all the previously drawn details along the outline.
 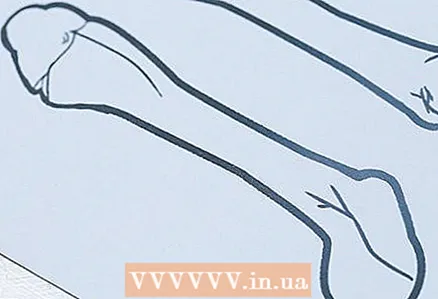 3 Print or paint the details of the legs. The legs are similar in structure to the arms. They can be divided into two main parts: upper and lower. Draw all the details you need, then you can cut them out.
 - To create a simplified skeleton model, depict each part of the legs in the form of a classic template image of a bone. One such bone will fall on the upper legs, and in the lower legs, these bones should be complemented by the image of the bones of the foot.
- To make an anatomically correct skeleton, you should pay attention to the fact that in fact the leg does not consist of two bones, but of a larger number of them. Follow a more detailed model of the skeleton and draw in detail the individual elements of the template for the structure of the leg, you can also just draw in more detail all the bones of the leg on the selected large parts of it. The upper part of the leg is made up of one bone called the femur. The lower arm consists of two bones: the tibia and the tibia. The foot contains many separate bones, including the metatarsal bones and phalanges.
- For an anatomically correct skeleton to have the correct proportions, the legs should be one and a half times longer than the arms.
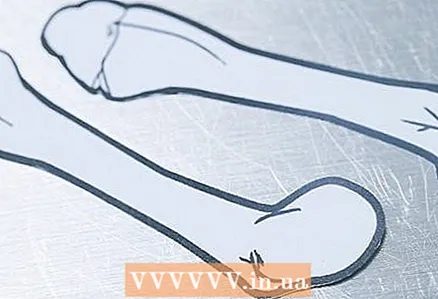 4 Cut out the leg details. Take scissors and cut out all the drawn details of the legs along the contour.
 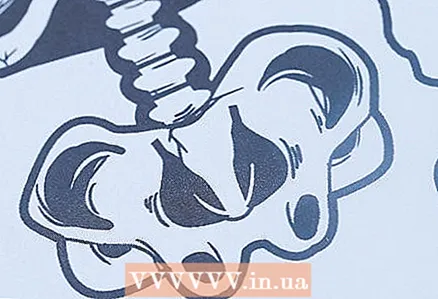 5 Make the ribcage and pelvis. Prepare the chest and pelvic images of the skeleton and then cut them out.
 - To maintain anatomical accuracy, 12 pairs of ribs must be depicted in the chest.
- The upper chest detail should also include the bones of the scapula, collarbone, and sternum.
- When detailing the pelvic area, you must not forget to depict the sacrum and coccyx, located at the end of the spine.
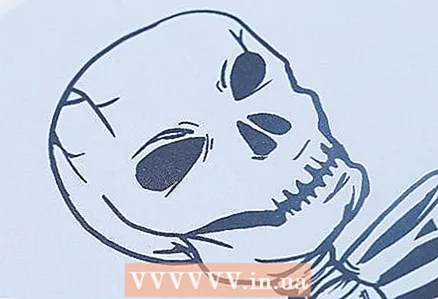 6 Make a head. Draw a skull on paper and cut it out. Do not forget to depict the holes in the eye sockets and the nasal cavity.
 - When creating the detailed skeleton, draw the lower jaw and teeth on the skull.
Part 3 of 3: Assembling the skeleton
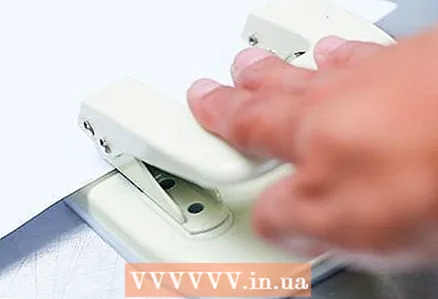 1 Use a hole punch to make fastening holes on the parts. Take a hole punch and punch holes on the parts to hold them together.
 - If you don't have a hole punch, use an awl, scissors, or knife.
- Make one hole at the bottom of the skull.
- Puncture a hole at the top of the ribcage to connect to the skull, and at the bottom of the hole to connect the pelvis. In the shoulder area, you will need holes for attaching the arms.
- Make one hole at the top of your pelvis and two holes on the sides at the bottom.
- Punch holes at both ends of the upper arms and legs.
- Make holes at the top of the lower arms and legs.
 2 Prepare fixing materials. Skeleton parts can be connected together with strings or brass paper rivets.
 - You can find paper rivets at office supply stores and craft stores.
- Rope bindings will allow skeleton parts to dangle freely, while rivets, when tightly fixed, will allow you to give the skeleton specific poses.
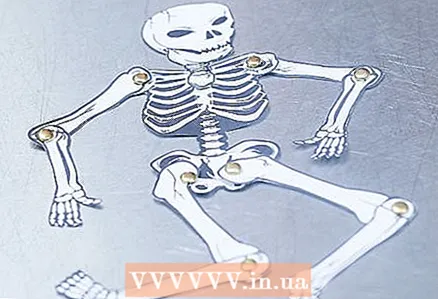 3 Collect the skeleton. Connect the skeleton parts together using rivets or strings.
 - The lower opening of the skull connects to the upper opening of the chest.
- The upper leg pieces are attached to the side holes of the pelvis.
- The upper arms are attached to the ribcage at the shoulders.
- The lower arm and leg pieces are attached to the corresponding upper pieces.
What do you need
- Scissors
- Brass rivets for paper or rope
- Paper, cardboard or disposable paper plates


