Author:
Helen Garcia
Date Of Creation:
16 April 2021
Update Date:
1 July 2024
Content
- Steps
- Part 1 of 5: How to Determine the Perimeter
- Part 2 of 5: How to make stars
- Part 3 of 5: How to Weave All the Elastic Bands Together
- Part 4 of 5: How to Finish Perimeter Weaving
- Part 5 of 5: How to Finish the Bracelet
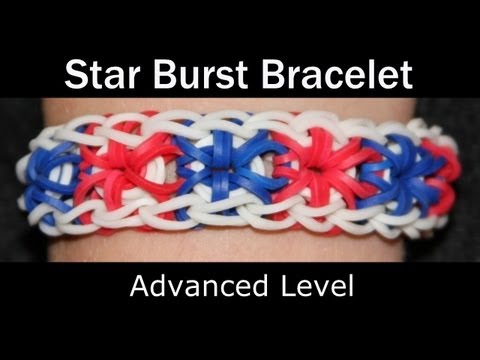
If you can master the basics of braiding with rainbow braid, then you are ready for a more complex project as well. Now you can make a bracelet with stars (in the shape of an asterisk)! This bracelet looks tricky to make, but it's not that hard to make. In the end, you will have a wonderful bracelet of any size, for both boys and girls.
Steps
Part 1 of 5: How to Determine the Perimeter
 1 Put on the first elastic. Place the braid so that the teeth are facing upward from you. Now slide the elastic over the first hook in the middle and the first hook on the left.
  2 Braid one side of the braid with an elastic band. Now make a loop from the first hook on the left to the second hook on the left, and then from the second hook to the third.
  3 Continue to put the elastic on the hooks. Continue adding loops along the left side until you get to the second hook from the end.
  4 Finish braiding one side of the braid. Then make a loop diagonally from the second hook from the end to the last hook in the middle.
  5 Repeat on the other side until you are finished braiding around the perimeter. Go back to the original hook and repeat on the other side. You should then have a line of braided elastic along the outer edge of the braid.
Part 2 of 5: How to make stars
 1 Press the elastic down. Press all outer edges of the elastic to the bottom of the hooks. You will have space for other rubber bands.
 - A hook is easiest to use, but you can also use your fingers or the back of a comb to do this.
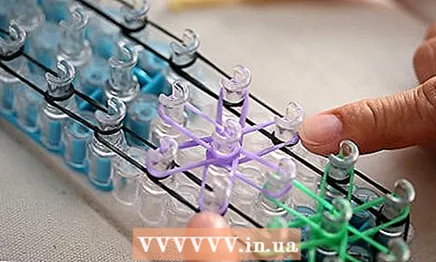
 2 Make the first star. Slip a Color 1 elastic (it can be any color) between the second crochet in the middle row of the braid and the second crochet in the right row. Then, in a clockwise motion, string five more elastic bands, using the hook in the middle row as the center. You should have a star (also known as an asterisk).
 - Continue pressing the elastic bands downward as you move. This will create additional space for further action.
 3 Make the remaining stars. Place the elastic over the fourth hook in the middle row, diagonally from the fourth hook in the right row of the braid. Move clockwise as before. You should have stars with the bottom covering the top of the first star. Continue braiding the stars until the entire braid is complete (inside the outer circle made in the first part).
 - Press down the elastic bands each time.
- You can change the colors of the stars if you wish. Each of them can be different or the same color. Everything depends on you!
 4 Place the rubber bands in the center of the circle. Fold the elastic in half to make a small circle. This elastic should be the same color as the outer circle. Place the elastic over the last hook of the middle row of the braid.Repeat this step and put the elastic on the hook in the center of the star. Continue adding rubber bands down the center of each star until you get to the very edge.
 - You should have something like this:

- You should have something like this:
Part 3 of 5: How to Weave All the Elastic Bands Together
 1 Rotate the braid. Rotate the braid so the prongs are facing you.
  2 Pull out the first elastic. Hook the bottom loop of the first sprocket and pull it out. You need to get it out from under the upper elastic bands. Be careful not to catch other elastic bands on the hook.
  3 Make a loop on the middle hook. Take the elastic and loop on the middle hook.
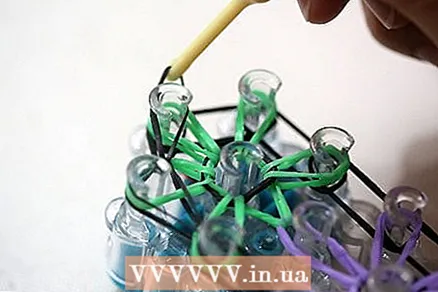
  4 Braid the stars. Place the hook under all the rubber bands on the center hook of the star and grab the elastic to the right of the bottom of the star. Grab it with your hook and remove so that you can put it on the hook on the other side. Continue counterclockwise until you are done with all the rubber bands on the star. Then do the same with the remaining stars on the braid.
 - The stars now look like a flower or a sun if you did everything right.
- Be careful not to rearrange other elastic bands on the hooks.
Part 4 of 5: How to Finish Perimeter Weaving
 1 Braid the elastic from the outside. Start with an elastic band around the bottom left and center hooks. Grab the end of the elastic around the lower center hook and pull it out (without disturbing the position of the other elastic bands).
 - Then slide the elastic over the lower left hook so that both ends of the elastic are on the hook. Do the same with the elastic around the bottom left hook and the second one from the left.

- Continue until you have finished braiding the entire left side. The last one should braid the hook in the middle with the last elastic band to the left of it.
- Then slide the elastic over the lower left hook so that both ends of the elastic are on the hook. Do the same with the elastic around the bottom left hook and the second one from the left.
 2 Do the same for the right side. Go back to the top or bottom and do the same for the right side of the braid.
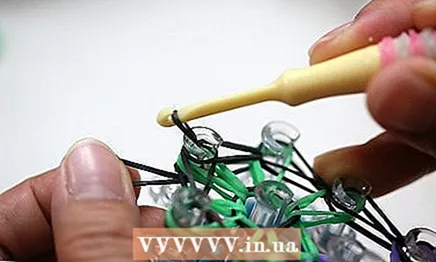
  3 Make the last loop. Pass the hook under all the elastic bands and loop on the last hook in the middle.
 - Take the new elastic with your fingers, thread it through all the elastic, and pull the hook through the loop in the new elastic so that it is completely wrapped around the hook.
- Take the new elastic with your fingers, thread it through all the elastic, and pull the hook through the loop in the new elastic so that it is completely wrapped around the hook.
 4 Remove the bracelet from the braid. Take the hook with the loop wrapped around it. Now pull the entire bracelet and remove it from the braid. Do this carefully and slowly.
 - You need to wiggle the rubber bands from side to side to make them easier to remove.
Part 5 of 5: How to Finish the Bracelet
 1 Add rubber bands. You need to add some rubber bands to make a complete bracelet. Add five elastic bands to one side.
 - Remove the loop from the first hook and put it on the second. Now put another loop on the second hook and secure it on the third. Continue to do the same, put the third loop on the fourth hook and so on, until the very end.
 2 Connect the bracelet. Take the first loop at the end of the bracelet opposite the hook and pretend it is another elastic. Add it to the chain with which you started to weave the bracelet. Now tie the elastic from the end of the bracelet all the way until you reach the first elastic.
 - In other words, you need to hook the bottom elastic on the second hook from the base of the bracelet and pull it up and down to put it on the third hook from the base. Continue making loops until you have one chain.
- You can also pair the bracelet in a different way if you like a different design. You can connect the bracelet in the traditional way.
 3 Attach the clasp. Attach the clasp to the last elastic on the braid. Now remove the chain and bracelet from the braid and then attach the clasp to the loops on the hook. Pull out the hook and the bracelet is ready!
  4 Enjoy your new bracelet. You can make any other bracelets using the Rainbow Braid ™ by following the instructions on wikiHow.


