Author:
Helen Garcia
Date Of Creation:
21 April 2021
Update Date:
1 July 2024

Content
- Steps
- Method 1 of 3: A plastic or foam board
- Method 2 of 3: Magnetic Metal Board
- Method 3 of 3: Small cardstock boards
- Tips
- Warnings
- What do you need
- Plastic or foam board
- Metal magnetic board
- Small cardboard boards
Large white boards, on which you can write with markers, and then erase the written dry, are very convenient for visual presentation of information. You don't have to buy such a board, but make it yourself to save money! A large board can be made from inexpensive materials such as plastic or foam, inserted into a frame, and hung on the wall. If you want magnets to stick to the board, try painting a steel sheet.You can also make small boards from paper and plastic that are convenient to carry. Among other things, you can write various notes and reminders on the white board, which will make your life a little easier.
Steps
Method 1 of 3: A plastic or foam board
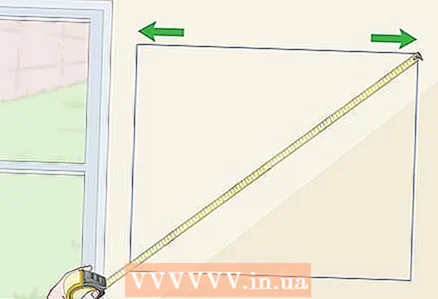 1 Measure the dimensions of the board according to the amount of free space. Choose the board sizes of your choice. At the same time, measure the free space on the wall in advance in order to know how much material to order. Take a measuring tape and measure where you want the board to hang. Write down your measurements and grab your notes when you go to the store.
 - Most of the materials needed for a whiteboard are sold as sheets (for example, 1.2 x 2.4 meters). If the home improvement store doesn't find the sizes you want, you can usually place an order.
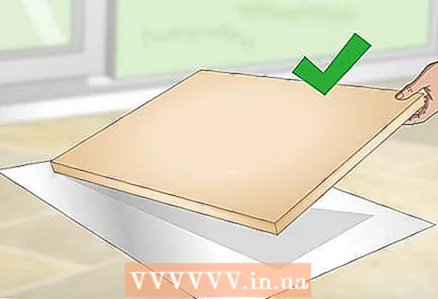
 2 Purchase a melamine sheet to make a traditional whiteboard. Melamine is a hardboard (hardboard) coated on one side. Most commercially available whiteboards use melamine, so you know what to expect from this material. Some sheets have a tile-like texture, which can be useful if you need to break information into individual squares, but it's usually better to choose a smooth sheet. Smooth sheets are easier to wipe clean and look neater.
 - You can also opt for a porcelain finish. It is more durable than melamine but also more expensive.
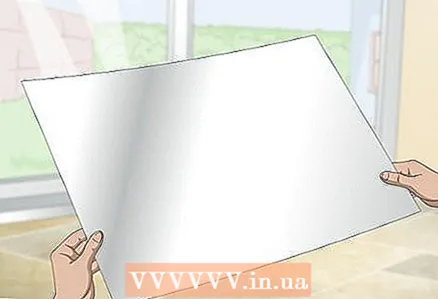
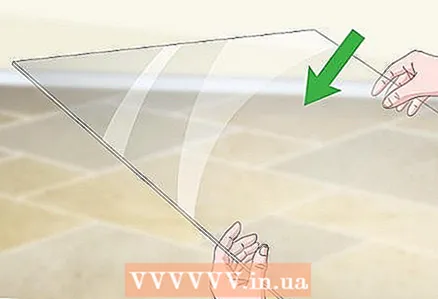 3 Choose a sheet of plastic if you are going to make a transparent board. Try Plexiglass or Lexan for something special. The acrylic and polycarbonate sheets are transparent so you can see the wall behind them. When you write on such a board, it looks like you are writing on the wall. Of these materials, it is better to use Lexan, as it is about twice thinner than plexiglass, weighs less and will not crack if you want to drill it to hang it on the wall.
 - Plastic boards don't stand out as much in most spaces and look good on white walls. You can purchase a large sheet of plastic to cover almost the entire wall so you have enough room. Plastic is very easy to clean and lasts longer than melamine.
 4 Purchase decorative wood slats to create a frame for your plank. In this case, the slats should be longer than the sides of the board so that you can trim them when you make the frame. For example, for a board of 0.6 × 1.2 meters, two strips with a length of 2.4 meters are perfect. The frame will hide the rough edges of the board and create an eye-pleasing border. Also, a board with a wood frame is usually easier to hang on the wall. The frame is fairly easy to make from wooden slats or planks.
 - Decorative slats cost a little more than other essential materials. If you want to save money, try using unnecessary planks that you have on your farm.
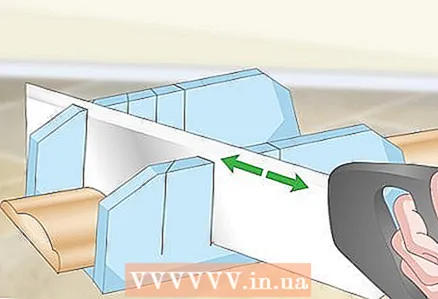 5 Measure and cut the slats with miter box. Use a tape measure to determine the length and height of the board. Measure these distances and mark them with a pencil on the bars from which you are going to make the frame. Then insert the rail into the miter box and line up the pencil marks with the saw cutouts. Insert the hand saw into the appropriate cutouts and cut the slats at a 45 degree angle.
 - Fold the slats to check if they fit snugly together. If you cut them correctly, you should end up with a frame like the ones used for pictures. If the ends of the slats are loose or overlapping, cut them again.
- If you have a circular saw, you can use it to cut wood slats faster.
 6 If you are going to stain wood, rub the slats with 120-grit and 220-grit sandpaper. The paint will then adhere better to the wood surface.Start with 120 grit sandpaper and rub the surface along the grain of the wood using light but constant pressure. Then use 220-grit sandpaper over the wood to smooth the surface.
 - Sand the wood along the grain to avoid unsightly scratches.
 7 Apply to wood stainto give it the desired shade. Choose a stain remover and apply it along the grain of the wood with a foam brush. Apply the product in continuous sweeping movements along the entire length of the staff. Then wait up to 15 minutes for the product to absorb before applying the next coat. Additional layers will make the wood darker and the frame will look much more attractive when you hang the board on the wall.
 - Wear gloves when handling stains. If you use too much stain, blot the excess with a rag until it is absorbed into the wood.
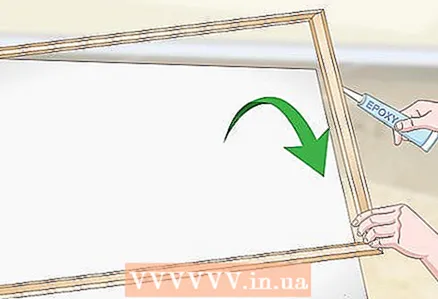 8 Glue the wood frame to the board with clear epoxy glue. Make sure the frame fits snugly against the board before sticking it on. When you are ready to attach the frame, apply glue to the back of the wooden battens. Place the slats against the edges of the board and press down if necessary to secure in place. Also add glue where the strips meet each other so that they stick together.
 - Epoxy is often sold in two parts. To obtain the adhesive, mix the resin and hardener in a 1: 1 ratio.
- You can also use acrylic or polymer superglue. Polyurethane building glue is great for attaching foam sheets to wood, as foam does not respond well to most other types of adhesives.
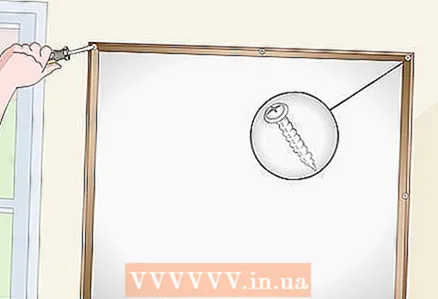 9 Fix the board to the wall with screws. Measure out 30 centimeters along the frame. Use a cordless screwdriver to drive 5 cm screws into the wood frame and the wall behind it. When doing this, ask someone to hold the frame with the board. The screws must be screwed into the support beam, otherwise the board may fall and break.
 - Use a discontinuity detector to locate the support beam in the wall. When you move along the wall, a sensor will light up on it when you get to the beam. Mark the appropriate spots so that you can secure the board as securely as possible.
Method 2 of 3: Magnetic Metal Board
 1 Purchase a sheet of metal of the appropriate size. For a whiteboard, you need something thin and sturdy. Metal is perfect for this purpose. If you need magnetic material, choose galvanized steel sheet. In this case, you can not only write and draw on the board, but also attach magnets to it.
 - Note that while aluminum seems like a good choice, as it is lighter than steel, it does not attract magnets.
 2 Attach a piece of wood to the back of the metal to make the board harder and stronger. Many whiteboards are composed of multiple materials. Place a sheet of wood under the metal to make it easier for you to hang the board and write on it. A soft and light cork sheet is fine, although plywood or something similar can be used.
 - Try to find a sheet of wood that is the same size as your future board. In this case, you do not have to cut the wood to fit it to the dimensions of the metal sheet.
- If the leaf is too large, you can cut it with a hand saw. Many hardware or home improvement stores can cut the board to the size you want if you ask for it when you buy it.
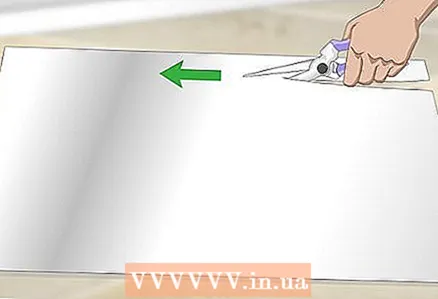 3 If necessary, cut the metal sheet to the size you want using metal scissors. It all depends on how large the board you need and how much space you have for it. If you need to shrink a sheet of metal, use a straight sheet metal shear to cut it. Carefully cut the metal to fit the back of the tree.
 - Sharp edges remain after cutting metal. Be careful not to touch them. You can wear leather gloves to avoid cutting yourself.
- There are various types of metal scissors. Choose scissors with yellow handles - they are best for making straight cuts, which is what you would expect for a rectangular board.
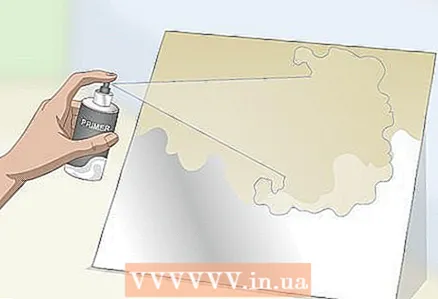 4 Spray the metal with a primer if you intend to paint it. Although there are no rules according to which boards must be necessarily white, it is customary to paint them in such a way that ink of all colors is visible. First, coat the metal with an anti-corrosive latex primer. Apply it in a sweeping, even motion along the entire length of the metal sheet. When doing this, hold the primer can about 15 centimeters above the metal surface.
 - Wipe off any visible dirt from the metal before applying the primer. Take a soft cloth dampened with water for this. You can also use white vinegar or white spirit to better clean the metal surface and prepare it for painting.
- For a smooth, even finish, apply a second coat. Before doing this, wait about 15 minutes for the first coat of primer to dry.
- Dry erase markers write great on bare metal, so you don't have to paint the board if you don't want to. If you prefer a shiny metallic surface rather than the standard white surface, leave it as it is. However, keep in mind that in this case, the marks from the darker markers will be slightly less visible.
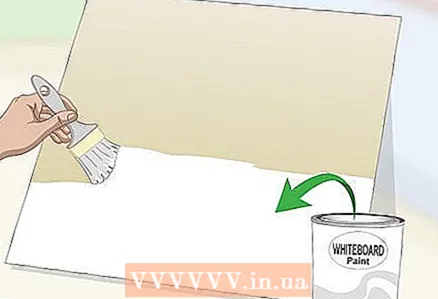 5 Paint the metal with dry wipe paint. Be sure to check the mixing instructions on the paint can. Mix the actual paint with the attached liquid activator and wait about one hour for the solution to settle. Then apply the paint to the metal with a foam roller. Try to keep the paint layer as smooth and uniform as possible, and there are no irregularities left on it that will create inconvenience when writing.
 - The whiteboard should be smooth and uniform. Dry erase markers do not write well on rough surfaces, so take your time and try to apply the paint correctly.
 6 Wait 10-15 minutes before applying additional coats of paint. After the first coat of paint, the whiteboard will most likely not have the surface you would like. Apply additional coats of paint over the first so that it is thick enough for writing. Since the metal has a dark tint, try 3-4 coats of paint. Wait a while before applying each next coat of paint, so that the previous one has time to dry.
 - Cover the metal with an even coat of paint. Apply additional coats until you are satisfied with the quality of the surface.
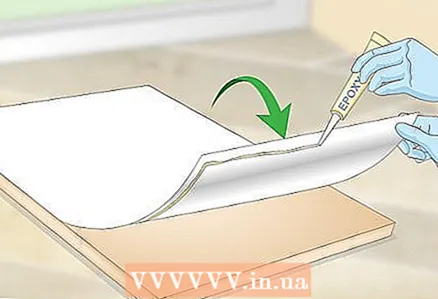 7 Glue the painted metal to the wood backing sheet with epoxy glue. Epoxy is quite corrosive, so wear rubber gloves before handling. Stir the glue with something you can throw away, such as a wooden paint stick. When you're done, apply the glue directly to the piece of wood in a thick, continuous layer, as if you were icing a cake. Then place a sheet of metal on top of the glue with the painted surface facing up.
 - The sheets can also be glued together with PUR super glue or silicone construction glue.
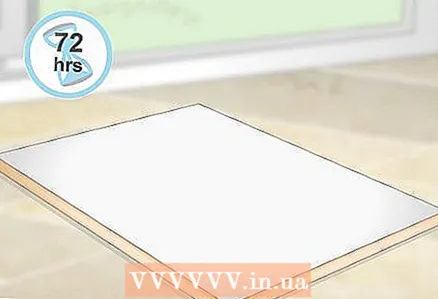 8 Wait 72 hours for the paint and glue to cure completely. It is too early to use the board - it takes time for it to dry completely. After the glue has hardened, you can hang the board without worrying about the sheet of metal slipping off and crashing to the floor.
 - Do not write on the board until it is completely dry.
 9 Hang the board with the adhesive picture strips. Peel off the covering paper from the strips and stick one strip to each corner of the back wood sheet of the board.The other sides of the strips will remain sticky, so press the board firmly against the wall. Press down on the board for about 30 seconds until the strips adhere properly to the wall. Then check if the board is securely fixed.
 - Painting strips are the only way to hang a whiteboard without drilling holes in it and the wall.
- If you want to hang the board on the refrigerator, use some glue to attach the magnets to the corners of the board. Epoxy glue, super glue, or any other strong and durable glue will do.
- Another possibility is to screw the board to the wall with screws. You can also purchase a metal picture hanger, attach it to the wall, and hang your board on it.
Method 3 of 3: Small cardstock boards
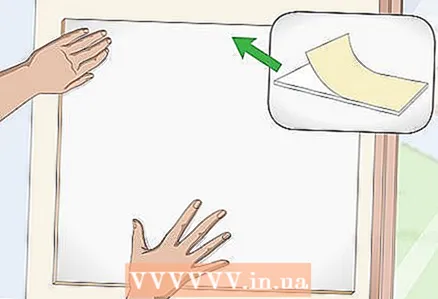
 1 Purchase plastic covers or wrappers to use as a whiteboard. If you need something you can write on over and over again, there is nothing better than plastic. An inexpensive option is plastic covers (plastic sheets in which reports are placed). The middle cover measures 22 x 28 centimeters, which is great for a small white board. In stores, you can find covers in other sizes.
 - Report covers are like plastic folders. Separate plastic sheets are also on sale, but in most cases they are connected in pairs with plastic strips that can be removed.
- Report covers and other supplies can be purchased at an office supply store.
 2 Cut out a sheet of cardstock paper the same size as the cover. Heavyweight cardstock is great for giving the board the hardness it needs to write, although regular paper can be used as well. Covers are usually designed to hold paper, so you don't need to trim them. If the cardstock is larger than the cover, cut an appropriate sheet out of it to stiffen the board.
 - Although regular paper is less stiff than cardstock, you can always change it. For example, it is very convenient for students. You can put a sheet with math assignments, and then change it to something else.
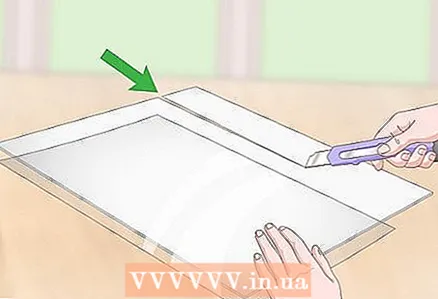
 3 Measure and mark all the borders you are going to apply to the sheets. Secure the plastic sheets with duct tape for a cleaner look. Select a colored tape, measure its width and divide by 2. Using a waterproof marker, draw lines on the plastic sheets at the same distance from their edge.
 - Adhesive tape should be used to glue the edges of the plastic. In this case, half of its width will fall on the front, and the second half - on the back sheet of plastic. You will glue the tape so that its edges line up with the lines drawn by the marker.
 4 Place tape on the cover to hold the plastic together. Wrap duct tape around the edges of the plastic to hold them in place. Smooth out the ribbon - you have a white board. Do not tape the plastic covers on at least one side so that you can change paper between them.
 - If you are not going to change paper, glue the plastic covers on all four sides. Remember to insert cardstock paper between the covers before glueing the last side.
- Another way is to wrap the cardstock with plastic wrap. You can use adhesive plastic wrap or stick the plastic with clear decoupage glue.
- You can also use laminated cardstock to make a sturdy, clear-coated whiteboard. If you don't have a paper laminator, your nearest library might have one.
Tips
- If you want to split your whiteboard into multiple sections, you can do so with car ruling tape. Just stick it to the board.
- Use magnetic paint to make a magnetic whiteboard out of a regular whiteboard.Simply apply a coat of magnetic paint to the board and then cover it with a coat of white paint.
- You can turn entire walls into dry-wipe paint using dry-wipe paint. If you want to do this, make sure you are allowed to paint and write on the walls.
- Melamine boards will stain with repeated use, so periodically wash them with a little isopropyl alcohol diluted in the same amount of water. You can also apply a coat of car wax to the board, which makes the marker much easier to wear off.
Warnings
- Be careful when cutting materials. Handle the saw with care and wear protective equipment such as a gauze bandage and safety goggles.
What do you need
Plastic or foam board
- Melamine, Plexiglass or Lexan sheet
- Decorative wooden slats
- Hand or circular saw
- Miter box
- Epoxy adhesive
- Wood staining agent
- Foam Brush
- Wooden stick for stirring paint
- Cordless screwdriver
- 5cm drywall screws
- Discontinuity detector
Metal magnetic board
- Galvanized steel sheet
- Plywood or cork sheet
- Anti-corrosive latex primer
- White dry wipe paint
- Wooden stick for stirring paint
- Epoxy adhesive
- Adhesive strips for attaching paintings
- Magnets (if needed)
- Metal scissors (if necessary)
Small cardboard boards
- Report covers or plastic wrap
- Card paper
- Scissors
- Ruler
- Duct tape


