Author:
Joan Hall
Date Of Creation:
6 July 2021
Update Date:
1 July 2024
Content
- Steps
- Part 1 of 3: Initial Sketches
- Part 2 of 3: Drawing objects from defined geometric shapes
- Part 3 of 3: Learning the Drawing Technique
- Tips
- Warnings
- Additional articles
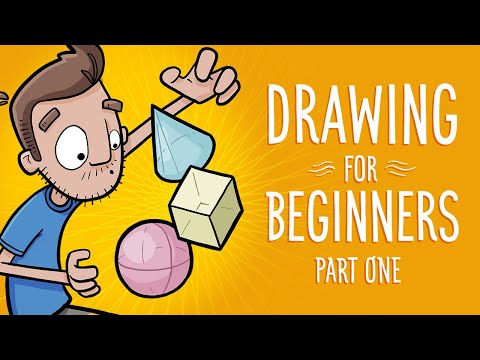
Drawing is an artistic skill that you will have a lot of fun mastering, and over time it can even turn into a terrific hobby. It may seem to you that in order to learn how to draw well, you need to attend professional lessons, but this is not so. Simple drawing for fun can save money and improve your skills. To learn how to draw without taking lessons, sketch in short strokes, apply shadows, highlight individual shapes in objects of various shapes, and practice as much as possible.
Steps
Part 1 of 3: Initial Sketches
 1 Select an object to draw from life. If possible, find something meaningful for yourself, like your favorite flower or your dog. Initially, it will probably be easier for you to draw from life than from memory or imagination. Therefore, drawing something that you like will help you concentrate.
 - If you're just trying to paint, you don't need any special art supplies yet. Any pen or pencil and paper on hand will do.
 2 Draw a general sketch with short strokes. Press lightly on the paper with a pencil. Concentrate on the line you are drawing, forgetting about the object itself. If you are drawing a dog, forget about it. Instead, start sketching her outlines. They represent the boundaries between the dog's body and the environment. Draw these outlines with short strokes.
 - The shorter your strokes are, the more accurate your sketch will be.
- Don't criticize your work. Move quickly and hone your strokes as you go.
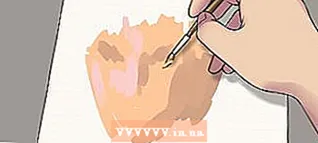
 3 Add details. Once you have a rough outline of the object, start sketching out its details. Try to identify distinctive features or marks on the object, for example, a chip on a cup or a clump of dog's fur, guided by which you can locate other nearby details in the picture.
  4 Apply shadows. It will be a little more difficult to apply shadows, but they allow you to reflect the play of light and shade in the drawing, and also create volume. See which side the object is illuminated from by the sun. Then take a sharpened pencil and evenly shade the penumbra. Once the tip of the pencil is dull, move on to shading the darker areas. Press harder to make the pencil leave darker strokes.
 - You can practice shadowing by drawing a smooth shadow scale. Start drawing the scale from the edge of the sheet. Move your pencil back and forth as you work. As you work, begin to press harder on the pencil to gradually darken the strokes.
- It is also helpful to practice drawing the achromatic color scale. Divide the oblong rectangle into five sections. Leave the first section white. Paint the last section as dark as possible. In between these two sections (in the center three sections), distribute your strokes in such a way as to get transition (from light to dark) shades of gray.
Part 2 of 3: Drawing objects from defined geometric shapes
 1 Practice drawing different geometric shapes. You won't get very far with just copying the outlines of objects. If you master drawing geometric shapes, you can even start drawing imaginary objects, and also improve the perspective of all your drawings. Start drawing 3D shapes. For example, adding a perspective line to a circle allows you to draw a sphere from different angles (depending on the specific position of the perspective line).
 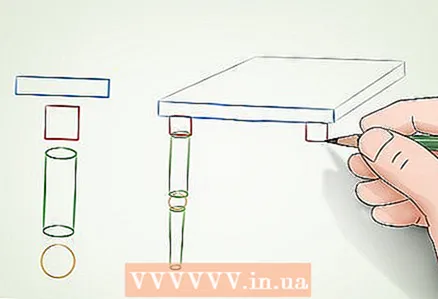 2 Connect different geometric shapes into shapes. Learn to compose the individual blocks from which the contours of the subject are formed. For example, you might think of a table as a set of rectangles and cylinders, and a snake as a series of circles.As soon as you learn to select individual geometric blocks in objects, you can even draw them from memory (without nature).
 - Spend some time looking closely at objects and trying to fit them into separate geometric shapes.
 3 Sketch the subject from different angles. Assemble your drawing object from different shapes. In the course of work on the sketch, erase the unnecessary and finish the necessary lines so that the object in the drawing takes the necessary shape. Once you've finished drawing this sketch, try drawing the same object from different angles. For example, in profile, a horse's head may consist of a square of a nose, a circle of a cheek, and a triangle of ears, but the same head can be drawn from many other angles.
 - Return to these sketches afterwards to improve the rest of your drawings.
 4 Draw the selected object again. Next time, after correcting various mistakes in the sketches from different angles, draw the object again. At first, you can even rely on prepared sketches. Build an object out of basic geometric shapes, then sketch out its details and correct possible mistakes. Once you have gained some experience, you can draw this object in various poses, even from memory.
 - It is perfectly acceptable to make some simplifications in the drawing, they can even become your individual style. For example, memorizing the location of each individual muscle on the body can take too long.
Part 3 of 3: Learning the Drawing Technique
 1 Learn about different painting techniques. The local library should have books on a variety of drawing styles from realism to Japanese manga. Similar books can also be purchased at bookstores. For free drawing ideas and demo tutorials, search for "how to draw (object)" in a search engine or on YouTube.
 - Anatomy books can also be a good source of information for realistic drawings. Learn to sketch the skeleton and muscles from them.
 2 Start working with additional materials. It is usually best to use one thing before you gain experience, such as pencil and paper. Then you can look for alternatives that you like best and will help you develop your own style, for example, start working with colored pencils or with charcoal. In addition, even simple pencils come in different hardness, which allows you to expand the possibilities in applying shadows.
 - Pencils TM (HB) are considered standard. T-grade (H) pencils are harder and suitable for drawing light lines. Category M pencils (B) are softer and suitable for drawing darker lines.
- The hardness and softness of pencils are expressed in numbers. Hard pencils (T or H) have the highest hardness at 9, while soft pencils (M or B) have the highest hardness at 9.
- Vinyl erasers and nags do not damage paper like regular rubber erasers, but they do not erase crayons. Due to the plasticity of such erasers (they have a pasty consistency), they can be shaped to any shape to accurately remove individual small parts of a pencil sketch.
 3 Learn to visualize the drawing process itself. When you're not busy drawing directly, take a look around. Think about how you could reflect the environment in the drawing. For example, imagine how you apply shadows around the drawn eyes, draw pupils and irises. This way of thinking will allow you to think about working on lines and creating your own style.
 - The goal is to learn to see details, not just general shapes. Instead of thinking about the eye itself, think about the lines and colors that will allow you to draw that eye.
 4 Practice. Drawing is in many ways similar to skills such as playing a musical instrument or cycling.Whenever you have some free time, sit down and sketch. Practice applying shadows and using different painting techniques. Sketch objects from different angles. In between drawing classes, just spend time with the objects of interest to learn more about them without overworking.
Tips
- Get in the habit of drawing every day. With this habit, it will be easier for you to force yourself to practice, and you will improve your skills faster.
- Don't be discouraged by the realization that you have made mistakes. This perception stops many aspiring artists. Remember, even seasoned artists continue to learn as they go along.
- Accurate hand coordination takes time. Keep practicing, add short strokes to basic geometric shapes, and the results will improve over time.
- There is no need to purchase expensive art supplies. For study, a notebook and pencils will be quite enough.
- Developing the skill to highlight individual geometric shapes in objects also takes time, but it helps to make more accurate sketches.
Warnings
- Someone, or even you yourself, can try to dissuade yourself from this venture. But don't listen to those who say you have no talent. Drawing is a must-learn, and if you enjoy doing it, just keep working on yourself.
Additional articles
 How to get a realistic skin tone How to mix colors to get turquoise How to draw shadows
  How to draw anime and manga faces
  How to draw and publish manga
  How to draw anime hair
  How to draw a Sharingan How to remove oil paint from brushes
  How to paint with oil paints
  How to dilute latex paint
  How to learn to draw
  How to draw an anime character How to get black How to draw
")


